Wonder how to record video on Windows 10 to bring more possibilities to your multimedia life? Well, relax, it's not as difficult as you think. Windows 10 comes with default recording tools to help you capture gameplay, make how-to tutotials, save live streaming videos, record online meetings, and more. By using such preinstalled video recording software, you can flexibly keep whatever you want and instantly share to others without verbally explaining a lot. To go further, you can also have a good recording experience with third-party tools in a hassle-free way. Just read on and you will definitely find a satisfying solution here.
- Part 1. Record Videos on Windows 10 Using Built-in Recorders
- Part 2. Record Videos on Windows 10 Using Third-party Recording Software
- 2.1 Joyoshare VidiKit [21-in-1 Toolkit]
- 2.2 PowerPoint
- 2.3 Camtasia
- 2.4 Bandicam
- 2.5 OBS
- 2.6 FlashBack Express
- Part 3. Final Words
Part 1. How to Record Video on Windows 10 with Default Recorders
Don't want to burden your computer by downloading and installing software on Windows 10? Alright, there is no problem. You can ask the built-in recording tools to create videos in the way you like.
1.1 Xbox Game Bar
Xbox Game Bar is a default video recorder on Windows 10. This inbuilt tool is able to work with most PC games. By pressing Win + G, you will be given instant access to widgets for screen capture and sharing. Xbox Game Bar comes in handy especially when you are playing a video game on your Windows 10, which will release you from the trouble of stopping the game temporarily to open a third-party program for gameplay recording. You can handily record in the backgroud and create up to 4-hour video at 60fps.
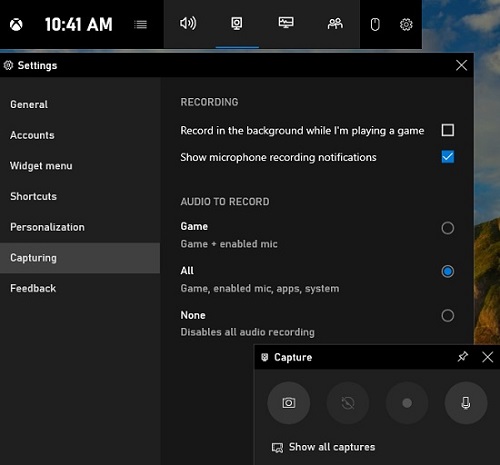
- Step 1: Press the Windows logo key + G to open Xbox Game Bar on your Windows 10 computer. You need to check the "Yes, this is a game" checkbox before you can continue.
- Step 2: Click on the "Start recording" button (or press Win + Alt + R) in the "Capture" module to start record a video on Windows 10. After that, a timer will appear at the top of the screen immediately.
- Step 3: Click the "Stop recording" button to finish the recording process.
- Step 4: To see the recorded video clips, you can check "Show all captures" in the "Capture" widget.
Note: If your PC games are in full-screen mode, you will not be able to see the Game Bar. But you can still use the Windows logo key + Alt + G to start and stop recording with ease.
1.2 Camera App
If you have a webcam, you can also use the Windows 10 Camera app to record video on computer 10 without downloading and installing extra software. If you PC doesn't have a built-in webcam, then you need to plug the webcam into one of the USB ports on your computer. Using this way, you will be able to take photos, capture videos, and make digital video stabilization. The operation is easy and you can master it easily.
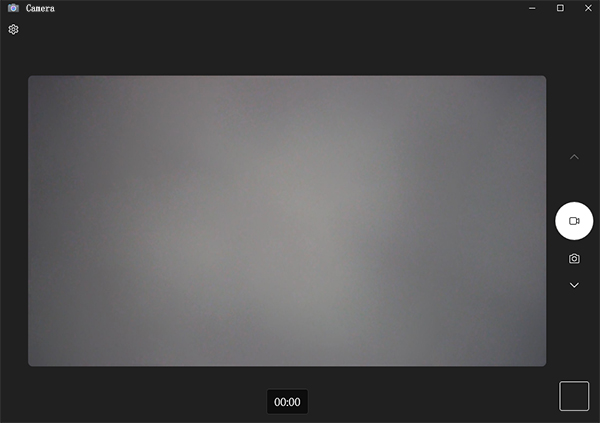
- Step 1: Type camera into the "Type here to search" bar on the lower-left corner of your PC screen and click the Camera app to open it.
- Step 2: Click the video camera icon on the right side of the Camera window to switch to the recording mode (if you have never set up webcam before, you may need to allow Windows access to your webcam).
- Step 3: Press the record button so that the Camera app can start recording for you.
- Step 4: Tap the stop button to finish recording, and the recorded video will be automatically saved into your Windows 10's Pictures folder.
Part 2. How to Record Videos on Windows 10 Using Third-party Recorders
If you want more freedom to customize your recording options, an advanced video recorder for Windows 10 is required. Luckily, in the current market, there is a variety of tools devloped with abundant features to help you make professional-looking videos. Here are some decent options you can consider.
2.1 Joyoshare VidiKit
Joyoshare VidiKit is devoted itself to recording field. It has powerful ability to capture video with audio synchronously. You can decide whether to grab system audio and microphone sound. It also gives utmost liberty to set recording area in a customized way.
It additionally comes with attractive features to cater to your requirements. It includes full support to all ongoing desktop video activities, such as online lessons, video calls, streaming movies, virtual meetings, self-demonstration, gameplays, YouTube videos, etc. Other than that, this all-around toolkit also empowers you to set shortcuts, adjust parameters, change the output format, create recording tasks, spotlight cursors, and so forth.

- Record video and audio from any source in 1080p/4K
- Record screen on Windows 10 without watermark and time limit
- Capture sound from Windows 10 system and microphone
- Set up hotkeys, mouse movement, format, parameters and more
- Provide extra game recorder, window recorder, webcam recorder
Valid until Dec 31, 2025
Copy the coupon and paste it at checkout.
Step 1 Open Screen Recorder on Windows 10
Download and install the handy and lightweight toolkit, Joyoshare VidiKit, for your Windows 10 from the official website. Simply get it run on your computer and lead yourself to "Screen Recorder" under the Recorder section.

Step 2 Set Capture Area and Audio
You are supposed to select the recording region by clicking on "Select area to record". It's available to customize region as per actual need or directly choose one from the inverted-triangle drop-down menu. Then move to the middle section to set System Audio and Microphone Audio. Do remember to adjust volume to suitable position by using the slider.

Step 3 Customize Recording Options
Now you can pay attention to the gear "Preferences" icon at the right bottom. Click it to display and confirm your other recording settings. After accessing to "Video" panel, you should firstly choose one output video format. Hereafter, you can optionally configure bit rate, codec, sample rate, channel, and more parameters as you like. The mouse effect, hotkeys, webcam and file location can be reset furtherly.

Step 4 Start Recording Video on Windows 10
Having changed designated recording options, you can prepare to capture video on Windows 10. Get what you would like to capture ready and go ahead to click on "REC" button to initiate a recording process. Make the most use of "Pause", "Snapshot" and "Cut" buttons during the period of recording.

Step 5 Edit Completed Video File(s)
As soon as you stop recording, you will be taken to the "History" interface. As you can see, there is a preview window on the left to play recorded video for you. Besides, you can click on the "Edit" button to trim specific section off.

2.2 PowerPoint
PowerPoint can record screen, internal audio and mouse pointer on Windows 10. It allows you to not only insert the video into slides but also save it as a separate file on your PC. When you're going to make a vivid presentation, this solution is optimal.
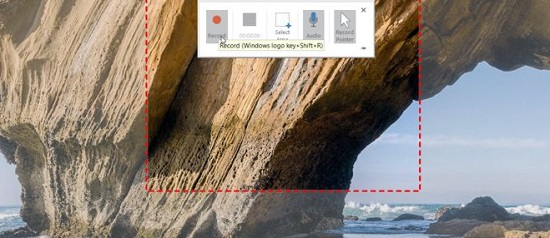
- Step 1: Open PowerPoint on your Windows 10 and then click on the "Insert" tab in the navigation bar to select the "Screen Recording" option.
- Step 2: Hit the "Select Area" button on the Control Dock to grab the capturing area in any size you want.
- Step 3: Adjust the "Audio" option as well as the "Record Pointer" option in the way you like.
- Step 4: Now you are able to click the "Record" button to start to screen capture Windows 10. If you want to stop recording, you can press the "Stop" button on the Control Dock.
- Step 5: To save the recorded video as a separate file on your PC, you are supposed to right-click the screen recording video embedded on your PowerPoint slide and click the "Save Media as" option. After specifying the file name and the folder location, you are capable of tapping the "Save" button to save your video to your PC.
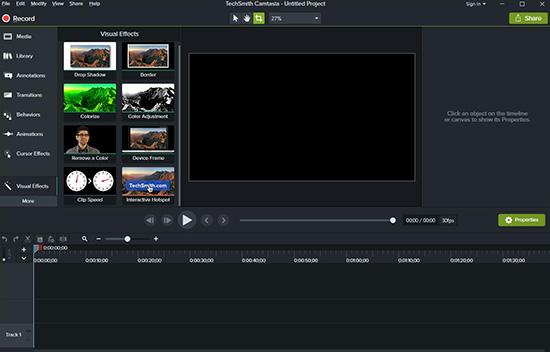
2.3 Camtasia
Camtasia is one of the best screen recorders for Windows 10. It supports recording websites, video calls, PowerPoint presentations, gameplay, and more in high quality. You are allowed to edit videos directly after screen recording, like adding transition, annotation, visual effects, filters, etc. This 2-in-one tool well combines screen recorder and video editor, being popular among professionals. However, it costs you a lot.
- Step 1: Double-click Camtasia to open it on your PC and choose "New Recording" to activate the video recording feature of the program.
- Step 2: On the minimized tool bar, you can choose to record Windows 10 video in full screen or in a custom area under the "Select area" module.
- Step 3: You are also free to turn on/off the "Camera" and the "Audio". Or adjust the volume under the "Recorded inputs".
- Step 4: Finally, click on the "REC" button to start recording video in Windows 10 and the "Stop" button to finish recording.
2.4 Bandicam
Bandicam is another widely-used Windows 10 video recorder. You are able to use it to record 2D/3D video games, HDMI devices, and specific window with up to 4K UHD resolution. Moreover, it supports adding webcam overlay, applying mouse effects, mixing voice, etc. But you can only output the screen recording as MP4 and AVI.
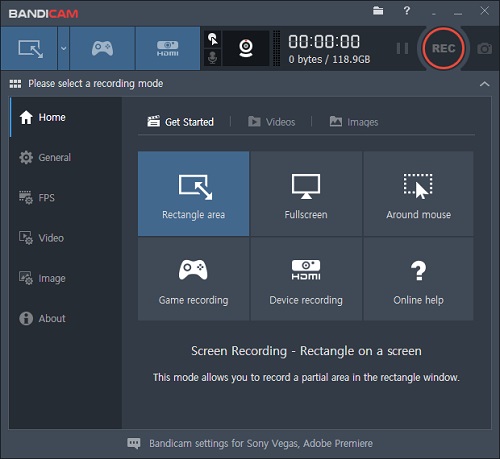
- Step 1: Start Bandicam and expand the down arrow on the upper-left of the screen to select a recording mode.
- Step 2: Click the "REC" button at the top of the pop-up window or press F12 to start and stop the recording.
- Step 3: After recording, you are allowed to go to Home → Videos to play and edit your recorded videos on your PC.
2.5 OBS
OBS is a well-known free and open-source screen recorder for Windows 10. Coming with strong system compatibility, it supports video recording, live streaming, audio capturing and mixing, etc. on Windows, Mac and Linux. Powerful as it is, beginners may find it difficult to figure out how it works due to its complicated user interface and loads of buttons.
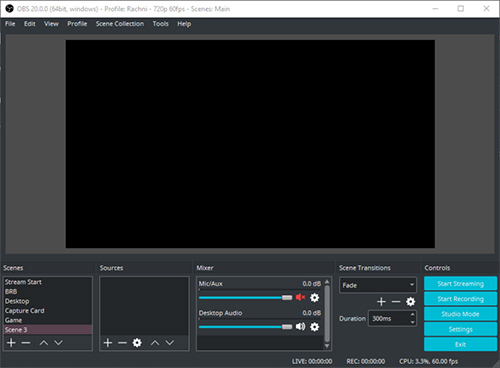
- Step 1: Open the OBS program on your Windows 10 computer.
- Step 2: Click on the "Scenes" tab on the menu bar and select the "New" option to create and name a new scene.
- Step 3: Press the "+" button in the Sources section at the bottom of the main screen and choose "Display Capture" on the pop-up list, which will allow you to record a video of your own Windows 10 screen (you can select a list of available video resolutions from the "Display" drop-down).
- Step 4: Now you are free to click on the "Start Recording" button on the right side of the OBS window to begin recording video on PC and the "Stop Recording" button to end the recording process.
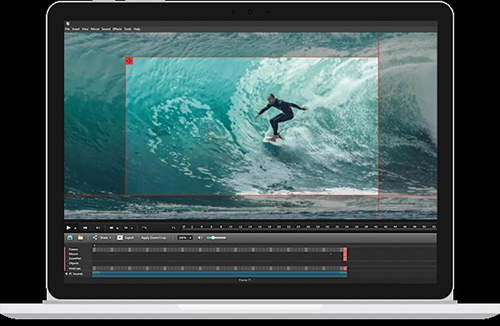
2.6 FlashBack Express
FlashBack Express is a free screen video recorder specially designed for Windows uers. Easy-to-use and powerful, it allows you to record screen, sound and webcam easily and efficiently. Besides that, you are able to enhance your recorded videos on PC with arrows and captions and by trimming and cutting.
- Step 1: Download and install FlashBack Express on your Windows 10.
- Step 2: Expand the "Record" dropdown list to choose your capturing area and then confirm which sound to record as well as adjust the volume.
- Step 3: Click on the "Record" button when you are ready to record video on Windows 10.
- Step 4: Click the red square on the progress bar when you want to finish recording, and then you need to press the "Save" button to save your video recording.
Part 3. Final Words
Undoubtedly, Windows 10 provides some convenient option for you to record videos effortlessly. Both Xbox Game Bar and Camera app can satisfy your basic recording needs. However, if you'd like to have more control over what you're going to record, a third-paty software can be considered. When record video on Windows 10, you can set up webcam, microphone, effect, format and more based on your preferences. So, think about your own needs before start your recording journey. But if you expect a full-featured tool, don't miss Joyoshare VidiKit, a one-stop recording solution!
