There are always various situations in our daily life, in which we need to screen record with audio, like watching online live broadcasts, enjoying the latest music videos on YouTube, learning e-courses, etc. Nevertheless, sometimes, especially for novices with no recording experience, finding a suitable and hassle-free method to record computer screen and audio is not as simple as imagined. If you are still on the way to seek for such a decent solution, this post will give you a satisfied answer, no matter you are using Windows, Mac or Linux operating system.
- Part 1. Record Computer Screen and Audio on Mac
- Part 2. Record Desktop Screen with Audio on Windows
- Part 3. Record Linux Screen with Audio
Part 1. How to Record Screen on Mac with Audio
Joyoshare VidiKit
The magic recording solution we recommend here is Joyoshare VidiKit (originated from Joyoshare Screen Recorder), one of the best and easy-to-use software to record screen with audio simultaneously on Mac and PC. With most advanced screen recording technology, this great tool is able to record any video and audio activity on computer desktop in HD quality. Comprehensive as it is, there's no problem to record online chat, webinar, tutorial, live-streaming video, gameplay, and more.
It allows you to choose what audio tracks to capture, including the system sound and microphone audio. Also, it provides multiple popular output formats and profiles, letting you save the recorded videos/audios in common MP4, MKV, AVI, FLV, SWF, WMV, MP3, AAC, WAV, etc. for Apple iPhone, Android, Windows Phone, smart TV, PS4, and others.
- Screen record on Mac with audio in high quality
- Preset codec, resolution and more for format
- Get sound from microphone and/or computer system
- Options to schedule, effect, trim, watermark, etc.
- Record video in full screen, standard ratio or customized size
- More advanced tools to cut, convert, repair, compress, etc.
Step 1: Download and launch Joyoshare VidiKit on Mac
Firstly, download Joyoshare VidiKit video editor from official website and quickly finish installation. Then simply get it started on your Mac, open "Screen Recorder" program, and get ready on "Record video and audio" mode by default.
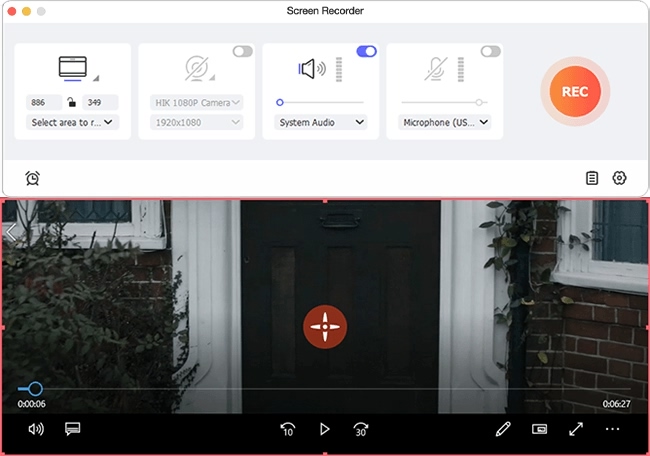
Step 2: Select the capturing area
Press the '+' button on the left part under "Capture Area". You'll see a pop-up window, from which you can adjust the screen size that you'd like to record. This software also provides some ratios i.e. 320x240, 640x480, 1280x720, full screen, etc.
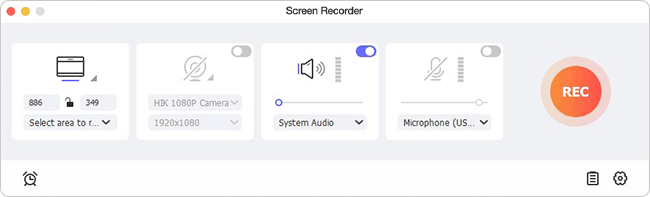
Step 3: Confirm audio and more settings
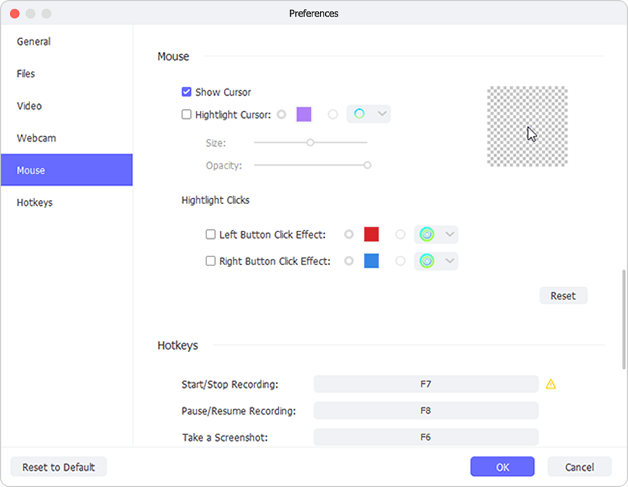
To record screen video with audio, you can turn both microphone and system audios on by simply clicking on related icons. Or only choose one of them to grab audio from. You're allowed to adjust volume and specify audio line to capture sound. Then find and hit the 'Options' button to furtherly customize screen recording according to actual needs. You can change the output format, set scheduled task, embed watermark, highlight cursor, etc.
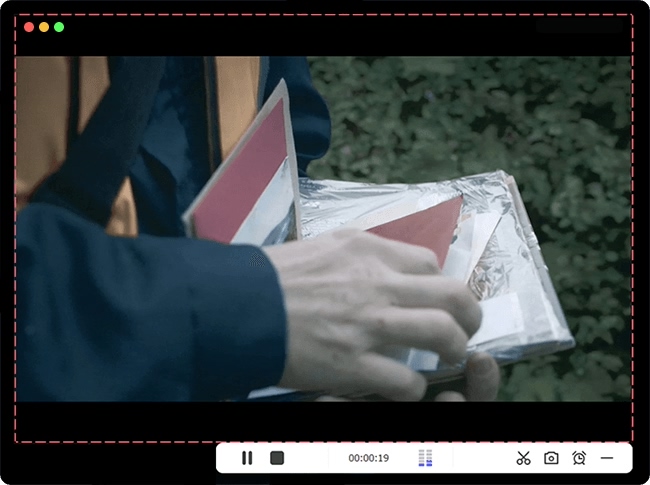
Step 4: Start to record screen with audio
Once you have selected everything, you can now begin capturing screen and audio by hitting the blue 'REC' button. During the recording, it's available to take screenshots, cut videos and pause to skip anything unwanted.
Step 5: Edit and manage recorded videos
After recording your computer screen and its synchronous audio, you can preview all files in the 'History' interface. Joyoshare VidiKit enables you to edit ID3 tags, trim again to delete useless content and rename as you wish.
Screenshot Toolbar
It's viable to record screen with audio on your Mac by using the Screenshot toolbar (Shift, Command, and 5) that's available in macOS Mojave or later. With it, you're able to capture selected portions, entire screen or just a still image from computer screen. Besides, this solution enables you to trim your recorded videos, quickly share, set a timer to begin capturing screen, grab voice from microphone, show mouse clicks and more.
Guide:
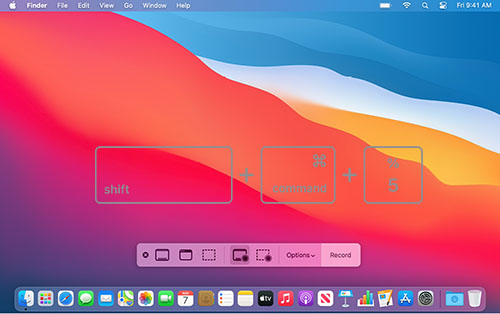
Step 1: Press three keys (Shift, Command, and 5) together on your Mac to activate onscreen controls;
Step 2: Now hit the ![]() icon to drag and choose a capture area on Mac;
icon to drag and choose a capture area on Mac;
Step 3: Expand the drop-down box in 'Options' to enable microphone audio;
Step 4: Click on the Record option to start recording Mac screen with audio;
Step 5: Press the shortcut, Command-Control-Esc, or click the stop icon to finish recording;
Step 6: Continue to trim, share and save your complete recorded files.
QuickTime Player
Similar to Screenshot toolbar, QuickTime Player is frequently applied when it comes to screen record on Mac with audio. It offers functions to customize capturing region, show clicks, change volume and grab microphone sound. However, it lacks the ability to record sound directly from the computer. If you are in this need, an additional extension, Soundflower, is required, which can get audio info to better record from Mac system.
Guide:
Step 1: Download and install the free system extension, Soundflower, for your Mac computer;
Step 2: Restart Mac and set "Soundflower" as output device under Sound in system preferences;
Step 3: Run QuickTime on Mac and click "File" > "New Screen Recording" to initiate new recording task;
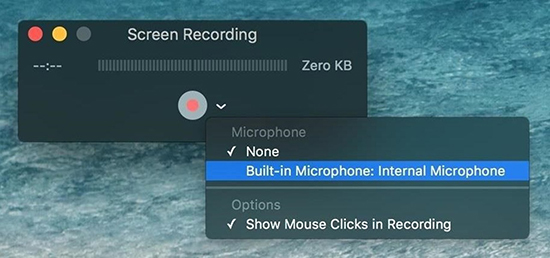
Step 4: Check and confirm all settings about microphone, quality and options;
Step 5: Click the central red recording button to start recording screen with audio;
Step 6: End recording by either clicking stop button or pressing Command-Control-Esc;
Step 7: Disconnect Soundflower and activate your speaker back. Then check the recorded files locally.
Part 2. How to Record Screen on Windows with Audio
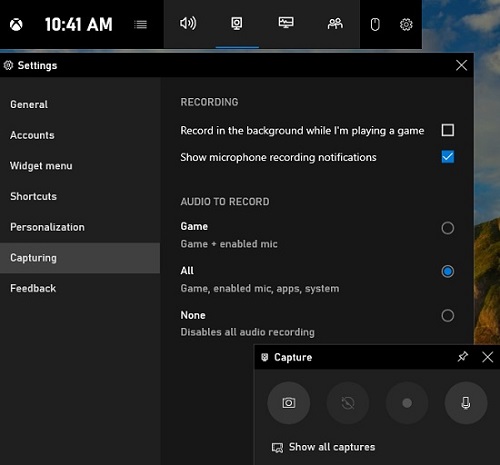
Xbox Game Bar
Xbox Game Bar is a default tool on Windows. It records your PC desktop and at the same time captures audios from system & microphone. It intelligently detects your programs on desktop and lets you adjust volume in advance. Other than that, Xbox Game Bar presets shortcuts and availably takes screenshots in a quick way.
Guide:
Step 1: Press Windows key + G to get Xbox Game Bar started;
Step 2: Tick and confirm "Yes, this is a game" when you're asked;
Step 3: When the Game Bar controls appear, you can set "Audio" specifically;
Step 4: Simply click on the Record button to begin recording your Windows screen with sound;
Step 5: Tap on Stop Recording button to finish recording video and check files in Captures folder.
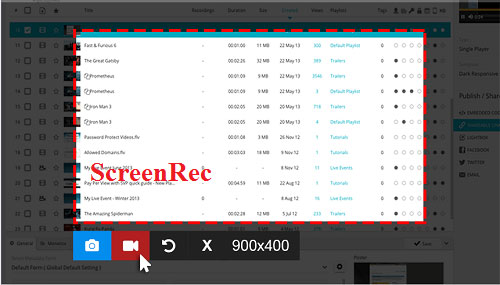
ScreenRec
ScreenRec is one of the best screen and audio recorders in the current market. It enjoys high reputation and good at recording screen with microphone or system sounds. The video can be made in HD quality and you can also make use of shortcuts. Handily, it generates sharing link after recording a screen and permits you to share via email, on social media or even a messaging app.
Guide:
Step 1: Install and launch ScreenRec on Windows;
Step 2: Configure your audio settings: microphone audio is enabled by default while the system sound can be turn on as per your need;
Step 3: Sign up for free and press the "Start video recording" icon in the sidebar to choose a capture area;
Step 4: The screen with audio will be recorded after a capture region is selected and you can stop anytime as you want.
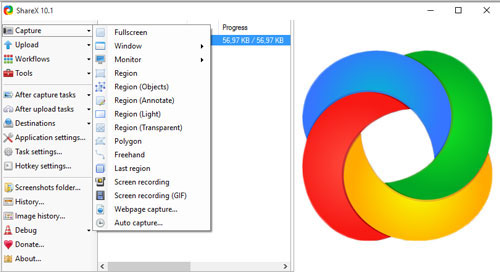
ShareX
ShareX can be a basic screen capture to help record computer screen with audio. Being a free open source, it has a very large user base. You can get different capture methods to record your screen and grab sound. Additionally, it offers options to apply image effects, add watermark and make annotations easily.
Guide:
Step 1: Free download, install and open ShareX on your computer;
Step 2: To record microphone voice, you'll head to Task settings - Capture - Screen Recorder - Screen recording options - Audio source. Choose "Microphone" from the drop-down list;
Step 3: To record screen with audio, you have to "Install recorder" and set "virtual-audio-capturer" under "Audio source";
Step 4: Now find and press "Capture" in the left side of ShareX's main interface to choose a recording area and select "Screen recording" to start recording;
Step 5: Save your recorded screen video after finish recording and then upload it to your wanted social media.
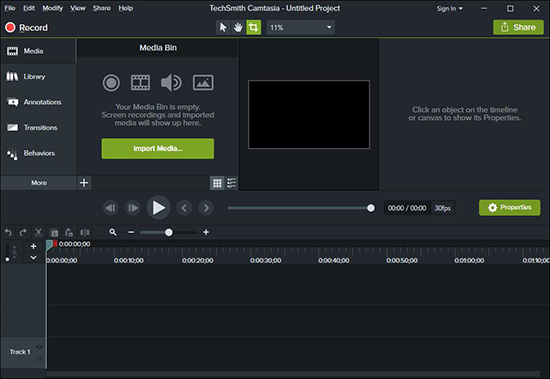
TechSmith Camtasia
Camtasia, developed by TechSmith, is a superior video editor with screen recording capability. It allows you to designate any certain region in your desktop screen. Also, this tool possibly gets audio from both system and microphone. Most of all, Camtasia has wonderful features to annotate, filter, text, effect, blur, add transition and more to create professional-looking videos.
Guide:
Step 1: Run your installed Camtasia on PC and click "New Recording" under "Get Started";
Step 2: In the pop-up recording program, you can choose full screen or preset a custom region;
Step 3: In the "Recorded inputs", you'll confirm whether to enable "Camera" and then turn on "Audio" by selecting specific sound source;
Step 4: Click on the red "REC" button to begin record screen and audio;
Step 5: When the recording process comes to end, save and export it. Or you can make some editing operations before output file.
Part 3. How to Screen Record with Audio on Linux
VLC
A large number of users out there wonder how to record screen with audio using VLC. Actually, this popular media player is often used to record videos and audios. It supports different formats, such as MP4, MPEG, MKV, MP3, MOV, etc. How does VLC record screen with audio? It's hard to find solutions using this cross-platform tool to record on Windows and Mac. So, we here only show the way to record on Linux with audio.
Guide:
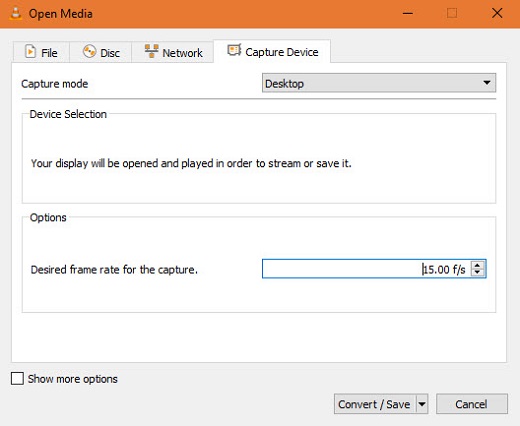
Step 1: Open VLC on Linux and head to 'Media' > 'Open Capture Device';
Step 2: Select 'Desktop' as Capture mode and meanwhile click on 'Show more options' to tick 'Play another media synchronously (extra audio file,...)';
Step 3: Copy and paste "pulse://alsa_output.pci-0000_00_1f.3.analog-stereo.monitor";
Step 4: Click 'Convert' and go to 'Profile' to choose 'Video - H.264 + MP3 (MP4)';
Step 5: Next, 'Browse' to choose a location to save your output recorded file ahead of time;
Step 6: Simply press on 'Start' to record and stream your Linux screen with audio;
Step 7: Close VLC to finish recording video and audio. Then navigate to your previously location to check it.
| Supported OS | Price | Shortcoming | |
| Joyoshare VidiKit | Mac, Windows | $19.95 | No |
| Screenshot Toolbar | Mac | Free | Capture only microphone sound by default |
| QuickTime Player | Mac | Free | Record only microphone audio by default |
| Xbox Game Bar | Windows | Free | Cannot directly record screen but capture in games or programs |
| ScreenRec | Windows, Mac, Linux | Free | Save recorded files in MP4 only; With 5-minute time limit |
| ShareX | Windows | Free | Require addition audio recorder installation |
| Camtasia | Windows, Mac | $249.99 | Too expensive |
| VLC | Windows, Mac, Linux | Free | Not record screen with audio on PC and Mac |
