Fast forward to today, where the popularity of consoles continues to grow, there is no denying that a large number of gamers still rely on PCs to play games. Undoubtedly, the fun is doubled when you share your gameplay with your friends, fans, and other players. To tell the truth, recording PC gameplay is nothing too hard, and the best way to do that is by using a handy and smart gameplay recorder. As learning how to record gameplay on PC is a must, if you want to do the same as well, below are six popular ways to help you out.
- Part 1. Joyoshare VidiKit [Recommended]
- Part 2. Xbox Game Bar
- Part 3. Bandicam
- Part 4. Nvidia Share (Formerly ShadowPlay)
- Part 5. OBS
- Part 6. EaseUS RecExperts
- Part 7. Useful Tips to Better Record Gameplay on PC
Part 1. Record Gameplay on PC - Joyoshare VidiKit
Recording PC gameplay can be fun using Joyoshare VidiKit (originally Joyoshare Screen Recorder). It is a multipurpose screen recorder for PC and Mac. The user interface is easy to understand and you can start gameplay recording with just one simple click. Supporting various output formats and devices, you will be able to record gameplay on Steam, Wii, PS3/4/5, Xbox One/360, etc. in extremely high visual quality.
Enabling you to have full control of your game video recording, Joyoshare VidiKit offers you many flexible features for customization. Examples are but not limited to grab screen size freely, adjust video parameters, add watermark to screen recording, highlight cursor and clicks and remove any unwanted content of the recorded game video. Such attractive functions make Joyoshare VidiKit worth giving a try.

- Simple, intuitive, and easy-to-navigate interface
- Play and edit recorded game clips directly
- Record gameplay on PC in up to 4K at 240fps
- Capture sound from PC or/and microphone
- Select the entire screen or any customized region
- Record videos without time limitations and watermark
- Support all popular file formats, gaming consoles, etc.
Step 1 Choose Target Game in Joyoshare Game Recorder
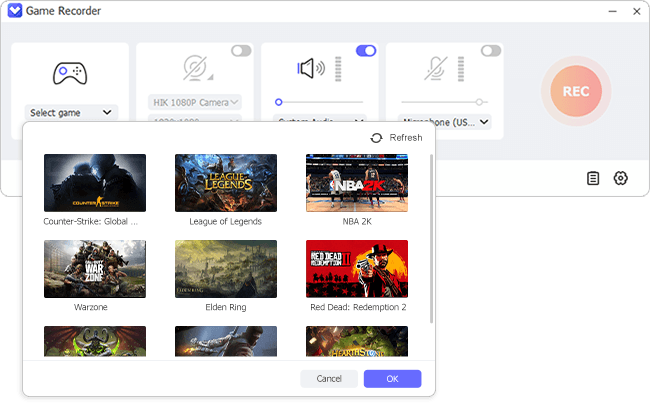
Install Joyoshare VidiKit on your PC and double-click on its desktop shortcut to launch it. In the main interface, select the Game Recorder option under the "Recorder" panel.

Joyoshare VidiKit can automatically detect activated games and show them in the program. So, ensure the game that you're going to record is open on your computer. Then, go to the bottom left and hit "Select game" to choose and confirm it. To grab system sounds and your own voice, you can enable both System Audio and Microphone Audio.
Step 2 Tweak Recording Settings
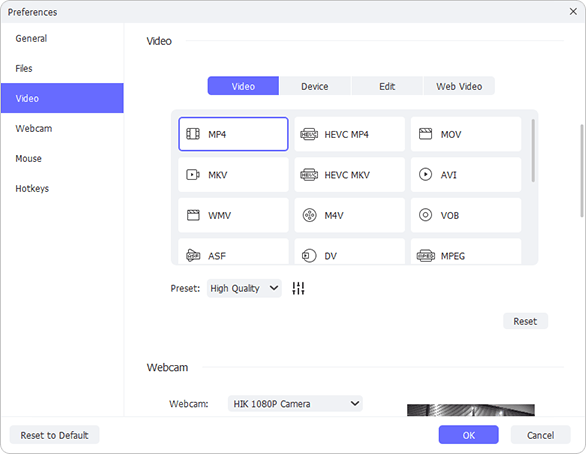
In the lower right corner of the interface, you will be able to see a gear icon displaying Preferences. Click on it to gain access to more options. The "Video" button will let you set up your target format and adjust its parameters (like 240fps, 4K) or output quality. Besides, click on the "Webcam" button if you plan to add your face and interaction to your gameplay recording. You can also customize mouse effect, hotkeys and more in the way you like.
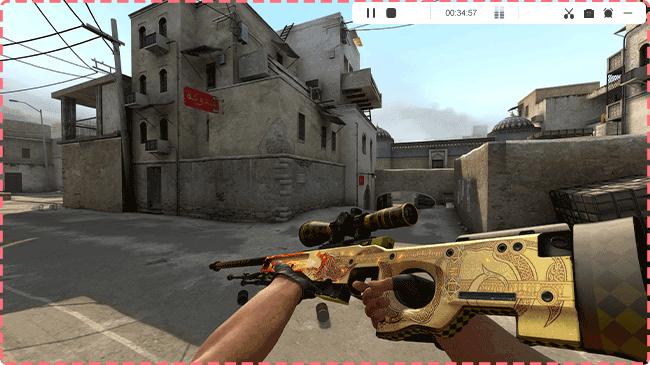
Step 3Start to Record Gameplay on PC
Click on the "REC" button and Joyoshare VidiKit will start to record your PC gameplay after a three-second countdown. The game, audio, and webcam video can be captured at the same time. You can take snapshots, pause to skip undesired clips, or trim game footages.
Step 4Play and Edit PC Games
Click on the "Stop" button shown on the minimized toolbar outside the dynamic recording frame to stop recording. The History window will pop up. You will be able to play and edit your game videos such as rename them and cut unnecessary parts of each game clip.

Part 2. How to Record PC Gameplay - Xbox Game Bar
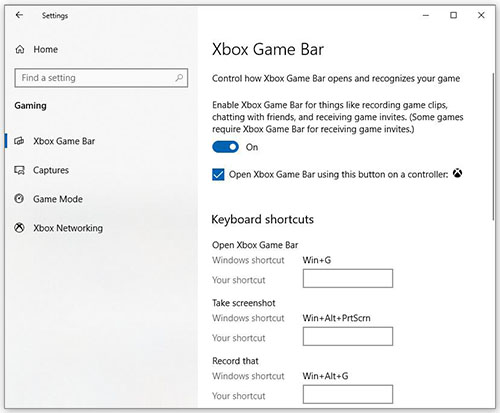
Windows 10 includes a built-in tool called Game Bar for recording PC games and taking screenshots. When playing a game and wanting to save your best action, you can press Windows Key + G on your keyboard to enable the video recording utility. It will pop up above the PC game you are playing.
Guide
Step 1: Open the Game Bar on PC
To open the Game Bar while playing a PC game, you need to press Windows Key + G. You may need to play a PC game in windowed mode so that you can see the Game Bar. Your PC may ask if you really want to open the Game Bar when you press Windows Key + G.

Step 2: Set Relevant Recording Settings
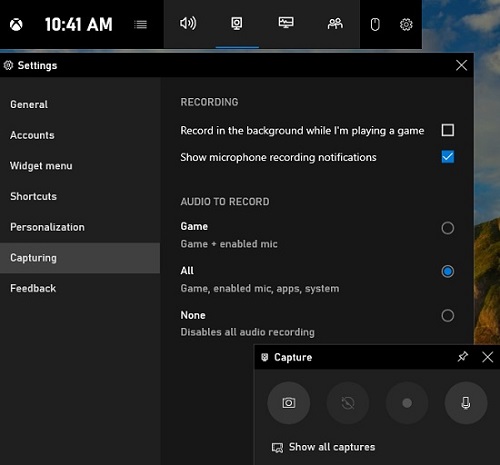
You may have noticed that there is a "Settings" icon on the menu bar. Click on it to adjust your gameplay recording preferences. For instance, you are able to change shortcuts to record last 30 seconds, start/stop recording, turn on/off microphone, etc. You are also able to select the "Capturing" tab to choose to record gameplay in the background without impacting your gaming performance.
Step 3: Start to Record Games on PC
When you are ready, you can click on the "Capture" button on the menu bar and then press the "Start recording" button (or press Windows Key + Alt + R) on the "Capture" widget. At that time, a small overlay will be displayed on your PC screen. Press the "Stop recording" button to quit recording.
Record the Last Few Seconds or Minutes
The "Capture" widget also allows you to record a PC game with the last few seconds or minutes. With the help of this feature, you will be able to save something spectacular that happens in the PC game you play even you didn't manually start recording your gameplay. All you need to do is to press the "Record last 30 seconds" button or press Windows Key + Alt + G.
However, this feature is available only when you have enabled the background recording in your Windows 10. To do so, you are ought to open the "Settings" app on your computer and then select the "Capture" tab. Check "Record in the background while I'm playing a game". You will also be able to choose to record up to the last 10 minutes.
Part 3. How to Record Games on PC - Bandicam
Bandicam makes it possible for you to record gameplay and then upload it to YouTube and Vimeo. As a lightweight screen recorder designed for Windows users, it is able to capture almost everything that happens on your PC screen in high quality. Recording from popular devices such as Webcam, IPTV, smartphone, etc. is made easy by Bandicam. Using it, you will be able to save your favorite game clips in MP4 or AVI format easily and quickly. Additionally, many editing tools are available as well. You are capable of add a mouse click effect while recording.
Key Features:
- Record various 2D/3D games up to 480 FPS
- Compatible with webcam, PlayStation, Xbox, etc.
- Only support Windows computers
- Record computer sound and voice at the same time
- Export game videos to MP4 or AVI
- Guide:
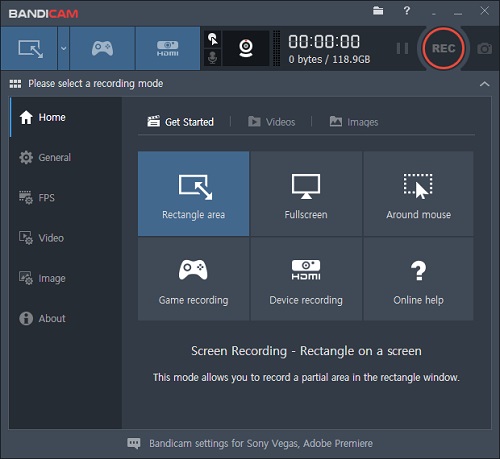
- Step 1: Start Bandicam on your PC nad select the "Game Recording" mode on the top menu;
- Step 2: Begin your PC game and check the green-colored number (FPS) shown on your PC screen;
- Step 3: Press the "REC" button at the top of the screen after adjusting other settings according to your needs;
- Step 4: The green-colored number (FPS) will change to red during the gameplay recording;
- Step 5: Press the record hotkey (F12 by default) to stop recording your PC game, and you are able to go to Home > Video to play, edit, or upload your recorded PC game clips.
Part 4. How to Record Video Games on PC - Nvidia Share
If you have GeForece GPUs, you can consider using Nvidia Share, also known as ShadowPlay, to record your PC game videos. This screen recording utility performs excellently in recording and sharing high-quality gameplay videos, livestreams and screenshots. Its DVR-style Instant Replay mode is able to save the last 30 seconds of your PC games and you can save it to your hard drive or share to Facebook or YouTube. More importantly, you can leave Nvidia Share running in the background.
Key Features:
- Record gameplay at up to 4K HDR at 60 FPS
- It is hardware-accelerated
- Save the last 30 seconds of games with a simple click
- Broadcast to Twitch, YouTube Live, etc.
- Create up to a 15-second GIF from gameplay
- Guide:
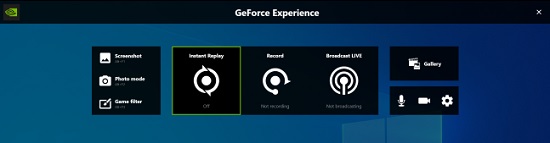
- Step 1: Press Alt + Z to open the Nvidia GeForce Experience overlay, but if this is not happening, you need to open the GeForce Experience application and then click the green "Share" button on the toolbar to open the overlay;
- Step 2: You can turn on the Instant Replay mode so that ShadowPlay will automatically save the last 30 seconds of your PC games;
- Step 3: You are also able to press the "Record" button and then select "Start" or press Alt + F9 alternatively to begin to record gameplay on PC;
- Step 4: To stop recording gameplay on PC, you can either press Alt + F9 again or open the overly to press the "Record" button and then choose "Stop and Save";
- Step 5: The "Settings" option shown after clicking the "Record" button will allow you to customize quality, length, resolution, etc.
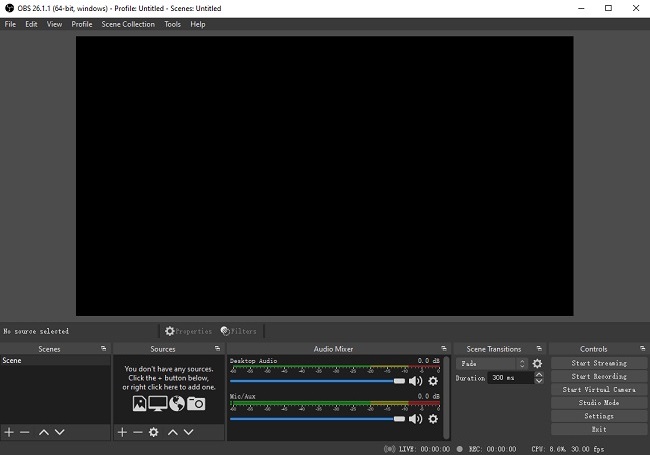
Part 5. How to Record Game Clips on PC - OBS
Any PC user can install OBS to record game footage, which is able to adapt to almost all platforms, such as Windows, Mac, Linux, etc. Versatile as it is, it's not nearly as convenient as Joyoshare VidiKit. However, once you get the hang of it, you may find it powerful and reliable. OBS is a free and open-source tool that will allow you to record PC gameplay in 1080p at 60fps. It has many incredible features, such as adjust resource properties, use audio mixers, and a whole lot more.
Key Features:
- Free to use
- Offer a beginner-friendly audio mixture
- Have easy-to-use configuration options
- Support gameplay recording and live streaming
- Use multiple video sources filters
- Guide:
- Step 1: Click the "+" icon at the bottom of the "Scenes" box in the bottom left corner of OBS;
- Step 2: Name your scene on the pop-up box;
- Step 3: Press the "+" button on the "Sources" box to the right of the "Scenes" box and add a "Game Capture"source;
- Step 4: Select "Mode" on the "Properties" box and then choose "Capture Specific Window", and after that, the title of your game will appear in a new dropdown menu under "Mode" (if this is not happening, you need to first open your game and then return to the "Properties" menu);
- Step 5: Press the "ok" button and your PC game will appear in the OBS window, and now, you are able to tap the "Start Recording" button on the bottom right side of the window to begin to record and save your game videos.
You may also need: How to Record Browser with OBS
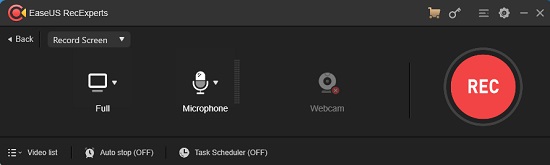
Part 6. How to Record PC Games - EaseUS RecExperts
EaseUS RecExperts is a simple and intuitive PC screen recorder to record gameplay and audio simultaneously. Similar to other gameplay recorders, it allows you to capture the entire screen or a specific region. But different from other conventional competitors, EaseUS RecExperts will enable you to add text, arrows, lines, images, etc. while recording a PC game. It supports webcam as well, which means you will be able to record yourself speaking and show your YouTube fans how to complete a gaming task at the same time.
Key Features:
- Record videos and audios simultaneously
- Capture any area of your PC screen flexibly
- Support uploading recorded game clips to social media
- Create gameplay recording tasks automatically
- Edit videos and audios while recording
- Guide:
- Step 1: Launch EaseUS RecExperts and start your PC gameplay, and after that, select "Record Game" from the menu;
- Step 2: Adjust the frame rate, turn on your microphone as well as your webcam as you like;
- Step 3: Press the red "REC" button on the right side of the screen to start to record games on PC;
- Step 4: Once you are done with recording, you can edit the recorded game videos using the built-in video editor.
Part 7. Useful Tips to Better Record Gameplay on PC
How can you get a good game recording experience and generate a high-quality game videos? If you are not skilled in capturing gameplay, here are some helpful tips that you can have a close look at.
- 1. Pick up an appropriate game recorder: There are a variety of game recording tools on the market. You should consider what your actual needs are and then check if the target tool does well in the specific aspects. Also, furtherly see whether your PC specifications meet the minimum requirements for the tool.
- 2. Ensure sufficient resources to consume: The process to capture a gameplay is undoubtedly resource-intensive. To let your computer ideally handle both game-playing and game recording at the same time in good performance, you should make sure enough storage space, RAM, and processing power on your device. This can effectively avoid frame drops.
- 3. Customize game recording settings: Based on your own preferences and computer specifications, configure related settings in advance to better record your gameplay. The parameters can include frame rate, resolution, output format, codec, quality, etc. Usually, 1080p resolution at 60fps is standard and enough. The recording can be saved using popular codecs like H.264, H.265 (HEVC).
- 4. Test before recording: Prepare everything you need ahead of time and test game recording for several times. Adjust something unsatisfactory until the test result can live up to your expectations.
- 5. Set and utilize hotkeys: Nearly most professional game recording tools can provide hotkeys for you to simplify the recording process. You can set up the hotkeys in the way you familiarize and then make full use of them to avoid unnecessary disruption during recording.
- 6. Add a webcam to game: It's suggested to record yourself and interactions with game players to your video. Adding a webcam can well enhance the viewing experience and make your recording more intuitive.
- 7. Post-process recorded game videos To make your finished game recordings professional-looking and attractive, you can apply some video editing tools for post-processing. Then, save and share the video to game-related platforms such as Twitch, YouTube, etc.
Conclusion
The above-mentioned PC gameplay recording tools provide complete control over your game. All of them are able to record gameplay on PC in high quality but may differ in features and ease of use. For example, Bandicam and Nvidia Share can only support Windows while others are also compatible with Mac operating system. OBS is free but it is not as handy as Joyoshare VidiKit. Nvidia Share is able to record at up to 8K UHD, but it may decrease your gaming performance. Among them, Joyoshare VidiKit is the most cost-effective and does well in recording PC games with no lag instantly and perfectly.
