Q: "I want to make lecture videos on my Surface Pro, but I see no app on Windows Store for screen recording. How can I record my screen?" - Reddit
Admittedly, Surface Pro is best known as the first generation two-in-one detachable tablet in Microsoft's Surface series. Equipped with Windows operating system, it's also popular and used by a large number of users. However, it doesn't have the same compatibility as a regular laptop, and many apps don't fit it completely. How to Screen Record on Surface Pro like the post requested? To make it an easy thing, we've selected five tools that are right for you here.
- Part 1. Game DVR
- Part 2. Joyoshare VidiKit [Hot]
- Part 3. OBS
- Part 4. Microsoft Stream
- Part 5. Online Recorder
- Part 6. FAQs about Screen Capture on Surface Pro
#1 How to Record Video on Surface Pro - Game DVR
Though Surface Pro is originally developed with Windows 8 Pro, it is upgradeable to Windows 10 for free. That is, when you happen to be running Windows 10, you'll have a chance to try out its built-in screen recording software, the familiar Xbox DVR/Game DVR. The steps to record video on Surface Pro are simple and you can check out them here.
Step 1 Complete Setup Process for Game DVR
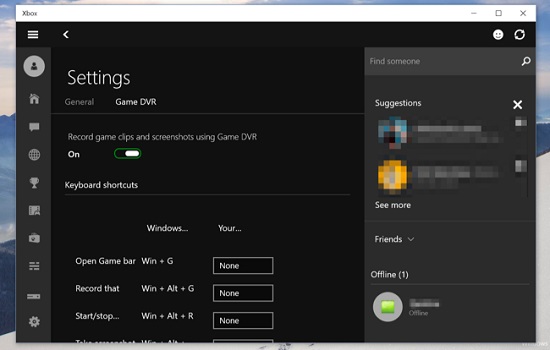
If you've never used Xbox DVR/Game DVR to record on your Surface Pro, you'll need to set it up first. Simply type Xbox to search and open it on your Surface Pro. Find Settings and switch the toggle "Record gaming clips and screenshots using Game DVR" on. Click Gaming – Game Bar and switch the button under the Background recording to record in the background when you play gameplays on your surface pro. It also allows you to adjust audio quality, microphone and system volume, frame rate and more. Then you can set it to record automatically as much as 10 minutes. Scroll down to find the final settings - recording mouse movement and clicks.
Step 2 Record Surface Pro Screen with Game DVR
Open a window or a program that you'd like to record. Now press Win+G on your keyboard to activate Xbox DVR. When you're asked whether it's a game, just check "Yes, this is a game." Next, click on the REC button or use "Win+Alt+R" to start recording screen on Windows 10. Note that your mouse clicks cannot be captured.
Step 3 Finish Recording on Surface Pro
Once the video or screen activity on your Surface Pro has been recorded, you can use shortcut or press stop icon to end it. The recording file can be checked later in Settings > Gaming > Captures.
- See Also: How to Fix Xbox Game Bar 0x8232300f Error
#2 How to Screen Record on Surface Pro - Joyoshare VidiKit
Joyoshare VidiKit - Screen Recorder is an ideal tool to record both video and audio on Windows XP and later, including Windows 7/8/10. It captures videos on Surface Pro in either full screen or customized size. Also, it's possible to grab audio from microphone and system, preset shortcuts, specify watermark and spotlight the cursor. It gives you power to customize codec, quality, resolution, sample rate and more before you start the recording process. Handily, you can do basic editing operations on your Surface with ease.

- Record screen video with audio on Surface Pro in high quality
- Save recording to Vimeo, YouTube, MP4, MOV, iPhone, Smart TV, etc.
- Support selecting Surface Pro screen area to capture with
- Stunning options to watermark, change parameters, highlight clicks, schedule task and trim
- Record various screen activities, like video chats, online meetings, games, lectures, etc.
Step 1 Open Screen Recorder in Joyoshare VidiKit
Launch the official program of Joyoshare VidiKit on your Surface Pro and run "Screen Recorder" under "Record". Make sure you are in the "Record video and audio" mode next to the "REC" button.
Step 2 Set Recording Options
Enable System Audio and Microphone sound as you like and tap on the gear-shaped "Options" button in the lower right corner to expand all settings. You can now change storage location, select output format, customize shortcuts, add watermark, create a task and show cursor movements.

Step 3 Start to Record Screen on Surface Pro
Get everything you need to record on your Surface Pro ready and designate recording region in "Capture Area". Now you can click the red REC icon to start recording. This program enables you to cut the video into small segments with its
 icon and skip any content you dislike with "Pause" icon.
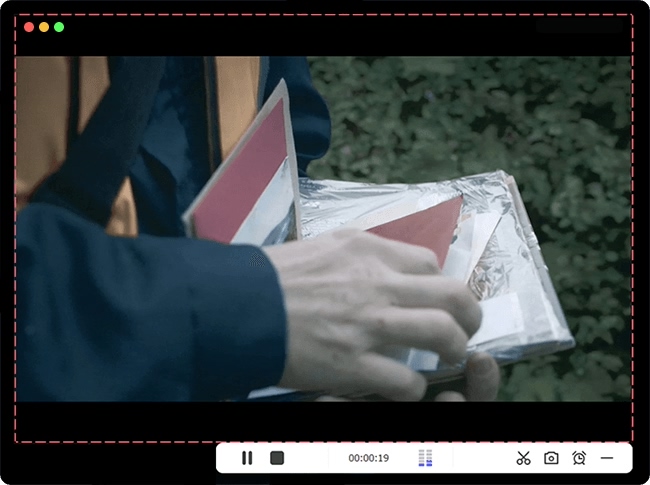
Step 4 Save and Edit Surface Pro Screen Recording
You can end the recording process by clicking the Stop button. Soon after, a pop-up History window will appear to let you play the video, rename it, edit ID3 tag and trim unwanted content out.


#3 How to Screen Record on Surface Pro - OBS
Of all the recommendations, OBS is the most sought-after one. Many Surface Pro users have proved that they have used this freeware to record well on the screen. This screen recorder provides many functions like cutting, trimming, adding effects and more to enhance your video. It's a typical cross-platform tool, so you can have a try. Here's how to record with OBS.
Step 1 Run OBS on Surface Pro
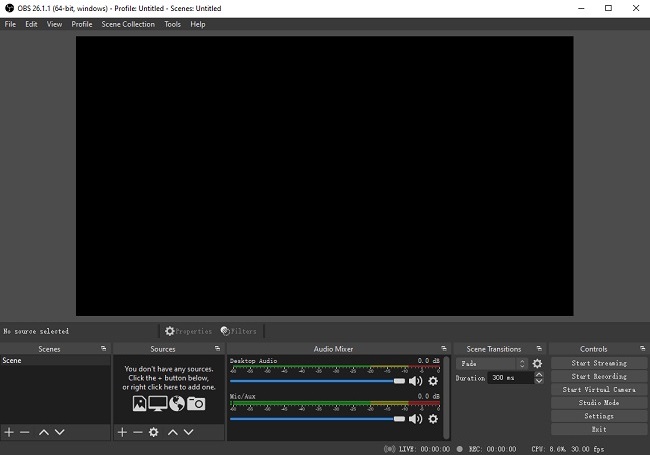
Download and install the Windows version of OBS on your Surface Pro. Get it started and you'll see "Scenes" to display your final recorded video as well as "Sources" to show where your video comes from.
Step 2 Set Recording Functions in OBS
There are lots of settings to confirm before recording. You can check them one by one. Click "+" under "Sources" and press "Display Capture" to Create/Select Source; Choose display from "Display" to record from different monitor (optional); Adjust Desktop Audio and Mic/Aux under "Mixer".
Step 3 Record Surface Pro Screen in OBS
Go to the bottom-right corner of this program to click "Start Recording" option. It will begin capturing screen on your Surface Pro right away. When you complete recording, just tap on "Stop Recording" to save it in your Videos folder.
#4 How to Screen Record on a Surface Pro - Microsoft Stream
As an enterprise video service that enables people in your organization to view, upload, and share videos securely, it also allows users to record screen content easily. If you only want to record on Surface Pro within 15 minutes, try using Microsoft Stream to help you, which allows you to record screen with webcam, microphone effortlessly.
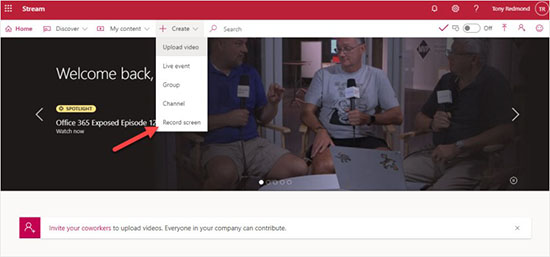
Step 1 Run Microsoft Stream
Activate the latest version of Microsoft Edge or Google Chrome on macOS or Windows. Open Microsoft Stream and choose Create - Record screen. Press Allow Microsoft Stream to use your camera and microphone in the pop-up window.
Step 2 Set Settings and Start Recording on Surface Pro
Click camera-shaped icon and mic-shaped icon to configure them. Hit the big recording icon to start the recording process. Choose full screen, application window or browser tab that you want to share and click the Share sign. Timer and time limit will show on your screen after the countdown.
Step 3 Save Video in Microsoft Stream
To stop the recording, you can press the pause button. Click the NEXT icon to preview your recorded video. The play button will appear on your screen and you can hit the Record again sign if you are not satisfied with your recording.
#5 Screen Record on Surface Pro - AceThinker Free Online Screen Recorder
Are you looking for a solution that is efficient and easy to use for your Surface Pro? How about taking a web-based screen recorder into your consideration? Give AceThinker Free Online Screen Recorder a try. It records screen without time limit, supports webcam, lets you add annotation and can upload to YouTube.
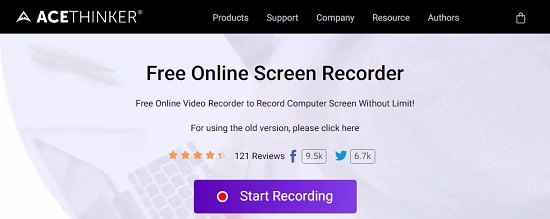
Step 1 Navigate to Online Screen Recorder
Visit the official website of AceThinker Free Online Screen Recorder and press on its "Start Recording" button in the center of the home page. You'll be asked to download Launcher first.
Step 2 Configure Recording Settings
Choose sound source, like system sound, as per your needs. Then select Full screen or customize a region to record your Surface Pro screen.
Step 3 Start Recording Screen on Surface Pro
Having set all options, you can click on the red "Record" option to begin your recording on Surface Pro. When it's finished, hit Stop button and "Save as Video File".
#6 FAQs about How to Record Screen on Surface Pro
1Is there an inbuilt Microphone on Surface Pro?
Of course, Surface Pro has a built-in microphone for users. To find this microphone, go to Control Panel - Sound and click Recording button, then you can find the NVIDIA Tegra Wave Device listed as the default microphone.
2 Is Surface Pro good for recording music?
With powerful quad-core Intel Core i7 processor, Surface Pro is perfect for all music recording and production, as its processor has a maximum turbo boost of 4.2GHz and 16GB memory for you to run audio recording process smoothly.
3Why isn't my camera working on my Surface Pro?
- ● Miss drivers after recent update.
- ● Anti-virus software in your Surface Pro is blocking the camera.
- ● Camera access does't be allowed in your privacy settings.
- ● There is a problem in your program that you want to use.
4How to switch to the front-facing camera on a Microsoft Surface?
Activate the Camera program in your Surface Pro. Scroll down and hit the Change Camera button. You will find yourself in the front facing cameras.
5How to screenshot on Surface Pro?
Press Power and Volume Up key simultaneously and your screen will flash. You can find your screenshot in your screenshot folder as it saves screenshot automatically.
6How to record zoom meeting on Surface Pro?
If you want to record Zoom meeting on surface Pro, you are able to use built-in screen recorder in Zoom. It also allows you to using Game DVR or others third-party screen recorders like Joyoshare VidiKit and OBS.
