Which website do you visit the most? YouTube, Hulu, Dailymotion, Vimeo, or other popular video-sharing platforms? Do you want to save all the videos and audio played on your preferred website? Or do you need to record your website so as to create a how-to video for various purposes? Happily, all you need is just a simple screen recorder that can record desktop activities in high quality. Using a screen recording tool to record video from website, you will be able to enjoy your favorite movies, TV shows, sports events, etc. offline at any time. Today we will take you through the steps to do that in 5 easy ways.
- Part 1. Joyoshare VidiKit (Highly Recommended)
- Part 2. OBS
- Part 3. AceThinker Screen Grabber Premium
- Part 4. QuickTime
- Part 5. Screen Capture
1. How to Record Video from Website - Joyoshare VidiKit
There are a few screen recorders out there that can help you record video and audio from a website. One of the most successful and popular tools of them is Joyoshare VidiKit (upgraded from Joyoshare Screen Recorder). The best thing about this all-in-one video recorder and editor is that it is able to record any video and audio from any source. No watermark, no time limit, and no latency. You can open multiple windows and record them at the same time.
Joyoshare VidiKit is more powerful than you might think. It can record and edit video from website in a flexible manner. In brief, using this feature-packed app, you will have full control of your screen recording and be able to customize your output videos and audio easily and quickly. It supports a large number of output formats, various gaming consoles, smart TVs, smartphones, and more.

- Support MP4, MOV, MKV, AVI, FLAC, WMA, OGG, MPEG, etc.
- Download video from website in 4K or HD quality with no watermark
- Allow recording video from multiple websites with no time limit
- Grab the entire screen or select a particular window to record
- Set the output format and adjust bitrate, quality, frame rate, etc.
- Customize, edit, and play videos and audio recorded from website
Step 1 Launch Joyoshare VidiKit on PC/Mac
Install Joyoshare VidiKit, then you are required to open the screen recorder on the panel. Having enabled the screen recording utility, you need to ensure that the
 button is on so that you can record video from website with audio. You can also tick the
  icon if you only want to record audio from website.
Step 2 Tweak Recording Settings
More custom settings can be accessed when you click the gear icon near the REC button. On the unfolded window, you are free to set up the output format, add an image watermark to screen recording, preset the start/end time of your recording task, choose to show and highlight cursor and clicks, and more.
Note: After selecting your target format, you can press the gear icon nearby. At that time, you will be able to adjust the codec, resolution, frame rate, bit rate, quality, channel, etc.

Step 3 Grab Capturing Area
Now you can open your website, then click the "+" icon and drag the pop-up capture frame to select the region you want to record on the website. You can also specify the width and height of your capture frame so that it can perfectly meet your needs. You can even lock the aspect ratio. Please remember to turn on/off "System Audio" and "Microphone" according to your requirements.

Step 4 Begin to Record from Website
Tap the REC button at any time and start to record what you want from website. After a three-second countdown, you can record everything that happens on your website screen smoothly. If you press the "Pause" button, you can remove unwanted content from your video. Several clips will be saved separately if you click the "Cut" button on the toolbar. At last, click the "Stop" button to complete the recording.

Step 5 Edit Recorded Videos
Saved videos and audio from website are manageable on the History window. You can not only rename your file but also press the edit icon to cut and trim your videos. Joyoshare VidiKit has a built-in media player, so you can use it to play and check your recordings straightforwardly.

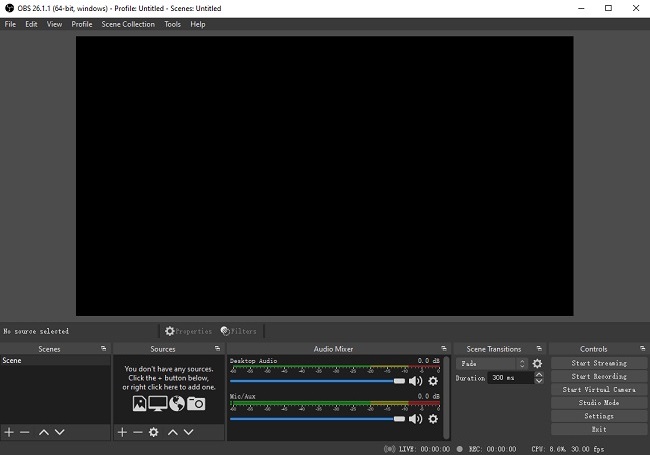
Part 2. Record Video from Website Free - OBS
OBS is a famous tool for video recording and streaming. Many people prefer to use it as it is free of charge and has many powerful features. In a previous article, we discussed how to record browser with obs using the Browser source. As a matter of fact, OBS has many other sources that are available for you to record your desktop. Here we will take the Window Capture source as an example and show you how to use it to record and save the video opened on your website.
Step 1: To begin with, you are required to open the video you want to record on your website;
Step 2: Run OBS and after opening the software on your PC, Mac, or Linux, a scene will be created automatically, so you need to click the "+" button on the "Sources" box, then select Window Capture to add a new source;
Step 3: Next, the "Properties for 'Window Capture' will be opened, and you can expand the "Window" dropdown list to select your website;
Step 4: Tap the OK button to go back to the main screen, where you will be able to drag and resize the website freely in the bounding box;
Step 5: When you get ready, you can click the Start Recording button on the right side of the main screen to start to record streaming video from website; click the Stop Recording button to stop at any time;
Step 6: Finally, you can go to File > Show Recordings to check your recorded videos easily.
Part 3. Record a Video from a Website - AceThinker Screen Grabber Premium
AceThinker Screen Grabber Premium has an excellent performance in recording onscreen activities and then saving them in various formats. You can make full use of it to record live streaming videos, online courses, gameplay, webcam, etc. in high quality. Working as an easy and flexible screen recorder for every beginner and professional, it is able to customize capturing area, support many audio input devices, set up output formats, etc. You are also allowed to apply many editing features such as highlighting the cursor, adding texts and arrows, and more.
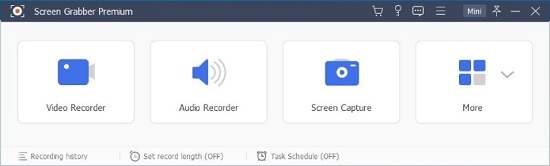
Step 1: Start AceThinker Screen Grabber Premium on your computer, then select the "Video Recorder" option;
Step 2: On the left side of the screen, you can choose to either record in full screen or a custom screen;
Step 3: You are also free to turn on the webcam, system sound, and microphone as you like;
Step 4: There is a gear icon above the "Microphone" button, and by clicking it, you will be able to adjust many options like video quality, mouse effects, hotkeys, and more;
Step 5: Finally, you can click the REC button on the right side of the screen to start to record from website.
Part 4. How to Record Video from a Website - QuickTime
If you wonder how to record streaming videos from multiple websites without downloading any extra plugins and extensions on Mac, you can consider using QuickTime, which is usually bundled with macOS. You can make most of this app to record videos and audio from system and microphone.
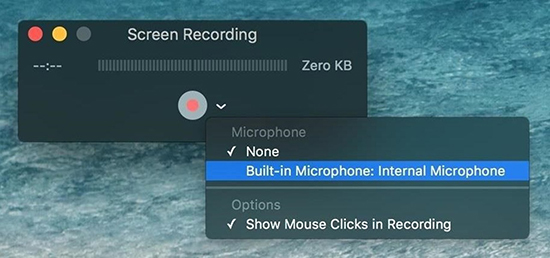
Step 1: At first, open QuickTime and navigate to File > New Screen Recording to start a new task;
Step 2: To adjust internal microphone and apply mouse effects to screen recording, you can press the down arrow button near the record button;
Step 3: Click the record button, then you can choose to click anywhere on the screen to record video from website in the full screen or drag to select a customized area;
Step 4: Now you can press Start Recording to begin the process and the Stop Recording in the menu bar to quit the process.
Part 5. Record Video from Website Online - Screen Capture
Screen Capture is an amazing free online screen recorder. It will allow you to capture your computer screen as well as browser activity in just a couple of clicks. No third-party program installation is needed. You can use this web-based service to record video with system audio. Screen Capture supports microphone and webcam as well. However, unless you purchase a premium plan, your output video will be watermarked.
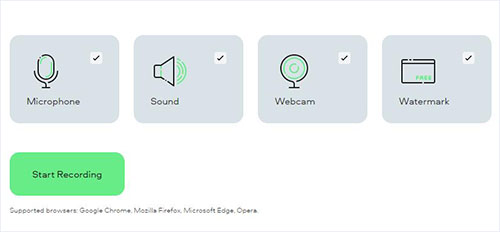
Step 1: Open Screen Capture, then tick the checkbox of "Microphone", "Sound", and "Webcam" according to your needs, and after that, you can press the "Start Recording" button;
Step 2: A window will pop up immediately, and you will be able to select "Entire Screen", "Window", or "Chrome Tab";
Step 3: Choose the website you would like to record and click the "Share" button, which will share the content you want to record to Screen Capture; everything that happens on your target screen will be captured by the online screen recorder;
Step 4: When you are done recording, you can go back to the web page of Screen Capture and tap the "Stop Recording" button to finish recording, and now, you will be able to click the "Download" button on the right side of the screen to save your recorded video to computer.
Conclusion
In this article, we have introduced several ways on how to record video from website using online and offline tools on Windows and Mac. But you may have noticed that all screen recorders have pros and cons. For example, when using Screen Capture, there is no need to download any software, but the video created by this tool is a bit stuck. OBS is free and powerful, but it may take some time for you to understand how to use it correctly. QuickTime is a perfect tool for Mac users as well, but you may find it lack advanced editing features. AceThinker Screen Grabber Premium and Joyoshare VidiKit (originated from Joyoshare Screen Recorder) are handy and reliable. Moreover, Joyoshare VidiKit is the most cost-effective. As an all-in-one video recorder and editor, you can always rely on this tool to create high-quality videos easily.
