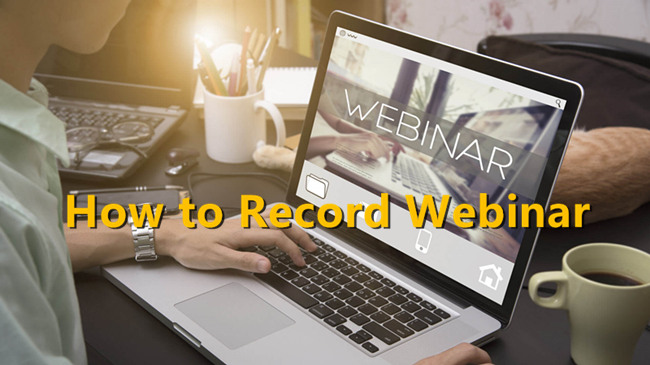
By using certain web-conferencing software, holding a webinar (web-based seminar, or online seminar) to do some online training, live presentations, distance medical services, video conferencing, etc. has become easier than ever. However, not everyone can attend the webinar at the appointed time. And it's not always easy for participants to remember all the key points and details. But don't sweat it too early. Just follow us to learn how to record a webinar in this article. All kinds of mentioned problems can be well solved by creating a recording file for later replay, review and sharing.
- Part 1. What Are the Benefits of Recording a Webinar?
- Part 2. How to Record Webinar on Windows
- Solution 1: Joyoshare VidiKit [One-stop Recording Solution]
- Solution 2: Xbox Game Bar
- Solution 3: Bandicam
- Solution 4: Movavi Screen Recorder
- Solution 5: FonePaw Screen Recorder
- Part 3. How to Record a Webinar on Mac
- Part 4. FAQs about Recording Webinars
Part 1. What Are the Benefits of Recording a Webinar?
Recording webinars is much more rewarding than you might think. It can bring great convenience to your work, no matter what field you are in. If you don't already realize how powerful it is, you might want to learn the details below.
- 1. Quick Access
- You can watch recorded webinars over and over again at your convenience without worrying about missing out it because of your busy schedule.
- 2. Wider Spread
- Recorded webinars can be accessed by anyone, not just attendees. It can be widely spread and shared among a larger group of users through different channels, such as mail, social platforms, cloud drive, etc.
- 3. Higher Work Efficiency
- The recorded webinars are reusable and can be watched anytime. There is no need to hold a webinar on the same topic, which can greatly reduce your workload and save cost.
- 4. In-depth Self-Evaluation
- By watching the recorded videos, you can visually see your own performance in the webinars, identify your shortcomings and know how to improve yourself in the future.
Part 2. How to Record Webinar on Windows
Solution 1: Joyoshare VidiKit
Joyoshare VidiKit is a handy and efficient webinar recording software to record any online seminar with high quality. With an intuitive interface and neat buttons, you can simply record your live webinar in a few steps. It's available to record screen, mcirophone voice, system audio, or even webcam video according to your needs. After finishing recording, you can export it in many formats like MP4, M4V, MKV, MOV, WMV, AVI, etc. for playing on various devices such as Apple iPhones, Andriod phones, Xbox and smart TVs, etc.
Surprisingly, Joyoshare VidiKit is more than a simple webinar recording tool. This application is competent to record everything on the desktop screen. You can make the most of it to record video calls, streaming movies, online music, academic presentations, etc. Besides, you're also free to customize relevant settings, such as capturing area, format parameters, shortcuts, recording schedule, snapshots, annotations and more.

- Record video with no watermark, no time limit, and no lag at all
- Compatible with a wide range of output formats, gadgets, and devices
- Record different webinar software in 4K or 1080p
- Record screen with drawing tools, microphone voice, and webcam
- Highlight click and show cursor movement
- All-in-one recording solution for screen, audio, window, gaming, and webcam recording
Step 1 Open Screen Recorder
Run Joyoshare VidiKit on your PC or Mac, go to Recorder panel and choose Screen Recorder.

Step 2 Set Recording Preferences
In the main interface, enable Microphone Audio to grab voice during the webinar and System Audio to capture sounds from computer. Next, click the gear "Preferences" icon and start to personalize your recording settings. Specifically, you can change the save path, select an available camera, customize your own keyboard shortcuts, highlight cursor and clicks, etc. When choosing an output format, you will also be able to change codec, resolution, frame rate, bitrate, and quality.

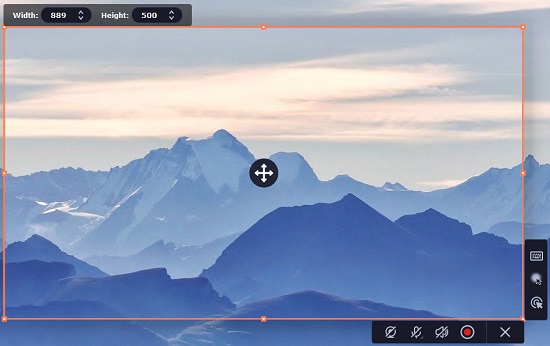
Step 3 Choose an Area to Record
Open your webinar software and now you can start to set a capture area. You can drag the capture frame to adjust target region. Alternatively, you can click the small triangle icon to choose a standard aspect ratio such as 320x240, 640x480, 1280x720, full screen, and so forth.

Step 4 Start to Record a Live Webinar
After everything is ready, click the "REC" button. A three-second countdown will begin and you can start your webinar right now. During the recording, you can click the "Pause" button on the minimized toolbar to pause the recording temporarily so as to skip your unwanted content. You can also use the "Cut" button to split your recordings into several clips or use Draw tools to add annotations. To finish the recording, just click the "Stop" button.

Step 5 Edit Webinar Recordings
Now you can find and preview your webinar recording at the pop-up "History" window. You're allowed to play, rename, or edit your files, such as cut and trim webinar videos, revise ID3 tag information, etc.

Solution 2: Xbox Game Bar
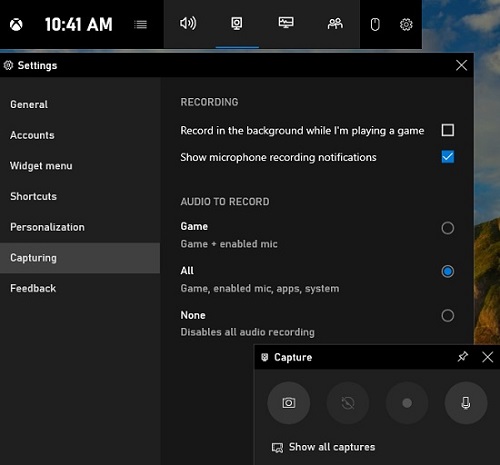
Windows 10 has a number of amazing features, and one of them is the Xbox Game Bar, which has fantastic performance in video recording. This floating toolbar can be accessed with the simultaneous pressing of the Windows key and the G key. With its simple and easy-to-navigate interface, you will be able to record gameplay, webinar, or other videos in high visual quality with far greater ease. There is no need to download any third-party software.

- Step 1: Press Win + G simultaneously and make use of the "Settings" icon on the menu bar to adjust your recording settings, such as create new shortcuts, adjust audio input devices, show animations, and more.
- Step 2: Tap the "Capture" button on the menu bar, and next, you will be allowed to utilize many functions like "Take screenshot", "Record last 30 seconds", and "Turn mic on while recording".
- Step 3: When you are ready, you are free to click the "Start recording" button (or press Win + Alt + R) to begin to record your webinar video.
Solution 3: Bandicam
Bandicam is a versatile PC screen recorder. It does well in recording almost all onscreen activities and create high-quality videos. Using this screen recorder, you will not only be able to record zoom meeting, streaming videos, webinars, webcams, and more. Good sound quality can be captured perfectly as well so that you will be able to record video with audio detected from your PC or your microphone. What's more, this solution includes a number of editing features like various mouse effects, real-time drawing, etc.
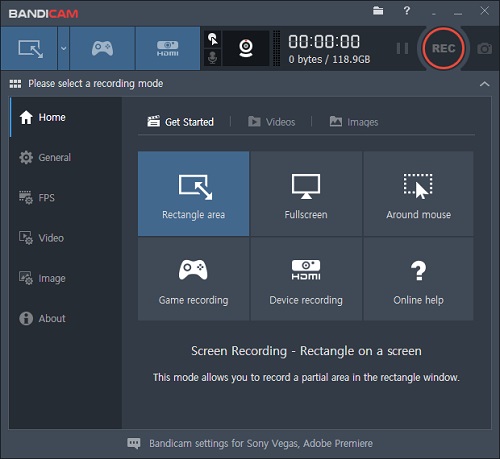
- Step 1: Download, install, and run Bandicam on your PC, then tap the "Screen Recording Mode" in the top-left corner of the screen.
- Step 2: A frame for capturing area will show up and you are allowed to drag its edges to select and customize your recording area freely.
- Step 3: If you want to record a webinar video in full screen, you can also click the "Fullscreen" button near the "Menu" button at the top of the capture frame.
- Step 4: For more custom settings, you are capable of select different tabs such as "General", "Video", "Image", etc. on the left side of the main screen to personalize your recording task in the way you like.
- Step 5: Finally, you can click the "REC" button to start to record webinar on PC.
Solution 4: Movavi Screen Recorder
Movavi Screen Recorder is one of the top-rated webinar recorders. It has a Windows version. Being good at capturing desktop actions like online calls, streaming events, etc. This app will enable you to grab both video and audio smoothly and easily. Movavi Screen Recorder also promises you a full control of your webinar recording. When opening the tool, a compact sidebar will appear on the desktop, which contains everything you need to work with the program. In a word, you will have an enjoyable recording experience when using the software.
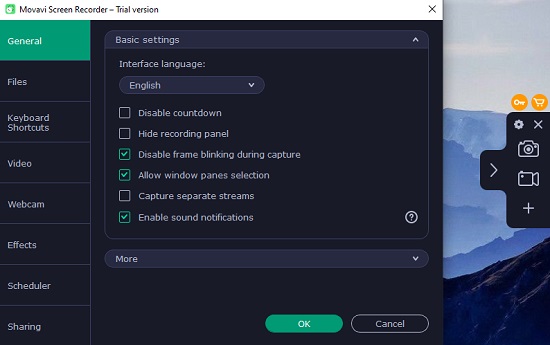
- Step 1: After opening Movavi Screen Recorder, you will see there is a sidebar on your desktop, which includes many buttons like "Screenshot", "Screen recording", and "Widget management"; you can also use the "+" button to select and add one more feature like "Webcam recording", "Audio Recording", or "Scheduler" for your quick access on the control panel.
- Step 2: Open your webinar window, then choose the "Screen recording" option and you will be able to drag to select your wanted recording area.
- Step 3: After selecting your recording region, you can still adjust the width and height of the area at the top of the frame; moreover, you will be allowed to turn on the webcam, your microphone, etc. by clicking many buttons.
- Step 4: More settings options can be seen when you tick the gear icon on the control panel, and when you are satisfied with your settings, you can hit on the "Start recording" button or press F10 to begin to record webinars on PC with ease.
Solution 5: FonePaw Screen Recorder
FonePaw Screen Recorder is a multipurpose screen recorder that lets you record webinars and other online videos in HD. Having an intuitive user interface suitable for beginners and supporting webcams, this application will enable you to record presentations without any problem. In addition to that, users are allowed to edit screen recording by drawing or adding texts, arrows, etc. to the video you are creating. Using the preview function to check your saved webinars is a good option as well.
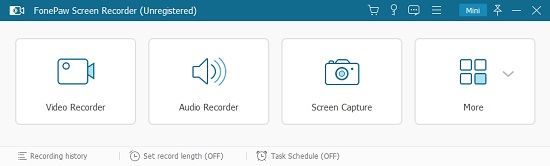
- Step 1: You will see there are many utilities like "Video Recorder", "Audio Recorder", "Screen Capture", etc. on the main screen of FonePaw Screen Recorder after opening the program on your PC.
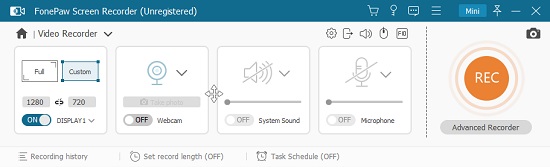
- Step 2: Click the "Video Recorder" and after that, you can begin to choose to record a webinar either in full screen or a custom area; you can also lock the aspect ratio on the left side of the main screen.
- Step 3: Moreover, you are free to turn on your webcam, microphone device, system sound, etc.; More settings related to sound, mouse, hotkeys, output, etc. will be accessible after clicking the gear icon near the "Microphone" option.
- Step 4: When everything is prepared well, you can tap the "REC" button immediately so that FonePaw Screen Recorder can help you screen record a webinar quickly.
Part 3. How to Record a Webinar on Mac
Solution 1: QuickTime Player
Similar to Xbox Game Bar, which is a default video recorder on Windows 10, QuickTime comes bundled with Mac computers. As its name suggests, QuickTime is a free application that has the ability to play movies, images, audio files, etc. But it can do more than that. You can use it as a Mac screen recorder with confidence. You can use it to record the entire computer screen or a particular window. With an attractive interface, QuickTime is easy to use, which can also meet your basic needs in recording a webinar or an online video call.
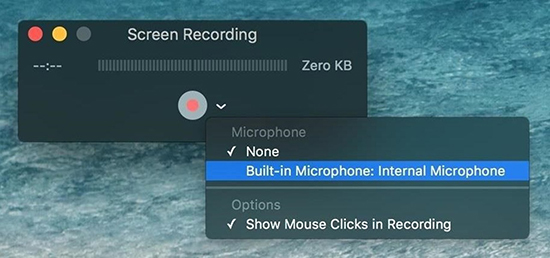
- Step 1: Open QuickTime Player on your Mac and choose File → New Screen Recording to add a brand-new recording task.
- Step 2: By pressing the down arrow button right next to the record button, you can adjust your microphone and choose to show your mouse clicks.
- Step 3: You can start grabbing the Mac screen instantly after clicking the record button; click anywhere on the Mac desktop to record a webinar in full screen or click to drag a specified region.
- Step 4: Now tap Start Recording to begin to screen record your live webinar in the way you like.
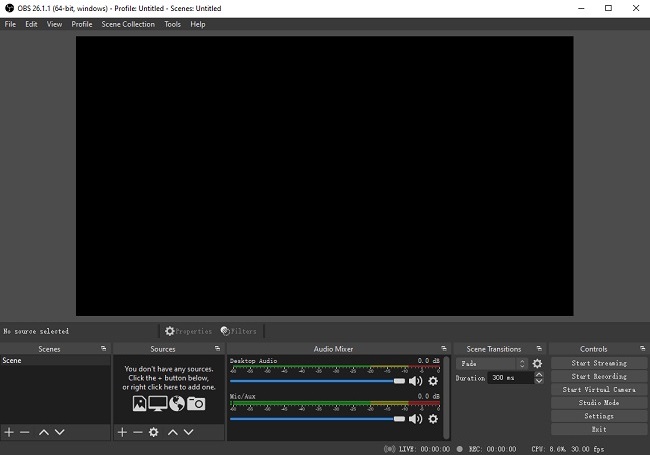
Solution 2: OBS
OBS is free and easy to download. You can always rely on it to record videos on Windows, Mac, and Linux. But we have to admit that OBS is more suitable for advanced users instead of starters. This freeware has a number of recording features, such as multiple scenes and sources, which may take you some time to figure out how they function. OBS also supports real-time audio capturing and mixing. In brief, you will be given a wide range of configuration options to tweak every aspect of your webinar recording.
- Step 1: A scene will be added automatically after launching OBS on your Mac computer.
- Step 2: Press the "+" icon at the bottom of the "Sources" box to create a source; you can select the "Window Capture" option.
- Step 3: Be aware that you need to open your webinar in advance so that you can find your target window from the dropdown "Window" list on the resulting window after rename your source.
- Step 4: Head back to the main interface and now you can tap the "Start Recording" button on the right side of the main screen to start to record a webinar free.
Part 4. FAQs about Recording Webinars
Q1. Do I need permission to record a webinar?
A: It depends on the webinar software as well as the host's settings. Usually, only webinar host and co-hosts are privileged to directly make a cloud recording without consent. But sometimes, like in Zoom, participants can start a recording without permission.
Besides, there are types of webinar recording tools in the market that allow you to record webinars no matter who you are, which requires no permission as well. However, for legitimate purposes, it's better to get the consent of others first.
Q2. What are popular webinar software?
A: There are various webinar software platforms that enables you to host webinars for training, education, marketing, etc. You can consider Zoom, GoToWebinar, BlueJeans, Webex, ClickMeeting, LiveWebinar, and the similar. Nearly all have a built-in recording feature for you to create recordings easily.
Q3. Should I hold a live webinar or recorded webinar?
Live webinar: In the course of the webinar, there will be a variety of uncontrollable situations, such as technical problems, network shutdown, etc. which is a great test of your tact to deal with matters of sudden urgency. However, the overall interaction with the participants is higher and will make the meeting seem more engaging.
Recorded webinar: It is more suitable for webinars on academic and technical topics. You can record the seminar in advance, cut out the excess, and make everything go the way you want it to. Also, it can help avoid embarrassing situations when you don't handle an urgent matter well.
Conclusion
This article has introduced you how to record a webinar using up to 7 high-performance webinar recorders on Windows and Mac. Xbox Game Bar and QuickTime Player can be used freely on PC and Mac without downloading any other software. OBS is completely free and it will be a perfect screen recorder for advanced users to record a webinar. But if you need the easiest-to-operate screen recorder for both PC and Mac to record webinars or other online videos, you can try Joyoshare VidiKit (originated from Joyoshare Screen Recorder). It is able to record any video and audio from any source in high quality easily and efficiently.
