ClickMeeting is a great tool to organize events and talk to a large audience. Coming with various flexible customization options, it has one of the easiest-to-use webinar interfaces on the market. Recording and sharing webinars sometimes mean significantly. If you know about how to record ClickMeeting webinar, you can create highly sharable content easily to distribute via various platforms, save reference material, review video content at any time, etc. Incredibly, ClickMeeting has an embedded video recording utility. So in this article, we are going to show you how to record ClickMeeting conferences using not only the built-in function, but also a feature-rich video recorder.
- Part 1. Record Webinar on ClickMeeting with Built-in Function
- Part 2. Record Webinar on ClickMeeting Unlimitedly
Part 1. How to Record ClickMeeting Webinar with Built-in Recorder
ClickMeeting has provided users with a better experience and service by enabling them to record and save video meetings with a simple click. In this way, every beginner and professional is able to review materials at his convenience. Recorded webinar will be saved automatically in your account panel, and you are free to trim it if necessary. You can also choose to download or export your webinar recordings in MP4 format for distribution on social media and website. Technically, there are two ways to record a ClickMeeting webinar, which will be shown as follows.
Before a Webinar
Step 1: Before a webinar starts, you can go to first go to the upper right corner in your Account Panel and select Account Settings from the drop-down menu;
Step 2: Tap the Advanced Setting tab and check the checkbox of Recording Auto-Start and after that, click Save, and now, all your coming events will be recorded and saved automatically.
After a Webinar
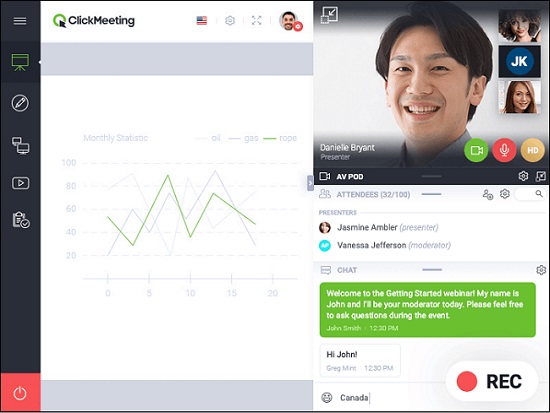
Step 1: If you are during a meeting, you are able to click on the Rec button on the top bar in your Webinar room to record your ClickMeeting webinar;
Step 2: After the webinar ends, you need to head back to your Account Panel to select Storage in the upper right corner of your screen;
Step 3: Choose Recordings from the drop-down menu and then pick an event from the list;
Step 4: Click on Actions on the right side and then click on Publish, and after that, you will be ready to send what you recorded previously to your attendees.
Tips 1How much recording space do I have?
It depends on which ClickMeeting service package do you have, which mainly includes 500MB, 1 GB, and 2 GB. You are also able to create a ClickMeeting free trial account for a 30-day webinar service before paying for a package.
Tips 2Can I edit a recorded event?
Yes, you can. You need to head to your Storage tab and then choose Recordings. After that, select Actions right next to a recording and choose Edit next.
Tips 3Where are my recorded events saved?
You can always find your recorded events on Storage > Recordings. Remember that when you stop recording, ClickMeeting will save your video content automatically in MP4 file format.
Part 2. How to Record Webinar on ClickMeeting with No Limitations
When it comes to webinar recording, the quality and smoothness of a recorded video mean profound. And Joyoshare VidiKit is able to satisfy all your needs from all aspects. As a handy and smart screen recorder for Windows and Mac, Joyoshare VidiKit, formerly Joyoshare Screen Recorder, performs amazingly in recording videos in up to 4K at 60 FPS. No watermark, no lag, and no time limit.
You can not only record GoToMeeting webinar, but also download streaming movies, online lectures, live sports events, game videos, and more. Besides offering you features that enable you to control the screen recording process completely, Joyoshare VidiKit is also a video editing software that lets you manipulate your videos in any way you want. In brief, you will have an enjoyable ClickMeeting webinar recording experience using this powerful and reliable tool.
- Record ClickMeeting webinar in up to 4K at 60 FPS easily
- Select screen size and customize an output format freely
- Grab sound both from computer system or microphone clearly
- Provide flexible settings options to control screen recording
- Change video codec, bitrate, resolution, quality, and more
Step 1Install Joyoshare VidiKit and Open Screen Recorder
Once you've installed the software on your computer, you need to double click on its desktop icon to run it. After Joyoshare VidiKit launches, select the "Record" panel and choose to open screen recorder. A new user interface will appear on the screen. Please click on the camera-like icon to make sure that the "Record video and audio" mode is on. Only in this way can you record screen with audio smoothly and swiftly.

Step 2Make Custom Recording
You will find the little gear icon in the lower right corner of the main screen. Click on it to unfold the settings window so that you can gain access to more options. You will be able to customize your output format by pressing the "Format" button under the "Basic record options". Scheduling a recording task is doable as well. If you want to highlight your cursor and clicks in a screen recording so that your colleagues can understand where you are going, you can simply tick the checkbox of highlight cursor/clicks under the "Cursor options".

Step 3Grab Recording Area
On the left side of the Joyoshare VidiKit's main window, you'll be able to see a "+" icon, which will allow you to choose which area of the screen you'll record. Just click on it and you'll be able to drag the edges of the pop-up blue frame to select any screen size. Move to the middle part of the window to open your system audio and/or microphone. Adjust the volume if necessary.

Step 4Record ClickMeeting Video
Tap the "REC" button whenever you would like to begin to record. After a three-second countdown, Joyoshare VidiKit will help you record everything that happens on your webinar on ClickMeeting without letting others know. You can take advantage of the three buttons on the minimized toolbar outside the dynamic recording frame to control your recording. For instance, you are able to use the "Cut" button to split recording into pieces, the "Pause" button to skip unnecessary parts, and the "Stop" button to quit recording at any time.

Step 5Edit Recorded Videos
Once you stop recording, the History window will pop up. At that time, you will be able to edit your recordings by renaming, trimming, editing ID3 tags, etc. You can also play them directly using the inbuilt media player.

Conclusion
As a matter of fact, each service plan of ClickMeeting will enable you to record a webinar for a specific period of time, up to 10 h, and allows you to save files at a maximum of 2 GB. Compared with the built-in recording function, Joyoshare VidiKit allows you to record videos from any source with no time limit, and the file size will depend on your hardware space. You can output recorded videos in MP4 format on ClickMeeting, and can select MP3, MP3, FLV, SWF, MPEG, MKV, AVI, MOV, FLAC, OGG, etc. As your output format in Joyoshare VidiKit. Moreover, Joyoshare VidiKit features more editing tools to personalize your videos. So if you want to have an all-powerful screen recorder to record webinars without limitations, maybe Joyoshare VidiKIt can be a better choice.
