It is common and necessary to record full screen, especially when you are going to record gameplay or make tutorial videos, which requires you to show the entire computer screen clearly. The recording work could be easy and fast as long as you have a handy full screen recorder at hand. Such kind of screen recorder will enable you to either record the entire computer screen or use a capture frame to select a customized area of any screen size. Happily, today's article is going to share the top 7 options with you and show you how to use these tools step by step. Read on and we are sure that you can find the one that best suits you.

- Part 1. Joyoshare VidiKit (Windows, Mac) [Hot]
- Part 2. Bandicam (Windows)
- Part 3. EaseUS RecExperts (Windows, Mac)
- Part 4. MiniTool Video Converter (Windows)
- Part 5. CamStudio (Windows)
- Part 6. OBS (Windows, Mac, Linux)
- Part 7. Camtasia (Windows, Mac)
Part 1. How to Record Full Screen Videos - Joyoshare VidiKit
You can easily record the entire computer screen or any selected area if you get an efficient full screen recorder like Joyoshare VidiKit (originated from Joyoshare Screen Recorder) at hand. No watermark. No time limit. No latency. This app works on every detail while carrying out the recording action. You can use it to record screen with audio and save videos in high quality. You can export your videos to MP4, FLV, MOV, AVI, MKV, OGG, 3GP, FLAC, 4K Video, and more.
Joyoshare VidiKit also serves as a perfect video editor. This feature-packed will enable you to customize your screen recording in the way you like. You can make use of many flexible editing features and configuration options to enhance your screen recording. Furthermore, you are allowed to edit and manage your video and audio files after recording. A built-in media player is available for you to enjoy your recorded videos and audio straightforwardly as well.
- Grab the entire computer screen or record partial screen of any size
- Output high-quality videos in various video and audio formats
- Record screen with audio from microphone and computer system
- Configure a number of settings and edit files after recording
- Customize output format and change frame rate, bitrate, codec, etc.
- Support smartphones, gaming consoles, smart TVs, and more
Step 1 Start Joyoshare VidiKit to Open Screen Recorder
The first thing you need to do is to download and install Joyoshare VidiKit on your PC or Mac. After running it, you can press the "Record" panel to open the screen recorder. In order to record computer in full screen, you need to click the
 icon near the "REC" button.
Step 2 Select Entire Screen to Record
You will find a little triangle icon in the "Capture Area" section on the left side of the screen. Click it to expand the list of many preset standard resolutions and choose "Full Screen". In this way, Joyoshare VidiKit will record your entire computer screen. If you need to select an area of any size, you can make use of the "+" icon nearby.

Step 3 Optionally Configure Recording Options
More settings options will be displayed once you hit the gear icon near the "REC" button. If you want to browse many supported formats and choose the one you need, you can press the "Format" button. The "Watermark" feature can be used to watermark your screen recording. You can even set up the start and end time of your video recording, which will certainly bring a lot of conveniences to you.

Step 4 Start to Record Video in Full Screen
A three-second countdown will begin the moment you press the "REC" button. After that, Joyoshare VidiKit will start to record full screen video smoothly. On the minimized toolbar, you can utilize the "Pause" button to cut out unwanted content and the "Cut" button to create several independent video clips. If you are done with recording, you can tap the "Stop" button.

Step 5 Edit Any Recorded Video
All your video and audio recordings will be displayed on the History window. You can rename them one by one and edit them by cutting and trimming. You are also able to play your recorded files using the embedded media player directly.

Part 2. How to Record Full Screen - Bandicam
Bandicam is a popular video recorder for Windows. It has "Screen Recording Mode", "Game Recording Mode" and "Device Recording Mode", which will enable you to choose any area on your Windows display. Full screen recording and audio capturing are supported, so you can record screen along with internal or external audio easily. Additionally, Bandicam supports a few editing features. You will be able to edit your recordings in a fast manner.
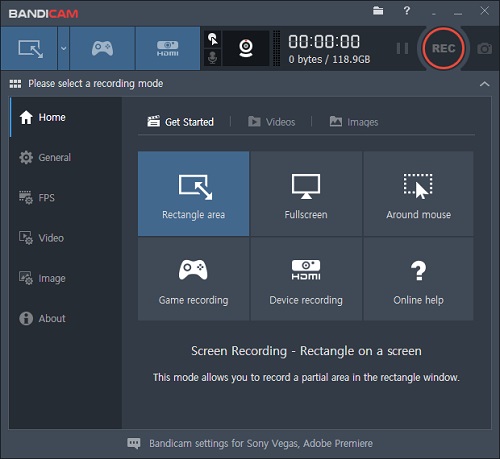
Step 1: After installing Bandicam on your Windows, open the program and select the recording mode you prefer at the top of the screen;
Step 2: You can click the down arrow button near the "Screen Recording Mode" button and select "Fullscreen" to record the entire computer screen; while for "Device Recording Mode", you can find a "Fullscreen" button in the upper left corner of the capturing screen;
Step 3: Now you can tap the "REC" button to start to record videos in full screen.
Part 3. Record Entire Computer Screen - EaseUS RecExperts
EaseUS RecExperts is an outstanding full screen recorder. It is able to record online videos, reviews, tutorials, gameplay, and more. Blessed with a simple and intuitive user interface, Bandicam will enable every starter to record full screen or a partial screen easily and quickly. It also supports webcam and voiceover, so you can record video and audio simultaneously. Adopted leading technology, EaseUS RecExperts is also able to edit recordings using many editing tools like adding texts and arrows, trimming, inserting a watermark, etc.
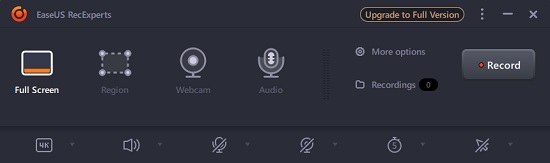
Step 1: Launching EaseUS RecExperts on your computer;
Step 2: You will find the "Full Screen" option on the left side of the screen, then click on it to bring out the capture frame;
Step 3: After setting up other custom settings, you can press the "Record" button and EaseUs RecExperts will start to record computer video in full screen.
Part 4. Record Computer in Full Screen - MiniTool Video Converter
MiniTool Video Converter is more than a video converter. It also works as a screen recorder and video downloader. The screen recording utility of this application allows you to record video in full screen or a selected region. MiniTool Video Converter provides you with a variety of custom settings. For example, when you open the screen recorder, you can hit the gear icon at the top of the screen to gain access to many options like "Output folder", "Video", "Mouse", "Recording", and more.
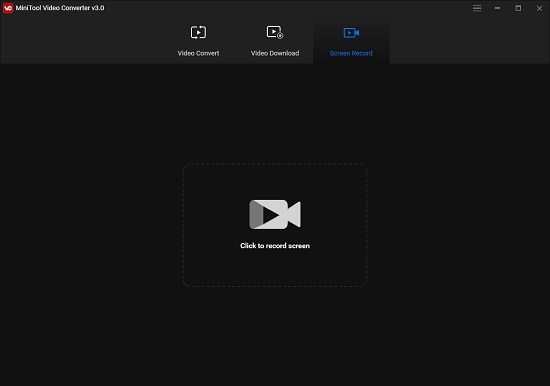
Step 1: Run MiniTool Video Converter and tap the "Screen Record" tab at the top of the screen;
Step 2: Click the "Click to record screen" area and now you can select "Full screen" on the left side of the result window;
Step 3: You can also hit the gear icon at the top of the result window to change output format, apply mouse effects, change hotkeys, etc.
Step 4: Now you are able to tap the red "Record" button on the right side of the screen to start to record full computer screen.
Part 5. Record Full Screen - CamStudio
CamStudio does well in recording all on-screen activities on your computer. With the help of this software, you are allowed to record the whole computer screen or any section of it with far greater ease. It can even add high-quality screen captions to your video recordings so that you can personlize your videos. More amazingly, CamStudio can reduce and increase the quality of the recording depending on your actual needs, which makes it unique and different from other competitors. After recording, you will be able to save your videos in AVI.
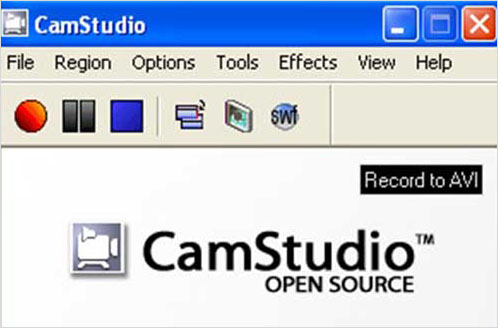
Step 1: Download and launch CamStudio on your computer;
Step 2: Press the "Region" tab on the menu bar and select the "Full Screen" option;
Step 3: You are free to select the "Options" tab to customize your screen recording in various ways; for example, you can choose the "Video Options" to change the quality of the output video, set up playback and capture rates, etc.
Step 4: Finally, you can press the red circle "Record video from the screen" button to start recording in the entire screen and the blue "Stop recording video from screen" to quit the recording process.
Part 6. How to Record Full Screen - OBS
OBS is a reliable video recording and streaming tool. With strong compatibility, you can use it to record desktop screen on Windows, Mac, and Linux. OBS offers many sources and scenes, which will allow you to save videos from almost all sources in a professional way. Though it may take you some time to figure out how to use this software, you will find it useful if you get the hang of it. With its unique functions, you will be able to record full screen or a selected region without any hassle.
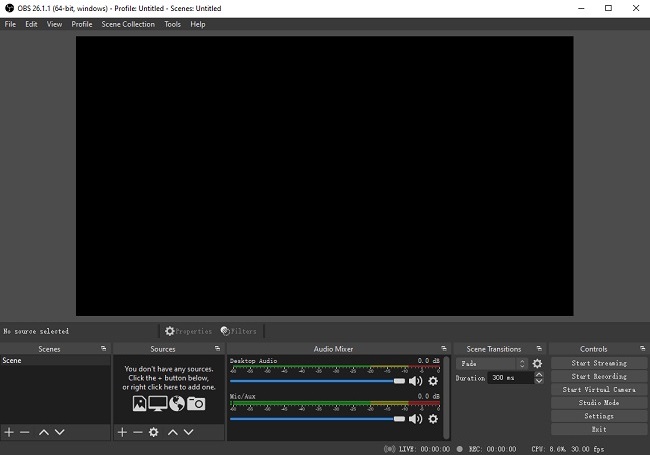
Step 1: Free download OBS and run it on your computer;
Step 2: A default scene will be added by default, so you need to go down to the "Sources" box and click the "+" icon to add a new source;
Step 3: If you would like to record full screen games, you can select the "Game Capture" source; you can also choose the "Window Capture" source to record in full screen;
Step 4: After selecting a source and setting up your recording preferences, you can hit the "Start Recording" button on the main screen to begin to let OBS record computer full screen.
Part 7. Record Full Screen Video - Camtasia
Camtasia is a 2-in-1 screen recorder and video editor. Using this app to record desktop screen is fast and easy. You can record streaming videos, virtual meetings, gameplay, online music, training videos, webinars, and many more in high visual quality. After recording, you saved videos will be opened in the video editor automatically, where you will be able to edit your videos and audio files separately. Camtasia's powerful video editor also allows you to add captions, transitions, annotations, special effects, and so forth.
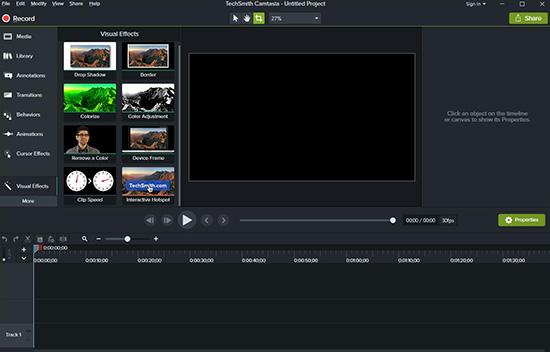
Step 1: After opening Camtasia, you can select the "New Recording" option to prepare for your video recording;
Step 2: Next, on the minimized toolbar, you will find the "Full screen" button on the left side; click it to select the entire computer screen;
Step 3: You are also free to turn on or off the camera and audio and adjust audio volume;
Step 4: Now you can tap the "rec" button on the right side at any time and Camtasia will start to record full screen videos after a three-second countdown.
Conclusion
It can be a piece of cake to record full screen by using any full screen recorder we mentioned above. No matter which operating system you run and what activities you'd like to capture, you can quickly get it done. Sure, you can freely look further to learn a variety of options in the current market if you have more requirements and standards for screen recording.
