Q:"How to screen capture desktop and browsers in 4K/HD?" - From Reddit
The advent of 4K has a great impact on every aspect of people's lives, so do the 4K screen recorder programs. They bring your scene to life, enabling you to create professional-looking and incredible 4K videos with vivid colors and detailed pictures. You can play them back without worrying about the quality, which will totally enhance your viewing experience. However, finding a suitable screen recorder that supports 4K videos is not easy. Hopefully, today's article has tested a few of them and provide you the best list, explained with steps on how to screen record in 4K. No matter whether you have a 4K monitor, you can always find the value out of this article to help you enjoy engaging videos.

- Part 1. Joyoshare VidiKit (with/without a 4K Monitor)
- Part 2. Camtasia
- Part 3. RecMaster
- Part 4. OBS
- Part 5. Shoot Videos in 4K on Samsung
- Part 6. Record Video in 4K with iPhone
Part 1. Record Desktop Screen in 4K - Joyoshare VidiKit
Joyoshare VidiKit - Screen Recorder comes with a beginner-friendly and unique interface. This qualified 4K and HD screen recorder can record screen at up to 60fps without latency. With wide support for output formats and devices, you are permitted to record streaming videos, virtual meetings, video chats, etc. in the best way you can and then save them to wherever you want. Most importantly, this software gives you more flexibility in screen recording. You will be able to record an entire screen, grab a particular window, preset recording time, hide/show/highlight cursor, use shortcut keys, add image watermark, and more.

- Record video in HD or up to 4K
- Resolution can be picked from a systematic list
- Have ability to capture internal and external sound
- Record desktop actions in high quality with zero lag
- Screen record in 4K with no watermark and no time limit
- Edit recordings with a wide range of easy-to-use tools
Step 1 Get Joyoshare VidiKit
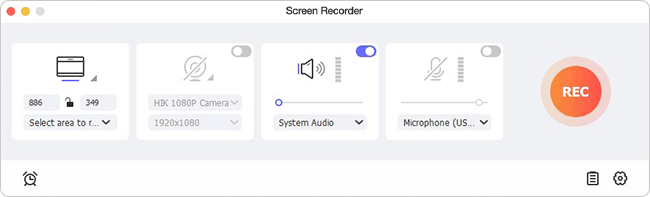
Download Joyoshare VidiKit software officially and launch it on your Windows/Mac computer after installation. Make sure that you have chosen "Screen Recorder" - "Record video and audio" mode. If not, please click the camera-like icon near the "REC" button to activate it.
Step 2 Choose Format and Adjust Other Settings
From the main interface, hit on the little gear icon at the lower-right corner to customize more options for recording screen in 4K as you wish. The following unfolded window will have three different tabs. Check the "Format" button under the "Basic record options" tab. Click on it to head to the "General Video" option and select "4K Video".
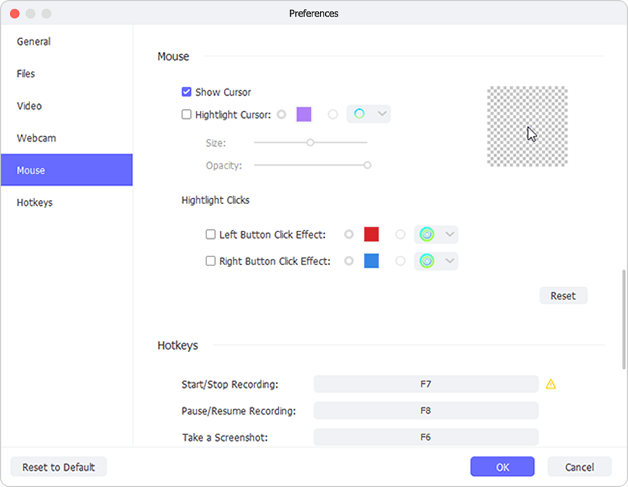
Note: In addition to this, you can press the "Watermark" button to load an image file and change its position, transparency, scale, etc. You are also able to put your recording tasks on schedule by entering into the start/end time into the temporal interval with millisecond precision.
Step 3 Grab Recording Area
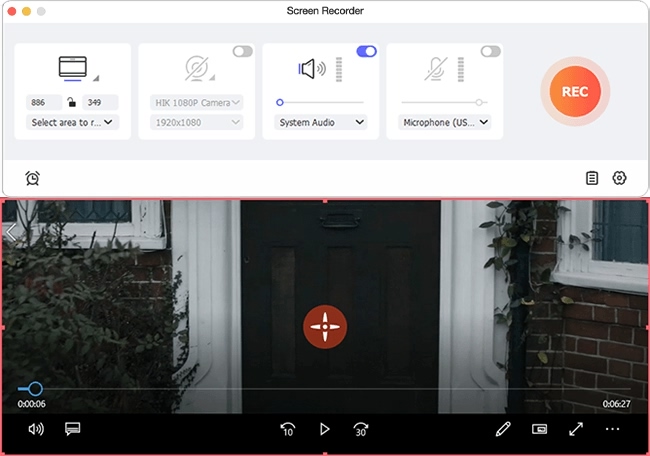
Next, go back to the main interface to define your capturing area freely. You are capable of pressing the small triangle icon under the "Capture Area" to select your recording area from a list of standards. Alternatively, you can make it by hitting on the "+" icon and dragging the edge of the red frame. Don't forget to turn on the system audio and microphone in the middle of the screen if you want to record screen in 4K with sound.
Step 4 Record Desktop Screen in 4K
Now, it's time to hit on the blue "REC" button to start recording. You will go through a three-second countdown so that you could prepare well before recording. Notice that the recording toolbar will be minimized to tray so that it would not affect your other activities on the desktop.
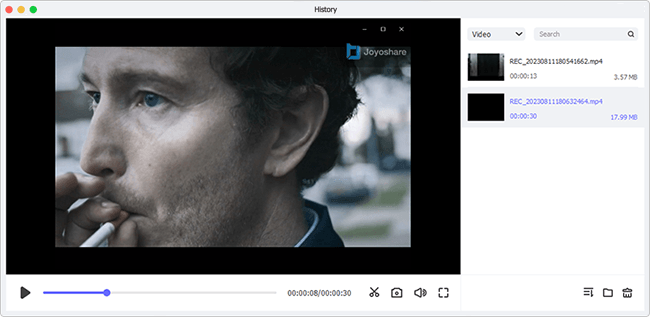
Step 5 Save and Check Completed 4K Video
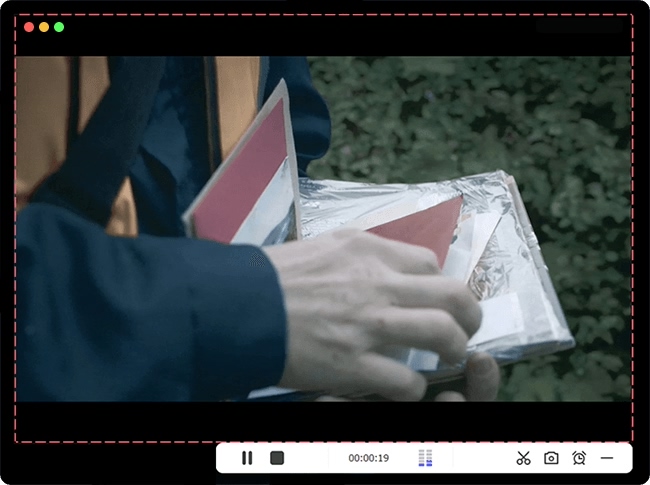
After click on Stop button, the video you create in 4K will be saved soon and added to the list in History window. Now, play to preview it and see whether it has high resolution as you expect. Trim the file to extract desired portion off if you need it.
Part 2. Record 4K Screen - Camtasia
Camtasia is an all-in-one 4K screen recorder and video editor for Windows and Mac with advanced timeline interface. You can utilize this tool not only to screen record 4K videos with ease but also to manage multiple video and audio clips at the same time. Moreover, it supports webcam. During making tutorial videos, you will be able to record yourself speaking while showing others what you are doing on your computer desktop at the same time.
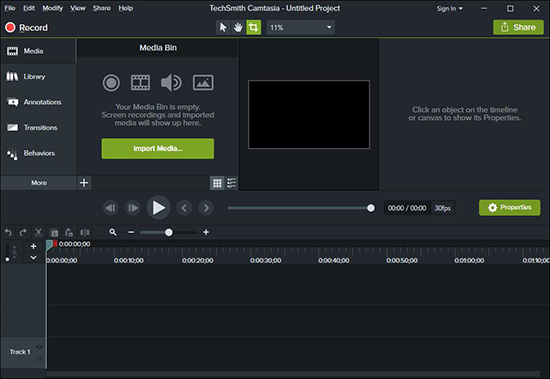
- Step 1: Open Camtasia to "Start a New Project";
- Step 2: Hit on the "Record" button at the upper-left of the screen to get ready for the recording;
- Step 3: Choose to record the full screen or custom the recording area under the "Select area" option on the appeared toolbar;
- Step 4: Decide whether to open your camera and audio or not under the "Recorded inputs" option on the toolbar;
- Step 5: Tap the red "rec" button on the right side to begin to capture 4K screen.
Part 3. Record 4K Video - RecMaster
There are a large number of screen recording software that can help you capture your 4K desktop screen, and RecMaster could be one of them. This software specially offers you up to five recording modes, including "Audio Only", "Webcam", "Custom Area", "Full Screen", and "Game Mode". With its intuitive interface, you will figure out how this app work without spending too much effort. What makes RecMaster stand out is that it supports "Mobile Phone Mode", which are suitable for Tik Tok and Instagram. But its "Task schedule" function is only available for registered users.
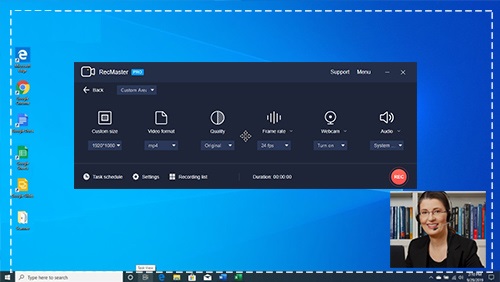
- Step 1: Install and run RecMaster on your computer;
- Step 2: Choose a proper recording mode you would like to use to enter a new operation window;
- Step 3: Adjust a series of settings such as the output format, video quality, frame rate, system sound and more on the main interface and by clicking the "Settings" icon at the bottom of the screen;
- Step 4: Tap the "REC" button at the right corner of the screen to start recording 4K videos.
Part 4. How to Capture 4K Screen - OBS
You can download OBS for free on Windows, Mac, and Linux. As an amazing tool for video recording and live streaming, this program is much preferred by games for broadcasting their gameplay. Using OBS, you will be able to capture the whole screen or a specific area easily and then record 4K videos without time limitation. Though it may take you some time to understand how to use it properly, once you get the hang of it, you will find it useful and powerful. However, this software integrates no video editor. If you would like to edit your recordings, you have to employ another program to help you.
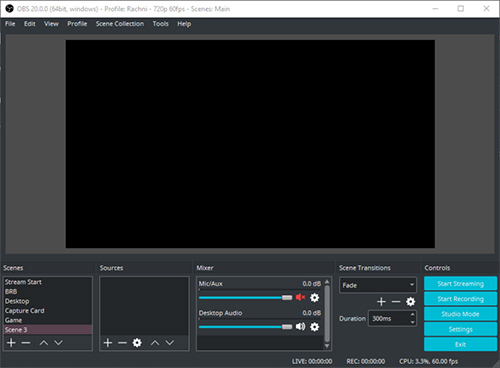
- Step 1: Install and launch the OBS app;
- Step 2: Tap the little "+" icon at the bottom of the "Scenes" option to create a brand-new scene;
- Step 3: Hit on the "+" icon at the bottom of the "Sources" option to choose "Game Capture" and "Audio Output Capture";
- Step 4: Click the "Ctrl" button on your key board to decide which part of your screen you would like to record, or OBS would capture the full screen by default;
- Step 5: Press the "Start Recording" button at the lower-right corner of the screen to start to record 4K videos.
Part 5. Record Videos in 4K on Samsung
How about using a phone to shoot videos in 4K? This might be an interesting idea. Using a smart phone every day, knowing how to create 4K videos directly will definitely bring us joy and convenience. In this part, we will take Samsung as an example. Follow the below steps to learn how to adjust the settings of your camera to record videos in 4K UHD.
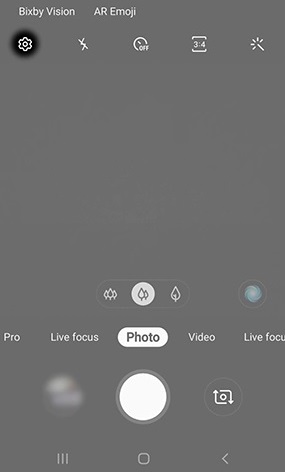
- Step 1: Open the camera of your Samsung phone and click on the "Settings" icon at the upper-left corner of the screen;
- Step 2: Select either "Rear Video size" or "Front Video size" under the "Videos" option;
- Step 3: Choose "16:9" and then hit on either "UHD 3840×2160" or "UHD (60fps) 3840 ×2160";
- Step 4: Now you can go back to your camera and slide to "Video" to shoot videos in 4K.
Part 6. Record Video in 4K with iPhone
Actually, it's effortless for you to record screen video in 4K, 720p HD and 1080p HD with your iPhone. By doing this, keep in mind that your 4K videos can be stored in iCloud in original format and its full resolution if you have previously enabled iCloud Photos already.
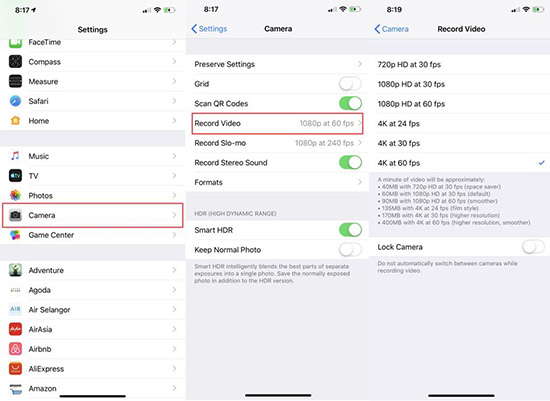
- Step 1: Open Settings on iPhone;
- Step 2: Slide your screen to find and click "Camera";
- Step 3: Tap on "Record Video" and then choose "4K at 24 fps" , "4K at 30 fps" or "4K at 60 fps" as you want;
- Step 4: Go back to the Home screen, open Camera app and record a video in 4K now.
Conclusion:
It is worth mentioning that Joyoshare VidiKit supports recording videos in 4K as well as recording 4K videos. It means that even though you don't have a 4K monitor, you can still use this software to save videos in extreme high quality. However, most screen recording programs are unable to function like this. Therefore, if you don't have a 4K compatible device, you are supposed to check carefully the features of the screen recorder software you are about to install.
