While how to record audio from the microphone on Mac is known by most users, it is a bit obscure to learn how to record internal audio on Mac. This is a real challenge. Because Mac computers, by default, do not come with built-in recording tool to directly record internal audio. Though there are actually many methods to get over this hurdle, most of them are going to bother you with either little or big drawbacks. Therefore, we have concluded 8 best ways to record Mac system audio, which can effectively bypass the limitations imposed by Mac default settings. Let's see what they are.
- Part 1. Joyoshare VidiKit [Hot]
- Part 2. Audacity
- Part 3. OBS
- Part 4. QuickTime Player
- Part 5. GarageBand
- Part 6. Recordit
- Part 7. Easy Audio Recorder Lite
- Part 8. Free Sound Recorder
Part 1. Record Internal Audio on Mac with Joyoshare VidiKit
Joyoshare VidiKit is a multi-functional audio recorder that is able to record audio from the soundcard, the microphone, the speaker or other audio devices connected to your Mac. So, you can replace the default recording software with this program. The high quality of the original audio will be retained in the recording as much as possible, and you can save the recordings to multiple formats, including MP3, AAC, AC3, APE, FLAC, AIFF, ALAC, OGG, WAV, WMA, etc.
It amazes many users with its post-recording editing feature, which allows you to trim the recordings, edit sound effects and ID3 tags. Besides, it is also worth mentioning that the ID3 tag information will be matched by the program when the recording source is a song. The auto-split of the recordings will increase the recording efficiency dramatically.

- Excellent and customizable sound quality, channel, bit rate, etc.
- 16 audio formats available like CAF, ALAC, M4A, FLAC, AIFF, and many more
- With powerful post-recording editing features like trimming and editing ID3 tag
- Record systen audio and microphone in high sound quality
- Best internal audio recorder to record audio from different websites, programs and more
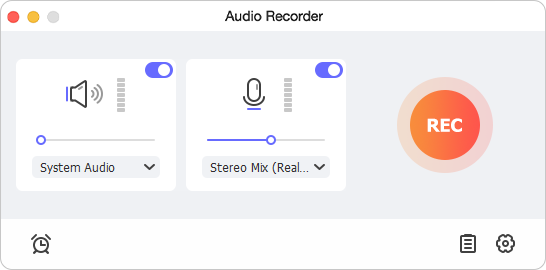
Step 1 Launch Mac internal audio recorder
Download Joyoshare VidiKit for Mac from the option above and run it. In the main interface, choose Audio Recorder under the Recorder section. Based on your own needs, simply set System Audio and Microphone Audio. You can decide to enable whichever you want and adjust the volume.
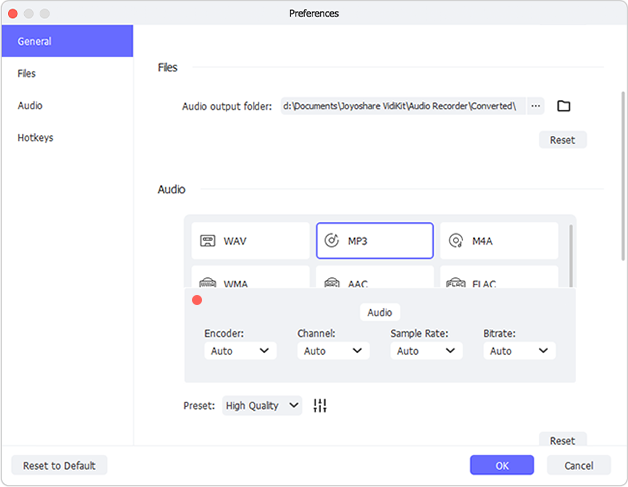
Step 2 Set the output settings
Click on the Preferences icon at the right bottom. Here you can change the recording-related settings, including format, codec, channel, bit rate, and sample rate. Or you can skip them and select High Quality or Small Size in the Preset option.
Step 3 Record internal audio on Mac
Now, find the audio you want to record first, make sure it is playable but don't play it yet. Click the REC button in Joyoshare VidiKit and then start playing. Upon the audio track playing comes to end, click on the Stop button in the toolbar to stop the recording process.

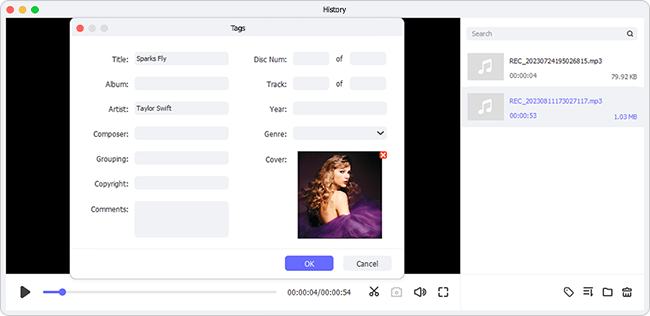
Step 4 Edit the recorded internal audio files
Right-click each track in the list of History window and hit the Edit icon to start to edit the recording. You can trim the tracks, adjust the sound effects, and edit the ID3 tags on your own.
Part 2. How to Record System Audio on Mac with Audacity
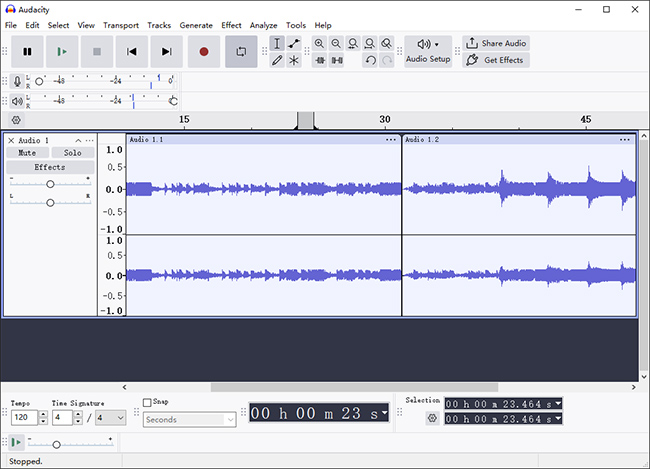
If you want to record Mac internal audio in a free way, Audacity is a good choice. This famous audio recording software can grab internal audio from your Mac computer system. Best of all, its stunning editing features can professionally make whatever you record more attractive. But it should be made clear that this method is complicated since it involves both Soundflower and Audacity.
Pros:
- Free to use on Mac, Windows, and Linux
- Classic audio recording software for multimedia users
- Provide advanced audio editing tools
Cons:
- Hard for beginners to independently operate in a short time
- Require extract software to record system audio
- Step 1: Download and install both Audacity and Soundflower add-on on your Mac computer.
- Step 2: Go to the "System Preferences" → "Sound" → "Output". Simply choose "Soundflower (2ch)" for sound output and adjust the volume.
- Step 3: Open Audacity, click "Edit" on the upper left corner, and go for "Preferences". In the popping-out menu, hit "Audio Settings" from the left volumn. Then click the "Device" drop-down menu under both "Playback" and "Recording" to select "Soundflower (2ch)".
- Step 4: Hit the red "Record" button in Audacity, and then play the audio. You will notice that the audio is being captured by the software. If you want to end the recording, click the recording button again.
Part 3. Record Internal Mac Audio Using OBS
Open Broadcaster Software, short for OBS, is an open-source audio recorder available on Mac, Windows, and Linux. It is designed to process video/audio files and stream to Twitch, Instagram, YouTube, etc. This advanced program can be well compatible with a series of video and audio formats. You have the luxury to record all internal/external audio sources on your computer.
Pros:
- Free, open-source, and cross-platform screen recording software
- Support live streaming on YouTube, Twitch, Instagream, etc.
- Capture any possible audio source
- Provide intuitive audio mixer
Cons:
- Can only record audio and video at the same time
- Lack of editing tools to process recorded audio files
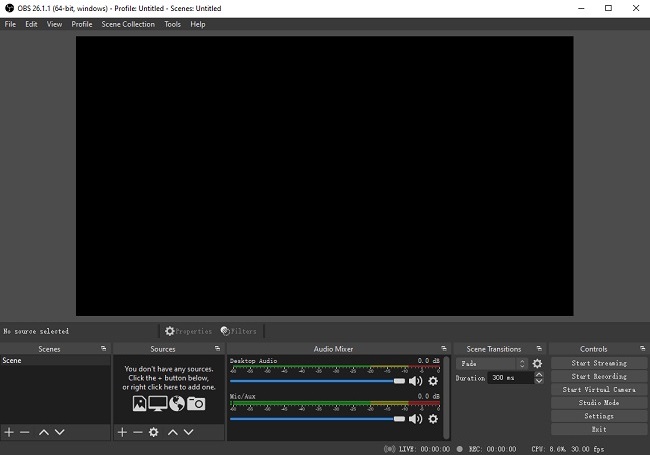
- Step 1: Install and launch OBS on Mac. Then navigate to the Sources box at the bottom of the screen and click the gear icon. In the drop-up menu, choose "Audio Input Capture" if you want to record audio.
- Step 2: Go to File → Settings → Audio. Here, find and click "Desktop Audio" tab, select the right source. Click OK.
- Step 3: Back to its main interface, click the "Start Recording" button to start the internal audio recording process. To stop the process, simply click the "Stop Recording".
Part 4. QuickTime Player
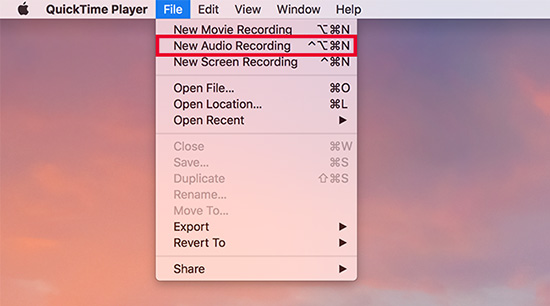
QuickTime Player is pre-installed on all Mac computers. It functions as not only a media player but also a recording tool. You can utilize it to record entire screen or a portion of screen on Mac. However, when it comes to audio capture, it is not a good option. It is unable to record internal audio by default and you're required to download an add-on called Soundflower. But luckily, both QuickTime and Soundflower are free to use without complicated features.
Pros:
- Free to use
- Preinstalled on Mac without software installation
- Easy for novices to manipulate
Cons:
- Need to install extra software to capture internal audio
- Lack of advanced audio editing options
- Step 1: Download Soundflower and change the audio output. Simply head to "System Preferences" on Mac → "Sound" → "Output" → set "Soundflower (2ch)".
- Step 2: Activate QuickTime program on your Mac and head to the menu.
- Step 3: Click "File" and choose "New Audio Recording" from the drop-down menu. Click the "Options" to configure Microphone to Soundflower.
- Step 4: Choose your desired audio quality by clicking down arrow before the audio recording process.
- Step 5: To save the recorded audio file, just click the File and select "Save..." option.
Part 5. Record Mac System Audio with GarageBand
Featured with a complete sound library, GarageBand is a music creation studio inside your Mac computer. It comes with a simple and intuitive interface, which means that you can operate this program without any steep learning curve. What's more, you are able to add tracks to GarageBand using iPhone and iPad devices as you want. After the audio recording, you can share recording files with your family, friends, and the whole Internet community.
Pros:
- Offer a variety of virtual instruments & pre-recorded loops
- Well integrate with other Apple services and products, like iTunes, iCloud
- Compatible with macOS, iOS, and iPadOS
Cons:
- Lack some advanced features in digital audio workstations (DAWs)
- Include no support for certain audio formats
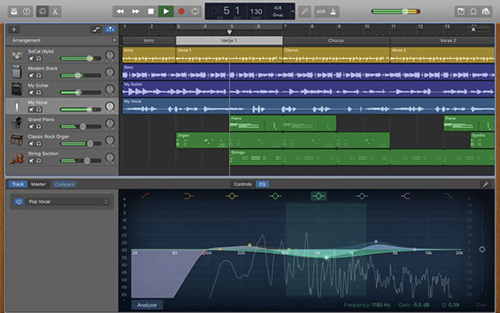
- Step 1: Download and activate GarageBand on Mac computer. Then choose sound effects on the user interface.
- Step 2: Now, click the red recording button to start recording and click the Stop button to finish the process.
- Step 3: After the recording, you can play and enjoy your audio recording.
Part 6. Record Internal Audio on Mac via Recordit
Recordit works as a screen recording and GIF creation tool available on macOS and Windows. It enables you to record onscreen activities as a video or a GIF. This practical, lightweight and professional tool can record screen and internal audio from Mac. However, its free version only allow 5-minute recording length. With the help of it, you can create demonstration video and video tutorial handily.
Pros:
- Convenient for creating GIFs and short recordings
- Simple to operate
Cons:
- Limit recording in max 5 minutes
- Need to pay to unlock recording length
- Cannot record audio only
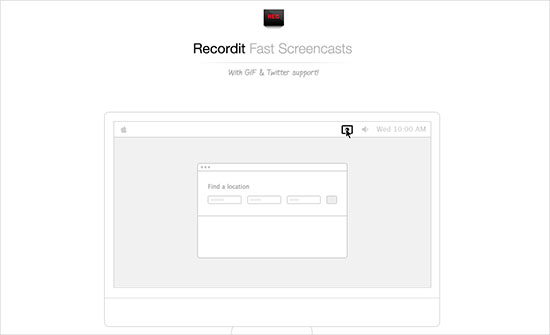
- Step 1: Download, install and open Recordit program.
- Step 2: Find and click the black circle icon at the top of the interface to initiate the recording.
- Step 3: To stop the recording, simply click the Stop option.
Part 7. Grab Mac Internal Audio - Easy Audio Recorder Lite
This easy-to-use audio recording tool, Easy Audio Recorder Lite, saves audio in WAV file format with high sample rate and has the possibility to send the audio file by using email. If you want to save your audio in M4A, FLAC, AIFF, CAF, and WAV formats, you should download the full version of this program. You can use this tool to capture audio podcast, audio lecture and music to enjoy later. During the recording process, pause, stop, or skip the recording with its recording controls.
Pros:
- Free to use
- User-friendly interface
- Capture audio from microphone and other input devices
Cons:
- Fairly basic with no advanced features
- Need extra software (Soundflower) to record system audio
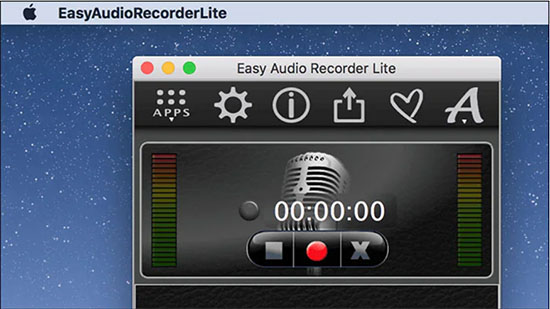
- Step 1: Go to System Preferences on Mac and set up Soundflower (2ch) under Sound → Output.
- Step 2: In Easy Audio Recorder Lite, customize Input Device and appoint Soundflower as the recording device.
- Step 3: Click the Record button to begin recording.
- Step 4: Once you hit the Stop button, the recorded audio will be saved to your Mac computer automatically. You can play and share it as you want.
Part 8. Capture Internal Audio on Mac - Free Sound Recorder
Compatible with both Windows and Mac, Free Sound Recorder is one of the best programs to help you record internal audio. With this tool, you are allowed to record audio like music, podcast and audio lecture. Operating this program is very easy as it is well developed with friendly and snappy user interface. Moreover, you can customize its inbuilt settings if you want to get audio recording with high-quality efficiently.
Pros:
- Support capturing internal and external sounds
- Provide digital audio editor to enhance audio recordings
- Offer ready-made presets to output recordings in optimal quality
Cons:
- Contain adware

- Step 1: Download Free Sound Recorder from its official website and activate it after the installation.
- Step 2: Click the Options to specify settings like format, channel, bit rate and more to record internal audio from Mac.
- Step 3: Click the big red record button to record your desired audio and click the stop record button to save your audio recording. Double click the audio file in the File List to preview your recorded audio files.
Conclusion
Now, you know how to record internal audio on Mac using 8 different Mac internal audio recorders. It is very complicated to use inbuilt audio recorder in Mac as you should configure the input audio device to Soundflower. If you want to get high-quality audio files with customized parameters, Joyoshare VidiKit is the best option as it is featured with multiple customizable features like channel, bit rate, ID3 tag and more.