Q:"Seriously, how do I record both computer audio and microphone input at the same time?" - psomaster226 from Reddit
If you want to record the external sound or your voice, it could be simply completed with your computer's built-in voice recorder. Sometimes you wish you can record system audio and microphone at the same time to add a voice-over narration or create a tutorial recording. But problems may arise as you find it difficult to capture two types of audios simultaneously. Is there any way to achieve that? In this article, we will offer various methods to guide you on how to grab these two audio resources easily. Stay tuned in and find your preferred way to start recording.
- Part 1. How to Record System Audio and Microphone on Computer
- Part 2. Capture System Audio and Microphone on iOS/Android Devices
- Part 3. FAQs on Recording Microphone and System Audio
- Part 4. Conclusion
Part 1. Record System Audio and Microphone Simultaneously
Recording system audio and microphone on your computer could serve multiple purposes. You can add narration to the recorded content, record yourself singing with background music, create more dedicated recordings, and more. There are some ways to help you reach these goals.
1.1 Joyoshare VidiKit (Windows & Mac)
If you're looking to record the audio you want in quality, it's tough to go wrong with Joyoshare VidiKit. It is a mighty audio grabber that empowers you to record all sound activities on your computer like Internet radio, YouTube videos, voicemails, and more. Also, its interface is straightforward and you can use it to record microphone and system sound effortlessly. With this incredible audio capturing tool, you are able to customize audio recordings by deleting unwanted content, adjusting related configurations, etc. What's more, it barely has no limit in audio formats and you can save recordings to multiple formats as you like. Another great thing about this software is that it offers a task scheduler to save on your time.
- Grab System Sound and Microphone simultaneously in high quality
- Support saving audio files in more formats like MP3, FLAC, WAV, OGG, etc.
- Able to remove the silence, set scheduled tasks, equalize audios, and more
- Create pro audio recordings by adjusting audio parameters based on your needs
Step 1 Install and Start Joyoshare VidiKit
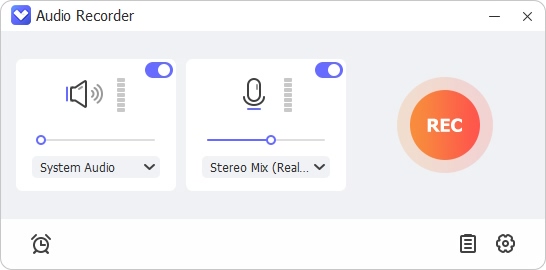
You need to download and install Joyoshare VidiKit on your computer first. Go to Record section and open Audio Recorder. In the bottom right of the interface, you could click the down arrow to turn on the system sound and microphone. Also, you can prepare the audio resources you want to capture in advance.
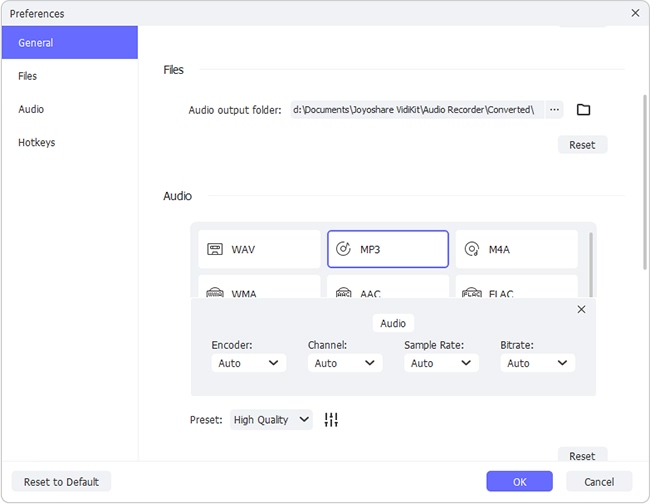
Step 2 Set Audio Recording Settings
To enhance your recordings, you can click the Format in the bottom left. A new window would appear on your screen, allowing you to select format, preset codec, sample rate, and other parameters freely. Besides, you can go to Preferences → Convert in the top right corner and make some further tweaks, such as determining the location of output recordings, removing silent parts, and others.
Step 3 Grab System Audio and Microphone
Before recording, it is suggested to test the volume. Then you can click the Start Recording button. Play the system audio and use the microphone at the same time to create your recordings. When you are recording, you can hit Cut Recording button to cut the audio into small segments.

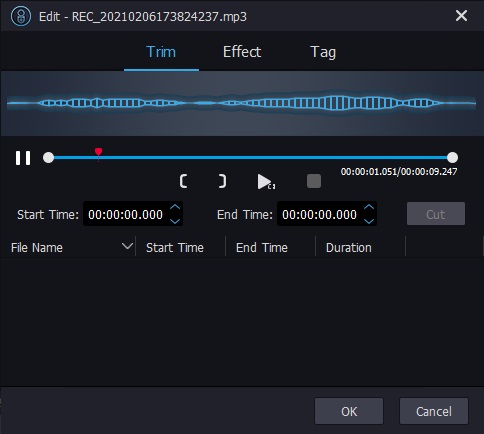
Step 4 Edit Recorded Files
Click Stop, and the software will stop capturing sound. All grabbed audio files will be saved in the Library. With a simple click on Edit, you can trim audios, add sound effects, and personalize ID3 tags.
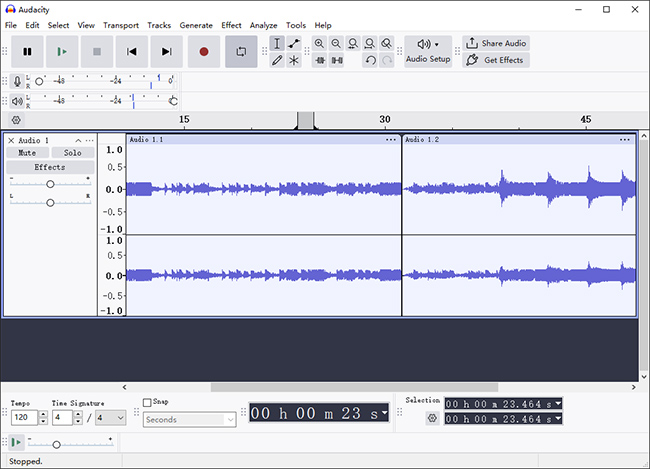
1.2 Audacity
Audacity is an open-source and cross-platform software for Windows, Mac, and Linux, offering practical audio recording and editing services. It can capture streaming audio and live audio in high quality, which is eligible for grabbing system audio and microphone in real-time. Also, this software is packed with various editing features, such as copy, trim, duplicate, and others. Yet Audacity has a more complex interface and you couldn't contact the support team directly, adding more difficulties to operation.
- Step 1: Install Audacity on your computer. Then open Speakers control panel and go to Recording, where you can see the recording devices. Right-click on the Microphone and select Properties → Listen → Listen to this device.
- Step 2: Back to Audacity, you can head to Edit from the top menu and choose Preferences. In the new window, set the desired microphone under Recording section and playback device under Playback section.
- Step 3: Still in the Preferences window, you can choose 2 (Stereo) in Channels to record both system audio and microphone.
- Step 4: Now you can hit the Record button to capture the system audio and microphone in Audacity. If you want to end the recording, hit the Stop button.
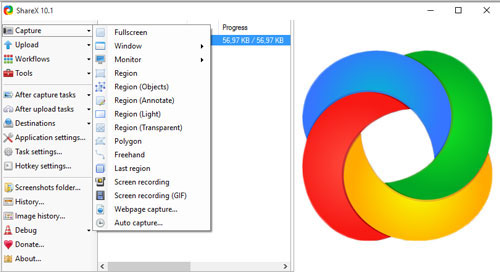
1.3 ShareX
Another excellent alternative to recording audio on your computer is ShareX. It is screen capture software with multiple recording modes. It comes with loads of features, such as scrolling capture, editing images, etc. Also, you could use it to grab system audio and microphone and share your recording files easily. However, the interface of ShareX is not that attractive with a compact layout. You can refer to the following steps to record the content you prefer.
- Step 1: Download ShareX from the official website. Open it up and head to Task Settings. Select Screen recorder and click Screen recording options.
- Step 2: When a new window shows up, go to Audio source and select your microphone. Also, click the down arrow next to the Video source and choose None. Then you can close all options windows and check if you get the audio ready for recording.
- Step 3: To start capturing, you can go to Capture → Screen recording and follow the onscreen instructions. To end the recording, you need to click the red dot in the taskbar.
1.4 Screen Capture
It is viable to record sound without downloading programs as well. Screen Capture is an online screen recorder that is capable of capturing your computer desktop as well as recording your voice and system sounds. This grabber is easy to use and it offers high-quality output recording files. It is compatible with various browsers, such as Google Chrome, Firefox, Microsoft Edge, etc. The downside of this online audio recorder is that you can't remove the watermark unless you subscribe to a paid plan. Also, the online version is limited in functionality compared to the desktop version.
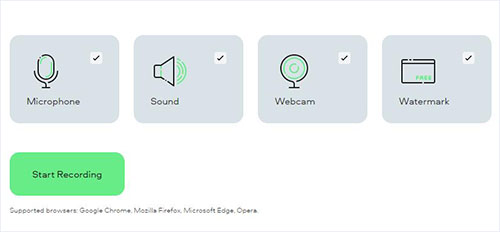
- Step 1: Open Screen Capture on your browser and turn on Microphone and Sound together. Then make ready the recording content.
- Step 2: Click Start Recording and choose Entire Screen. Next, click the box next to Share system audio and hit Share. It will record in progress.
- Step 3: When it's over, hit Stop Recording button and you can view the file immediately.
Part 2. How to Record Microphone and System Audio on iOS/Android Devices
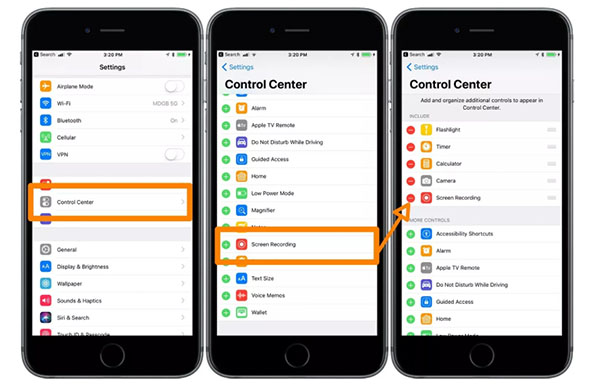
If you'd like to grab system audio and microphone on your mobile devices, things would go much easier. Your phone has a built-in screen recording feature, which is able to capture both audio resources in a breeze. If you are an iPhone user, go to Settings → Control Center and enable Screen Recording. Then back to your home screen and open Control Center. Tap the recording icon and make sure the Microphone Audio On is on. After that, you can start to record the system sound from your iPhone and your voice via microphone. The operations are alike for Android users. Go to Control panel and locate the recording icon. Tap on that icon to start capturing sound from the phone and microphone.
Part 3: FAQs on Capturing Microphone and System Audio
1. Does Audacity record computer audio?
Yes, Audacity is able to grab computer audio with no problem. For Windows, go to Audio Setup in Audacity and click Host → Windows WASAPI. Then select the output you want and start recording by hitting the record button.
2. How do I record internal audio on Windows 11?
Windows 11 is preinstalled with a Sound Recorder that is simple to record internal audio. You can locate it by searching the name in the search box of your computer. When the recorder shows on your screen, click the red button to start capturing sound.
3. How do I record both microphone and system audio?
All methods in this post could be applied to record both microphone and system audio. The optimal tip is to find an effective and intuitive tool to capture both sounds quickly. Joyoshare VidiKit and Screen Capture are worth looking into for their simple operation.
4. Can Audacity record two inputs?
Normally, Audacity can only record one sound input each time. But you can try to record two inputs if the sound device has separate right and left mic inputs.
Part 4. Conclusion
Have you found any tips to help you record system audio and microphone at the same time? Well, this post shows different ways to capture these two audios simultaneously. You are free to employ these sounds to grab system audio and microphone from any device. Hope you can make use of these audio recordings to serve your purposes well.