
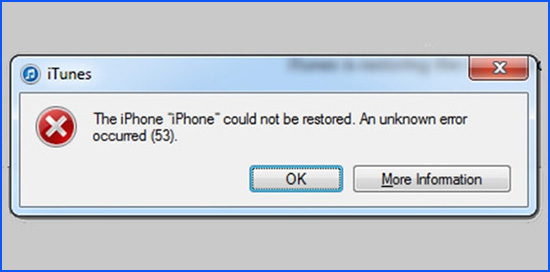
It has been observed that iPhone error 53 usually happens while updating or restoring iPhone with the help with iTunes. This is an error that is associated with the Touch ID module. Therefore, if your device comes with the fingerprint scanner, you may receive this error message when an unknown or unidentified touch ID has been found in your iOS. How to deal with this iPhone error under different circumstances? This article raises 5 tips to help you get away from the trouble.
- Tips 1: Update iTunes
- Tips 2: Uninstall iTunes and Install Again
- Tips 3: Clean Recycle Bin
- Tips 4: Try Joyoshare UltFix without Losing Data
- Tips 5: Contact Apple Support
Part 1. Fix iPhone Error 53 by Updating iTunes
When you apply iTunes to update or restore your iPhone, there are different error codes appearing in iTunes or iPhone. A universal solution to all these errors is to check iTunes update. Here are the specific steps that every iPhone user takes while encountering such errors caused by outdated iTunes.
On Mac:
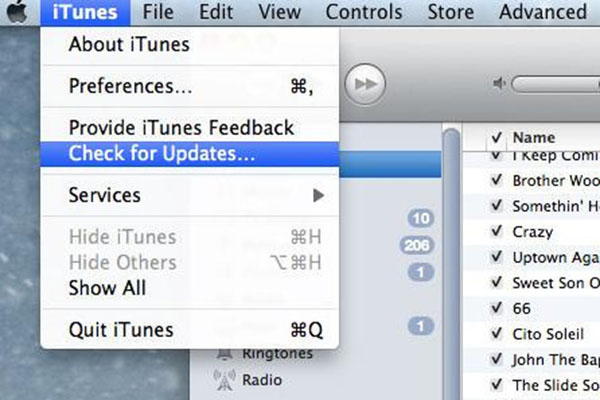
Step 1: Run iTunes on Mac and followed by "iTunes" from the menu bar;
Step 2: On a little pop-up window, you need to tap on "Check for Updates". If an available update is detected, just install according to the instructions.
On Windows:
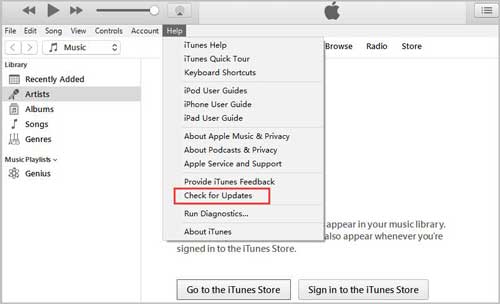
Step 1: Start by launching iTunes on Windows and then choose "Help" at the top of this window;
Step 2: Still, you ought to touch "Check for Updates" on a pop-up window;
Step 3: If there is an update available, you can get the latest version of iTunes following the on-screen prompts.
Part 2. Uninstall and Re-install iTunes
If no update is available, another method to get rid of iPhone 53 error fix is uninstalling iTunes and install again on your computer. It has very little difficulty in uninstalling on Windows. Nevertheless, uninstalling iTunes on Mac requires some brain as it is the built-in application in the Apple system. Generally, Mac system will protect self-contained programs, so it is not feasible for us to uninstall iTunes directly using the usual method we uninstall other apps. The following sections will explain how to do.
On Windows:
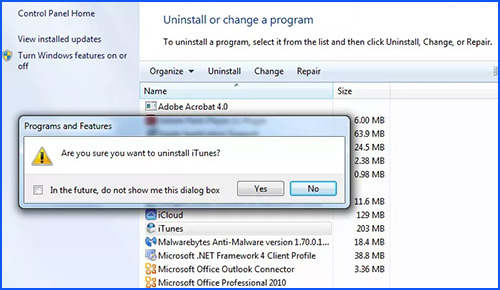
Step 1: Click the "Start" button first and then go to "Settings";
Step 2: In this interface, choose "Applications" and you will see all apps you install on the screen;
Step 3: Locate iTunes and click it to uninstall.
On Mac:
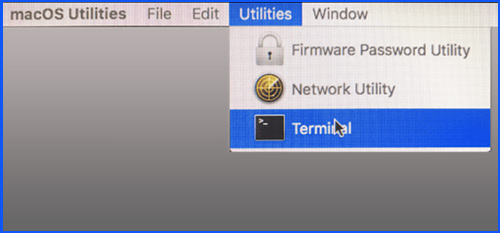
Step 1: In the first step, you need to restart Mac. In the meanwhile, press the "Command" and "R" keys at the same time to enter the tool interface;
Step 2: On the main menu bar, you should choose "Utilities" and then "Terminal";
Step 3: After getting into the terminal, type "csrutil disable" and press the "Enter" button. If you see a prompt on the screen, it means that SIP is disabled;
Step 4: Repeat the previous two steps and type command "sudo-i" to enter the root directory of system;
Step 5: Afterward, you have to continue to type command "rm-rf/Applications/iTunes.app". Like that, iTunes is uninstalled from Mac.
Note: Since you disable SIP before uninstalling iTunes, it is necessary to enable it again. To do it, just get into the terminal in the same way as mentioned above and enter the command "csrutil enable".
Part 3. Empty Recycle Bin to Fix iPhone Error 53
The unknown iPhone error may occur because of junk and cache on the computer system. Hence, you can simply clean recycle bin to free up the system space. This handy method can get the iPhone error rectified to a great extent. If the above solutions do not work, you might as well try it. Now, proceed with the indications below.
On Windows:
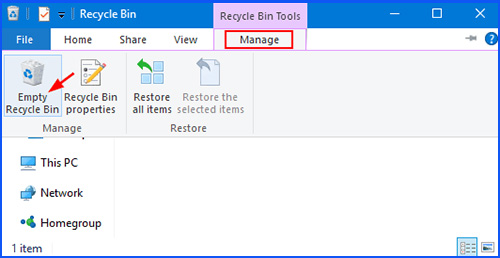
Step 1: Double click on the icon of "Recycle Bin" to open it;
Step 2: Choose "Recycle Bin Tools" from the menu bar at the top of the window;
Step 3: After that, tap on "Empty Recycle Bin" and a window pops up to require you to confirm it;
Step 4: You just touch "Yes" to permanently erase all files in it.
On Mac:
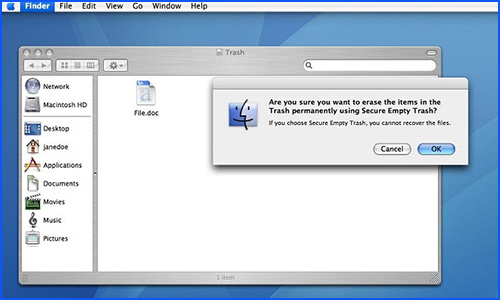
Step 1: From the launch bar, you have to open "Trash";
Step 2: Select the "Finder" option and touch "Empty Trash" in this menu;
Step 3: A pop-up window will ask if you are sure that you want to perpetually delete all these items. Just click on "OK".
Part 4. Fix iPhone Error 53 with No Data Loss
In most instances, especially when you are sure that your iPhone hardware is not damaged, some glitches with iOS system might lead to this unknown error. To eliminate the error without the risk of losing data, you need a special iOS system repair program to assist you in handling this problem. One of the best such tools is Joyoshare UltFix iOS System Recovery that is conducted to fix varied underlying iOS issues on iPhone, iPad, iPod touch, or Apple TVs without any trouble.
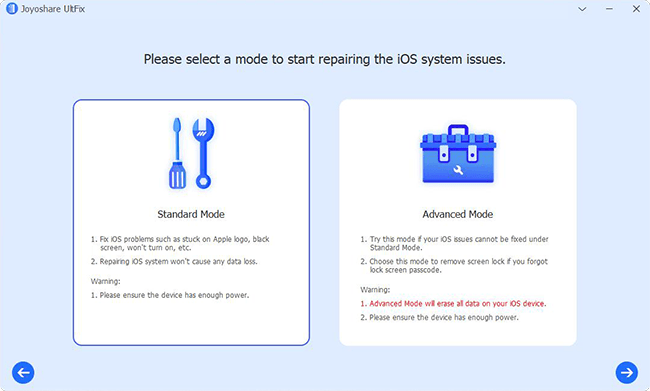
Other than that, the software comes with two repair modes, namely standard mode, and advanced mode. As the term suggests, standard mode is exploited to repair certain general iOS problems with no data loss. For example, iPhone error 9, iPhone error 53, iPhone error 3194, iPhone stuck in recovery mode, and more. If this problem fails to be settled satisfactorily with standard mode, then advanced mode is a great alternative to work for you. Incidentally, Joyoshare UltFix is completely compatible with the newest iOS version and all iOS devices. You can rest assured that the iPhone error will be managed out with the assistance of it.
Key Features of Joyoshare UltFix iOS System Recovery
Support all iDevices and iOS 12.4
Offer two modes to fix different issues
Can solve more than 30 types of iOS issues
Repair error 53 iPhone issue without data missing
Joyoshare UltFix is an ultimate and user-friendly tool that you may use it without any related technology background. To fix iPhone error with it on Windows, follow these steps expounded below.
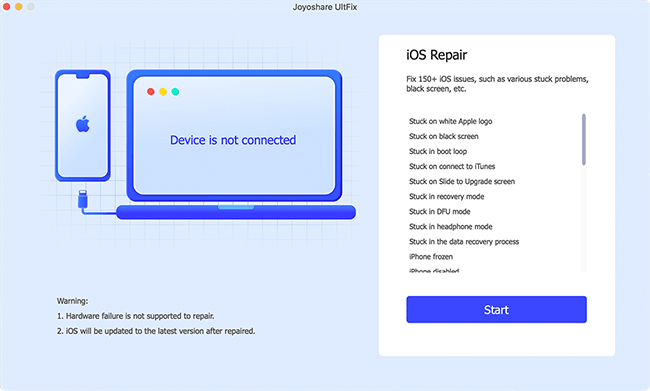
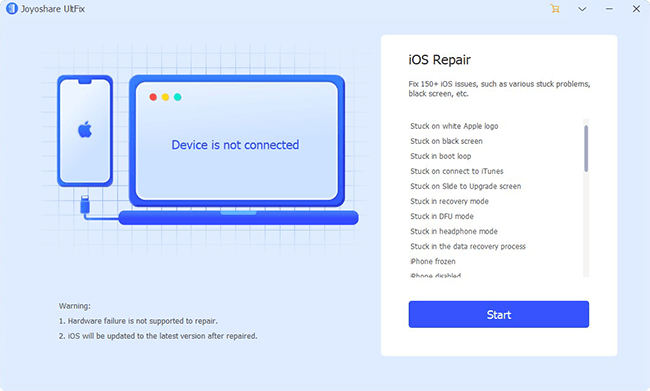
Step 1: At first, download the recent version of Joyoshare UltFix from the official website. Then install it and connect your iPhone to the computer. Click on "Start" to commence the process while iPhone is recognized;
Step 2: In this section, you have to select standard mode to repair the iPhone error in order not to loss data. After doing, perform the next step with the "Next" step;
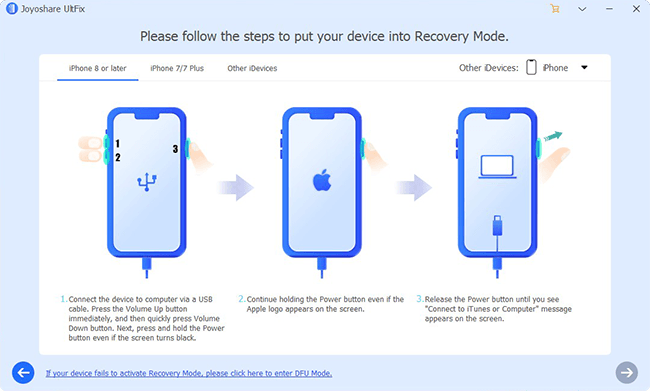
Step 3: As instructs on the screen, you are asked to set your iPhone into recovery mode. If you get stonewalled during the process, the link located at the bottom of the window will help you;
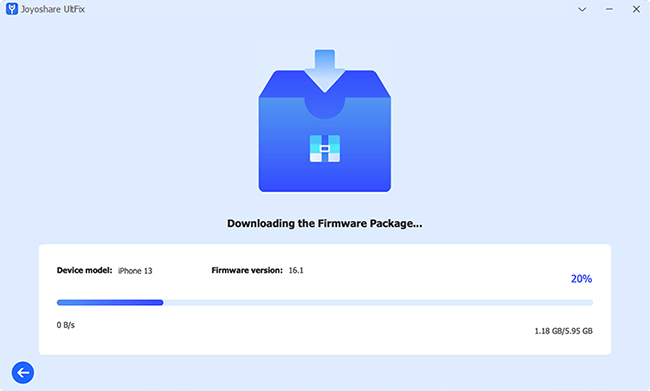
Step 4: To smoothly download and verify the firmware package for iPhone, you need to confirm all info of iPhone shown on the screen. Wait patiently for the verification to be finished. Then you can get into the step 5;
Step 5: At last, touch the "Repair" button to make the firmware package unzipped and Joyoshare UltFix will fix your iPhone error at once.

Part 5. Contact Apple for Support
After attempting all the above approaches but you still get the message of iPhone error 53, then it may be time to take Apple support into account to address the problem. If you do not mind, you can go straight to the nearby Apple store. Of course, you can contact Apple for help from the official website as well. Apple provides full-time services that you are able to get through to official telephone at any time.

Conclusion
Presently, you might have fixed your iPhone error 53 with one of the above methods. Of all the solutions, Joyoshare UltFix is highly recommended to you because many users have reported that the software can help them resolve such problems without damaging any data. Certainly, it is entirely up to you to decide which method to choose, as long as it is helpful to you.
