
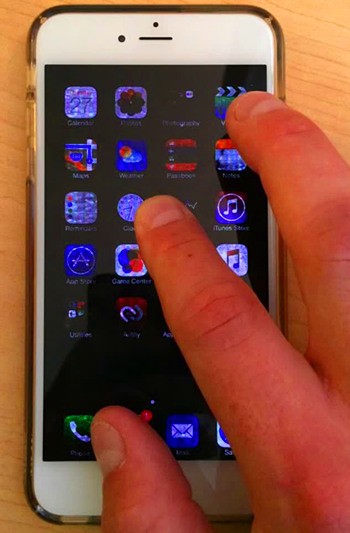
Q: "I put my iPhone in my pocket which was perfectly fine yesterday, but a couple of minutes later it wouldn't turn on. But I later found out it was turning on but the display is just extremely dark (visible in a really dark room and still rings, flashlight, audio, etc.)." – from Apple Community
An iPhone is not cheap, and any damage to it can make your heart wrench. Unfortunately, many people experience some issues with their iPhones, especially if it is a little old. They find the iPhone backlight not working in most cases. Sometimes, this fault can surface after you have dropped your phone on a hard surface or smashed it against something accidentally. However, if you have not been in either of the situations, then your phone may have some hardware issues. Do not worry, because you can tackle the problem without sending it for repair. In this article, we will discuss the information about the backlight feature and give two methods to repair your iPhone's backlight; stay tuned!
- Part 1. FAQs about the Backlight Feature
- Part 2. Use Joyoshare UltFix to Repair the System
- Part 3. Repair iPhone Backlight for Hardware Issue
- Part 4. Conclusion
Part 1. FAQs about the Backlight Feature
Q1: What is the function of the backlight?
A: Backlight is a feature to sense the brightness of the light source according to the user's environment and automatically adjust the screen brightness.
Q2: What causes iPhone backlight failure?
A: The backlight issue can be due to hardware or system issues. If the components of iPhone, such as the LCD screen and the backlight filter, are damaged, the backlight will work badly. While the iOS system is corrupted, it also has the potential to cause backlight failure.
Q3: How do I know that the backlight is not working on my iPhone?
A: Try to connect your iPhone to a computer if you suspect that the backlight stops working. If your device can be detected even if the screen is black, it can conclude that the backlight is malfunctioning.
Part 2. Use Joyoshare UltFix to Repair the System
One of the methods to fix backlight on iPhone not working is to repair the iOS system issue. Joyoshare UltFix has to be one of our favorite solutions as it allows people to deal with multiple iOS solutions. It has a standard repair and deep repair mode, making it an ideal choice for small or big issues. It is suitable to repair frozen iPhone, iTunes errors, stuck phone, data damage, forgotten password, etc. With standard repair mode, Joyoshare UltFix is capable to fix iPhone speaker not working, Tap to Wake stops working etc. with zero data loss. The big issue one has to face with iOS repair software is the lack of compatibility. With Joyoshare UltFix, you can expect high compatibility with even iOS 17. You merely need to click once to enter or exit data recovery mode.
- Fix over 150 iOS issues effortlessly with a high safety coefficient
- Standard repair iPhone/iPad/iPod touch with zero data loss
- Works for various iOS versions, including iOS 17
- Free to exit/enter recovery mode with one click
- Downgrade and upgrade iOS to the earlier versions
Step 1 Connect iPhone to Joyoshare UltFix
Download Joyoshare UltFix on your PC, connect your iPhone to the computer and run the software. Select iOS System Repair, and click the Start button.
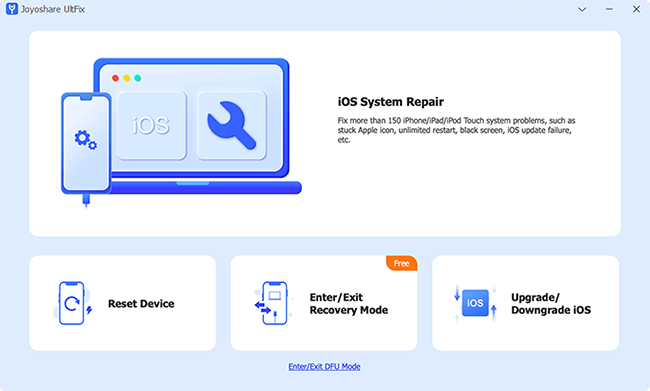
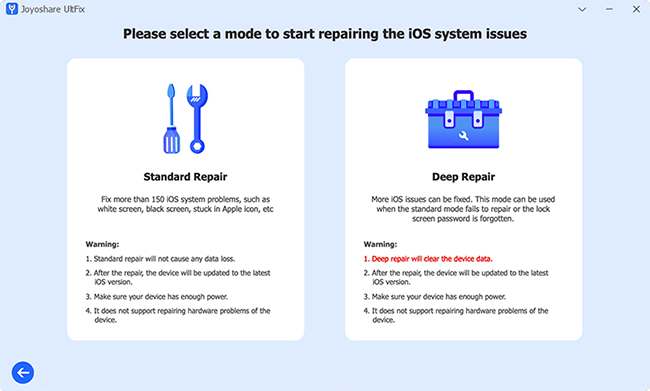
Step 2 Choose Standard Repair
Click the standard repair section. If your iPhone can be recognized, you will enter the next page. If not, you will be required to put your iPhone into DFU or recovery mode. After following the on-screen instructions, you can click the right arrow to continue.
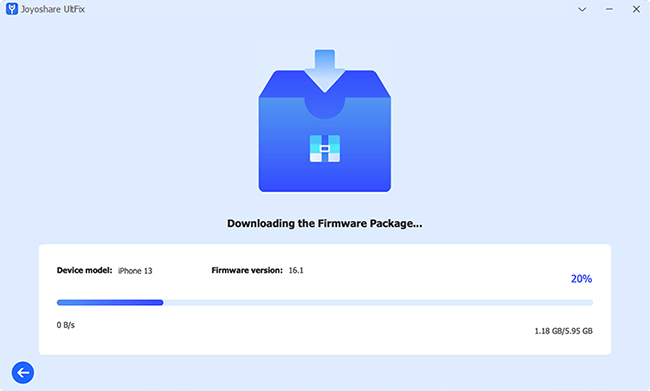
Step 3 Install the Firmware Package
After confirming all the details about your iPhone, such as models, iOS version, etc. click the Download button to install the matched firmware package.
Step 4 Fix iPhone Backlight Failure
You can click on the Repair button after verifying the firmware package to fix the issue. It will start working normally after repair.

Part 3. Repair iPhone Backlight for Hardware Issue
The backlight issue in an iPhone can arise due to hardware issues. Primarily if you use it roughly or your phone is too old, it is common for your phone to have hardware issues. For instance, some damages, such as drop damage and water damage, could result in screen failure. If the backlight filter is burned up, your backlight is absolutely affected by it. In fact, you do not necessarily have to replace your phone if you face a backlight issue due to hardware. We are going to state a few steps to resolve this issue. Let's begin!
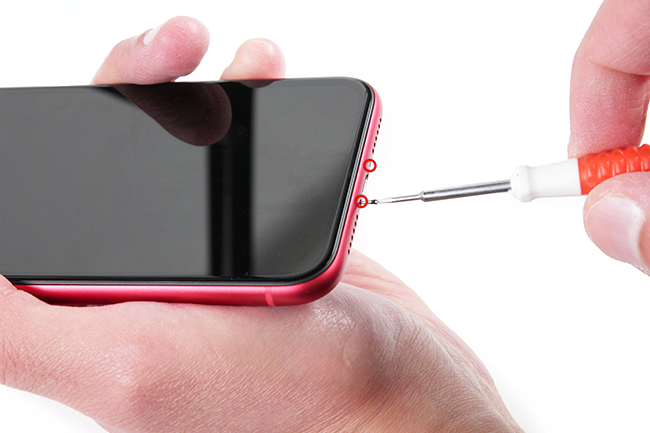
Step 1: Unassemble iPhone
The first step to fixing the malfunctioning backlight is unassembling your iPhone. Start by backing up all the data so that it is not lost during the process. Shut down your iPhone by long pressing the Power button and dragging the slider. Unscrew the back panel and take the battery out of the socket. Remove the SIM from the jack and also lower the antenna from the logic board.
Step 2: Remove Fundamental iPhone Cables
The next step may seem intimidating, especially if you do not handle technical repairs. Dismantle the WIFI antenna that connects it to the logic board. Now safely lift the camera cable, top microphone, rear camera, jack, digitizer cable, and LCD cable.
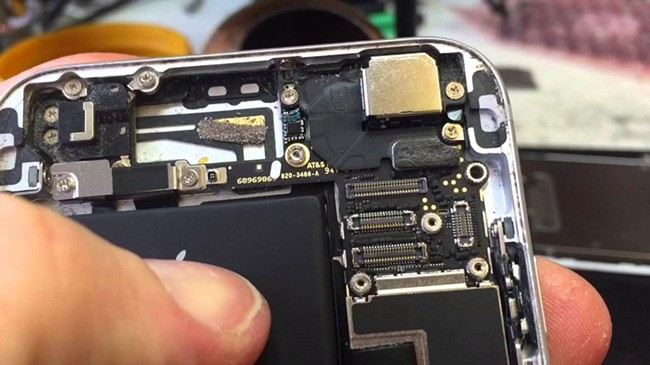
Step 3: Remove Logic Board, Buttons and Screws
With all parts removed, the logic board can now be removed as well. After that, remove the screws holding the vibrator to the inner frame and the speaker. Once you have removed all screws on the side of the buttons and SIM card, you can lift the top edge of the front panel assembly.
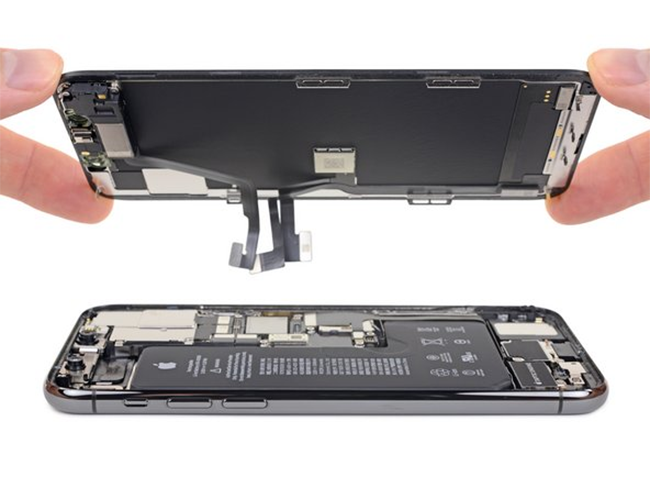
Step 4: Remove Display from the Screen
When the above-mentioned components are removed, you can take out the display from the screen. And you will now be able to see the damaged parts. Keep in mind to preserve the assembles in a safe place.
Step 5: Replace Damaged Parts and Reassemble
Now that you see the damaged part, replace it and start reassembling the phone. You must be very careful with this step.
(Note: If you don’t have the relevant background knowledge or experience, this operation is not so suitable for you. It would be better to ask a serviceman for help in a physical store to prevent irreversible consequences.)
Part 4. Conclusion
You may get worried when you notice the iPhone backlight not working. Most people think they have to either give their iPhone a repair or spend a ridiculous amount or buy a new one. However, you do not have to spend money because you can do it yourself easily. The initial step to making any repair attempt successful is to identify the root cause. Once you determine whether the backlight issue arises from a hardware or a system issue, you will be able to repair it in no time. We suggest downloading Joyoshare UltFix if you confirm the backlight failure results from a system error. Although there are operating steps to repair hardware issues, it is risky to un-assemble iPhone. For the ultimate solution, ask Apple Store for assistance.
