Inevitably, sometimes you really need to schedule a good time in advance to record anything that happens on your screen. It may be that you can't stay in front of the computer at that time, or you are afraid that you will suddenly forget it due to other things. Regardless of the purpose, it is necessary to choose a tool that's capable of timing recording screen. Which one is it? Now, please refer to these items we have collected for you to schedule screen recording whatever you want effortlessly.

- Part 1. Joyoshare VidiKit
- Part 2. Bandicam
- Part 3. Camtasia
- Part 4. EaseUS RecExperts
- Part 5. Filmage Screen
- Part 6. OBS Task Scheduler
- Part 7. Secret Video Recorder
- Part 8. Icecream Screen Recorder
#1 How to Schedule Recording - Joyoshare VidiKit (Windows/Mac)
Joyoshare VidiKit - Screen Recorder is a qualified tool to schedule screen recordings on PC and Mac. With advanced capturing technology, it's able to record not only videos on screen, but also audios from computer system and microphone. It does not set any recording time limit and watermark, so you can assign your recording schedule without any worries. Also, make the most of its options to generate a recorded file as you wish.
- With ability to capture video chats, online meetings, class lectures, etc.
- Record 4K video with audio within the specified time
- Show cursor and clicks during the recording process
- Support cutting and skipping any ongoing screen content
- Record screen no lag, no time limit, no watermark and in high quality
- Customize capture area, output format, shortcuts and watermark
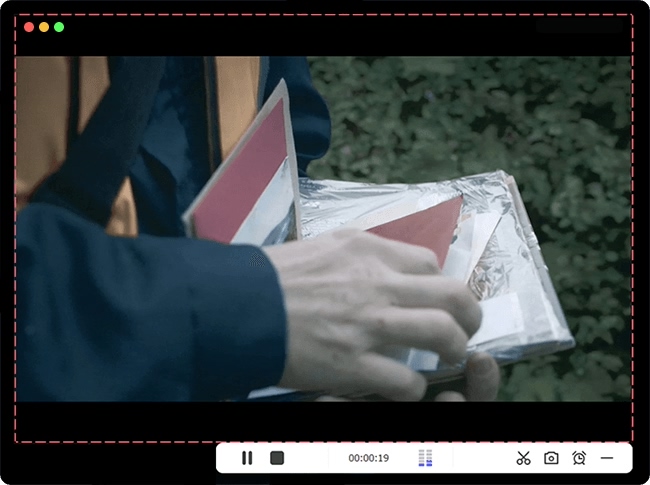
Step 1 Open Joyoshare VidiKit
Firstly, download Joyoshare VidiKit program installation package officially and run it on your desktop screen by clicking Record - Screen Recorder. You'd make sure which mode to choose. To capture a screen activity, just designate "Record video and audio" mode by pressing the button next to "REC".

Step 2 Create a scheduled screen recording task
Click the "Options" button in the lower right corner to expand all function modules. Then go to "Record time options" section to set a recording task. You can tick either "Start and end on schedule" or "Start manually and end after". Now, specify both start time and stop time to finish scheduling recording. Note to check and confirm capture area, system audio, microphone audio, format, shortcuts, cursor and more.

Step 3 Start recording screen as scheduled
Remember to keep your computer on and start this program. When it comes to your scheduled start time, Joyoshare VidiKit will automatically record the screen activity based on the area you have selected in advance. It will also end at the stop time you set and save the recording file directly.
Step 4 Check and edit scheduled screen recordings
When the scheduled screen recording task is completed, you can check whether it meets your requirements in the "History" folder. It's available for you to preview, rename, trim the video and audio and manage ID3 tags.

#2 How to Schedule Screen Recording - Bandicam (Windows)
Bandicam is a competitive program that offers ability to record kinds of activities on screen, capture external video devices, and grab 2D/3D games in up to 480 fps. It lets you mix your voice and system sound at the same time, show mouse movements, draw videos in real-time and add webcam overlay. To schedule recording, it allows one-time, daily and weekly task preset. Also, you can record screen over 24 hours with high quality as you want.
- Pros:
- Record screen over 24 hours without stopping
- Capture high-quality, even 4K Ultra HD videos
- With flexible options to schedule screen recording
- Cons:
- Lack of editing functions
- Guide:
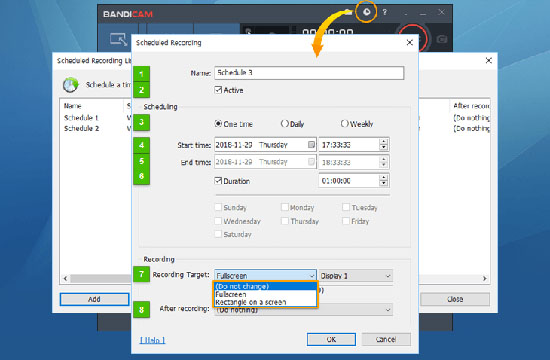
- Step 1: Run Bandicam on your computer and click "Scheduled Recording" icon in the top menu bar;
- Step 2: Press the "Add" button in the pop-up window to create new screen schedule to the list;
- Step 3: Now, name the recording, confirm "scheduling one time, daily or weekly", set start time, end time, etc. Hit "OK";
- Step 4: When the scheduled time arrives, Bandicam will start to record your screen.
#3 How to Create Recording Schedule - Camtasia (Windows/Mac)
Camtasia is a relatively advanced tool to record and edit videos. It comes with abundant features to refine your media file, such as annotations, transitions, animations, visual effects, etc. To your delight, its one-stop service makes it possible to record screen videos and audios in the way you like and output to desired configuration. The highlight of this program is that it allows you to capture audio and screen at the same time or separately.
- Pros:
- Record screen video with or without audio feasibly
- With diverse options to edit and create home-made videos
- Save recorded files to preset device or social platform
- Cons:
- Too complicated to operate for new beginners
- Guide:
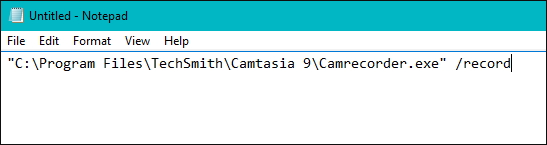
- Step 1: Install Camtasia and create a new file with "Notepad";
- Step 2: Copy and paste "C:\Program Files\TechSmith\Camtasia 9\CamRecorder.exe" /record to the document and save it with the title "record.bat.".
- Step 3: Similarly create another document and insert "C:\Program Files\TechSmith\Camtasia 9\CamRecorder.exe" /stop. Then save it with title "stop.bat".
- Step 4: Press "Win + R" on keyboard > type "control panel" in the pop-up Run window > System and Security > Administrative Tools;
- Step 5: Now click and access Task Scheduler > Action > Create Task > General. Name your recording task file and choose Triggers > New. Then set a start time to schedule your task under Settings. Select Actions > New > Browse to open the created record.bat. file.
- Step 6: Repeat to set your end time for stop.bat. file. Afterward, click on OK to finish setting your task.
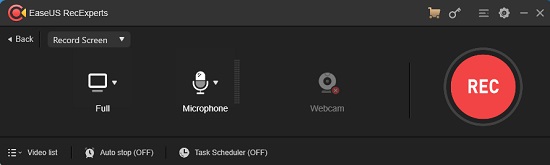
#4 Create Recording Schedule - EaseUS RecExperts (Windows/Mac)
Helping users perform scheduled recording task, EaseUS RecExperts is an excellent screen recording that's compatible with Windows and Mac operating systems. This tool is coming with multiple useful functions, which can be exemplified by changing recording region, providing various audio sources, recording webcam and more. Also, same as other screen recorders, it has the ability to capture audio from system and mic as you want.
- Pros:
- Specify capture area before the recording task
- Create and manage all schedules easily
- Edit recorded video with its basic editing features
- Cons:
- Can only record video within 2 minutes with free version
- Guide:
- Step 1: Download and install this tool and launch it. In the main interface, locate and click the Task Scheduler option. Then choose "+ New Task" button.
- Step 2: Configure the settings like start time, end task, and recording area as you want in the pop-up window. Click the OK button.
- Step 3: It will record and save your recording automatically when the time has passed.
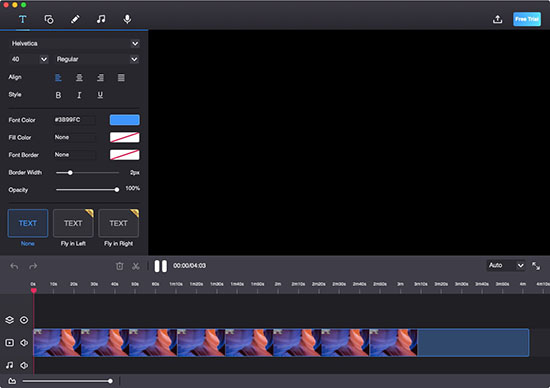
#5 How to Schedule Screen Recording - Filmage Screen (Mac)
Filmage Screen, an easy-to-use tool designed to process audio and video, allows you to customize a series of parameters like bit rate, resolution, sound, recording area, which can help you get a good video with high quality. Before recording, you should choose recording area and you are allowed to capture full screen, target window and custom recording region. There are many full creative tools provided in this program, including sketch, subtitle effects, voiceover, text, music and many more.
- Pros:
- Record your screen and audio in resolution like 1080p/4K
- Compatible with multiple video and audio formats
- Process video and export video with original quality
- Cons:
- Limited features in the free version
- Guide:
- Step 1: Open this program after downloading it from its official website. Click Screen and choose Schedule Recording.
- Step 2: Here, you can choose and specify Start Recording Time and Screen Recording Length.
- Step 3: Once you have done the recording, simply edit and save your recorded video.
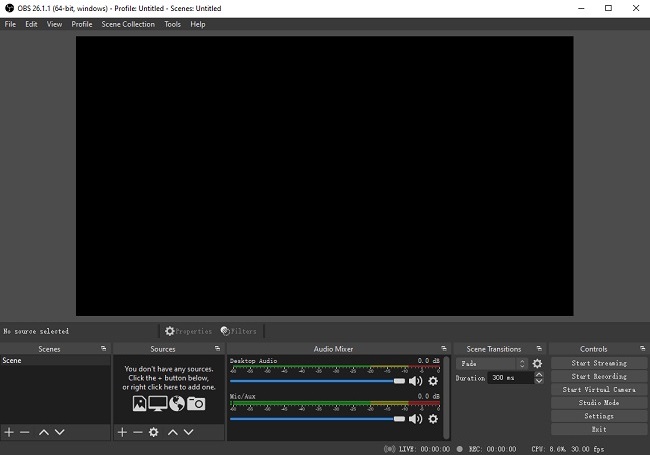
#6 OBS Task Scheduler (Windows/Mac)
As we all know, OBS is an open-source screen recorder provided for professionals to create video with its advanced functions, which means that this tool is not friendly for beginners for its complicated interface. Open Broadcaster Software (OBS) boasts a multitude of features like screen capture, video recording, video broadcasting, setting hotkeys, managing quality, intuitive audio mixer, and many more. With this tool, you have the power to capture videos from online websites without any frustrating time limit.
- Pros:
- Record and save video in highly customizable quality
- Accept webcam as video source and mic as audio source
- Support live streaming on Facebook, Instagram, Twitch, and YouTube
- Cons:
- Require steep learning curve to operate
- Guide:
- Step 1: Install OBS and Advanced Scene Switcher from website. Open OBS.
- Step 2: To open plug-in in OBS, just click Tools and select Advanced Scene Switcher.
- Step 3: Activate plug-in by clicking Start under the General tab. Navigate to Macro, click + icon and customize settings like start time and stop time. Confirm that the checkbox next to your Macro name is ticked.
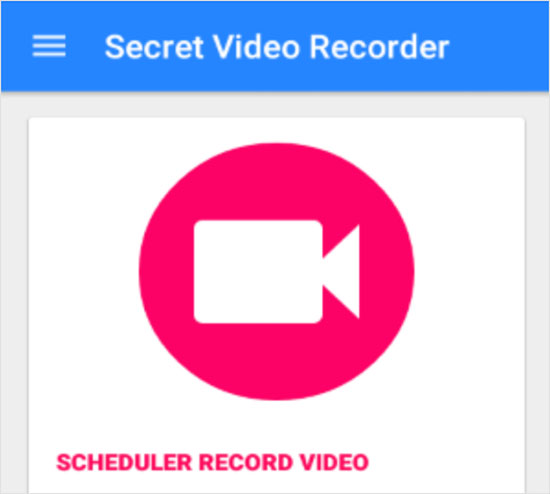
#7 Schedule Screen Recording - Secret Video Recorder (Android)
You may also want to schedule recording on Android. Fortunately, Secret Video Recorder can help you do this as it can run secretly in the background without any preview, meaning that you can close or minimize it and it will start recording in the background. All you need to do is set time, select date, choose recording duration, and select camera mode. Also, it supports additional features like trimming video, unlimited recording duration, video orientation, and changing video quality.
- Pros:
- Offer customizable options like video quality, recording duration, recording date, etc.
- Start and finish recording in the background automatically
- Edit recorded video with inbuilt editing features
- Cons:
- Without advanced functions for users to use
- Guide:
- Step 1: In its pretty intuitive and simple to use interface, you can start scheduling video recording after downloading and installation.
- Step 2: Customize date, time, duration, and camera according to your need under the SCHEDULER RECORD VIDEO tab.
- Step 3: It can start, stop and save the recording automatically when the time comes.
#8 Schedule Screen Recording - Icecream Screen Recorder (Windows/Mac)
Icecream Screen Recorder can be taken into your consideration as a good option. It works to record types of things on your screen, like video tutorials, gameplay, streaming videos, etc. Importantly, it's able to capture screen with both audio and webcam. With a task scheduler, you're allowed to create multiple screen recording assignments. Plus, recording screen, audio, webcam and editing recorded video with its inbuilt features are also available.

- Pros:
- Record screen, audio, webcam, webinars, games and more
- Trim recordings, speed up videos, highlight hotkeys, etc.
- Support clearing all screen schedules at once
- Cons:
- The free trial version allows only 5-minute recording
- Guide:
- Step 1: Launch Icecream Screen Recorder and tap on the "Tasks" button;
- Step 2: Find and click the "+" option at the upper right corner to create new tasks;
- Step 3: Type in definite start and stop time and confirm other settings to "Save";
- Step 4: The screen recording will begin as you set and you can later manage files on the "Tasks".
Conclusion:
Undeniably, scheduling recording tasks ahead of time can bring great convenience to our daily lives. If you happen to have this need, you might as well learn the above eight methods that this article introduces for you to schedule screen recording. If there is another simple way to operate, you are also welcome to share with us. Anyway, don't miss your important thing that you'd like to record.
