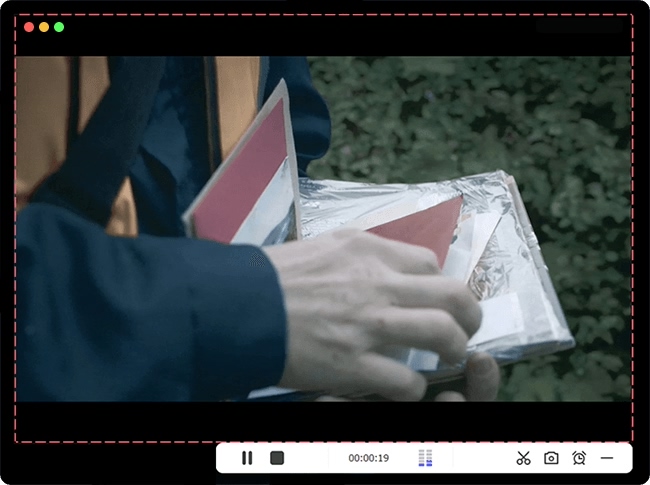
Q: "How to record a stream off YouTube for Mac?" - From Reddit
Video content has been gaining traction in the evolving market. Live streaming has become a new way to reach customers and spread brand awareness by connecting with audience. More than that, people also like to give a broadcast to share anything they want. Some of the most popular live streaming platforms include YouTube, Twitter, and Facebook Live. So how to record a streaming video on Mac when you come across a meaningful live video? Here we humbly recommend many tools to help you capture live streams in different ways.

- Part 1. Joyoshare VidiKit
- Part 2. Snagit
- Part 3. Wondershare Filmora Scrn
- Part 4. AnyMP4 Screen Recorder
Part 1. How to Record Live Stream on Mac - Joyoshare VidiKit
Joyoshare VidiKit for Windows and Mac is capable of recording any video and audio activity on desktop screen in a few clicks only, including live streaming movies, video conferences, video calls, online radios, webcam videos, gameplay and many other different types. Both computer system sound and microphone audio can be recorded perfectly.
Using this tool, you can easily create high-quality live streaming video recordings. After that, you're free to save them in any format like MP4, MOV, WMV, AVI, ASF, MKV, MP3, AAC, MA4, M4B, etc. or export it onto any device such as Apple iPhone, Samsung Galaxy, Xbox, Smart TV, etc. You can also set recording preferences such as select recording area, schedule recording tasks, set cursor effects, edit recordings, etc.
- Record screen in up to 4K with no time limit and no lag
- Easily record streaming audio and video on Mac and PC
- Cut any section at the beginning, middle or end of the video
- Skip any unwanted content from live streams when recording
- Grab streaming video with sound from computer and microphone
Step 1 Launch Joyoshare VidiKit and Grab Area
After downloading and installing Joyoshare VidiKit on your Mac, you can simply launch it. On the home interface, tap the "Record" tab to activate the screen recorder. Now you can open the live video you want to record. Next, go to the "Capture Area" section of he screen recorder and select an area for recording.
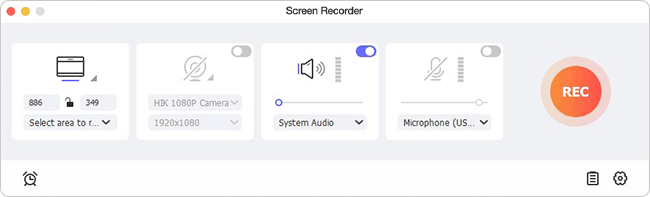
Note: There are two options for choosing recording area. You can just click the "+" button to personalize a specific recording size, or simply hit the triangle button beside it to select a suitable one from 320x240, 640x480, 1280x720, full screen, etc.
Step 2Set Recording Parameters
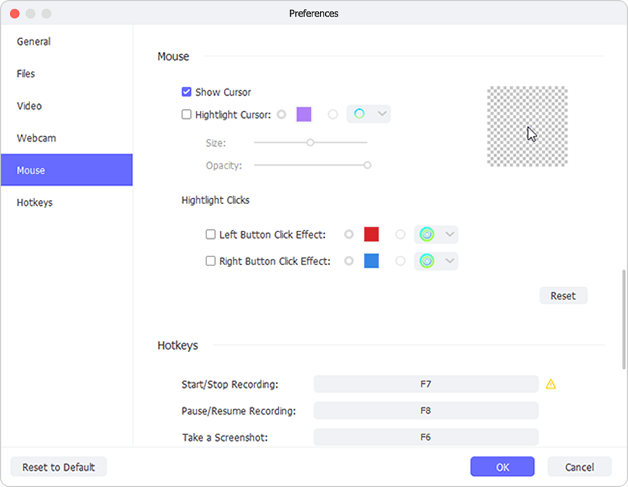
Next, click the audio icon to enable "System Audio" and/or microphone as well as adjust the volume. Then click the gear icon in the lower-right corner to customize capturing settings. You can set an output format, change the output save path, personalize shortcut keys, add a watermark, change cursor options, etc. based on your requirements.
Step 3Start to Record Live Video on Mac
After all the settings are ready, you are able to click the blue "REC" button to let Joyoshare VidiKit help you capture live streaming videos. The recording process will start right after a 3-second countdown. To remove any unnecessary sections from your favorite live video, you can use the "Pause" button on the minimized toolbar. Hit on the "Stop" button to end the recording process.
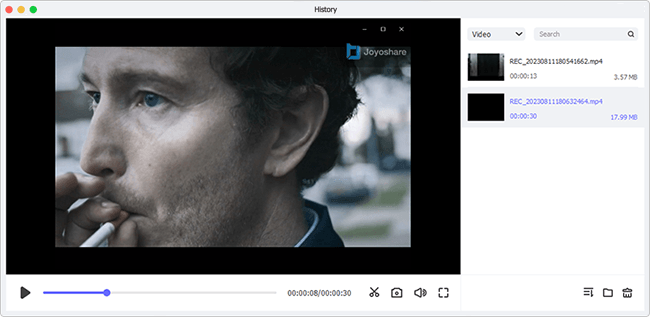
Step 4Edit Recorded Live Streams
Your recorded streaming videos will be opened immediately in the "History" window once you stop recording. Now you can play them using the inbuilt media player. You can also edit the file names, cut recordings, edit ID3 tags, etc. as you like.
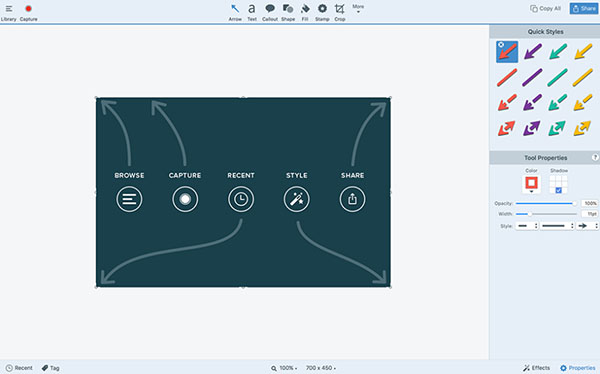
Part 2. How to Capture Streaming Video on Mac - Snagit
You can rely on Snagit to record a streaming video whether you are running Windows or Mac. With the help of this simple and powerful tool, you can not only capture your whole Mac screen, but also a window, a customized region, or a scrolling screen. Recorded live videos can be saved as MP4 or animated Gif. In addition to this, you will be able to remove any unwanted content from your screen recordings like audience reactions.
Step 1: Open Snagit on your Mac computer and go to the "Video" tab directly;
Step 2: Here you can set to capture cursor, record microphone and/or system audio, preview in Editor, etc.;
Step 3: Click on the "Capture" button to select an area to record;
Step 4: Adjust audio and webcam settings on the toolbar and then press the record button to start recording your favorite live stream;
Step 5: After recording, you can make quick video edits using the Snagit Editor.
Part 3. Record Streaming Video on Mac - Wondershare Filmora Scrn
Wondershare Filmora Scrn has powerful features for high-quality live streaming video recordings. It can help you record live streaming on Mac with sound from computer system and microphone. Supporting real-time screen drawing, this software even allows you to make notes using circles and arrows easily when recording online courses. Furthermore, after recording, you are able to export your recorded live videos to multiple formats, such as MP4, MOV, Gif, and so forth.
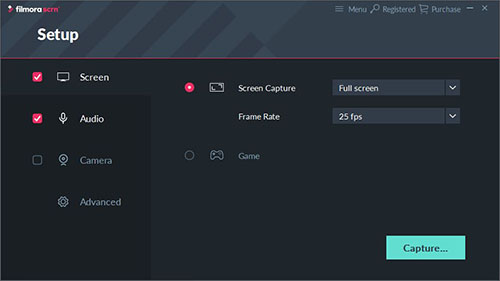
Step 1: Open Filmora Scrn and choose "Get Started" to start setting many recording parameters;
Step 2: In the "Screen" tab, you can choose whether to record in full screen or a specific part of your screen; in the "Audio" tab, you can choose whether to record audio from both your computer system and microphone; and in the "Camera" tab, you are able to select your camera, change resolution, and more;
Step 3: Press the "Capture" button once you'are finished with the Setup window, and then tap the "Start Capturing" button (or press F10) to begin recording your live streaming video;
Step 4: When you're done recording you will be able to export your recordings and save them to your computer.
Part 4. Record Live Streaming Video on Mac - AnyMP4 Screen Recorder
AnyMP4 Screen Recorder is a professional HD screen recorder for Windows and Mac users to record almost all kinds of desktop activities, including live streaming shows. You will be able to capture live streams without any quality degradation with audio from different sources, such as system audio and your microphone voice. Additionally, using this handy too, you are capable of capturing the whole scene or selecting any part of the screen as you like.
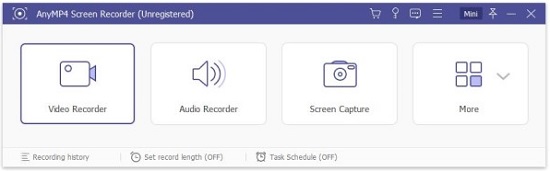
Step 1: Download and install the Mac version of AnyMP4 Screen Recorder, and after opening it, you need to choose the "Video Recorder" option in the home interface;
Step 2: Next, you are free to adjust various recording settings, such as choose to record in a full screen or a customized region, turn on system audio and/or microphone, etc.;
Step 3: Open the streaming video and start to click the REC button to begin capturing streaming video on Mac;
Step 4: Once you'are satisfied with your recorded live streams, you can click on the Save button to save your streaming videos in any format you like.
