Have you ever encountered a problem that the format is not supported when uploading the recorded audio? As the main format on Microsoft Windows systems for uncompressed audio, WAV, being popular and widely-used, is actually a typical example. In certain situations, you may need this format, such as specifically record WAV file on Windows 10 and share to target platforms. But do you really know what can be done? Let's take a look at this article.
- Part 1. How Can I Record .wav Files on Windows 10 - Voice Recorder
- Part 2. Record WAV Files on Windows 10 - Joyoshare VidiKit
- Part 3. More WAV Recorders for Windows 10 to Recommend
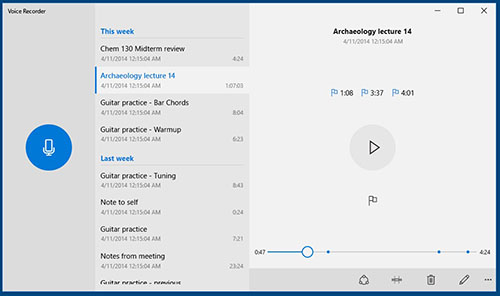
Part 1. Does Windows 10 Voice Recorder Record in WAV?
Are you looking for how to directly use the voice recorder that comes with Windows 10 to record and save files as WAV? Frankly, it's possible to make it in Windows 7. However, on Windows 10, the captured audio can only natively save in MPEG-4 Part 14 (.m4a). If you don't mind, you can also open file location to rename the audio by changing its file extension from .m4a to .wav. You will be prompted by the question: "If you change a file name extension, the file might become unusable. Are you sure you want to change it?". Then confirm it with Yes and check whether your WAV audio can play well without a problem.
Part 2. How to Record WAV Files on Windows 10 - Joyoshare VidiKit
With a user-oriented interface, Joyoshare VidiKit - Screen Recorder is a trustworthy option here to record audio files in high quality and save as WAV, MP3, WMA, AAC, OGG, AIFF, APE, FLAC, MKA, etc. It captures audio not just from the computer system but also from microphone. There is no skill required. Anyone can apply it, schedule a task, change parameters and more. What's better, it functions ideally to help trim audio and edit ID3 tags.
- Record audio from YouTube, meetings, gameplays, etc.
- Record WAV files on Windows and Mac without time limit
- Preset sound source (system or microphone) to capture audio from
- Customize format by setting codec, bit rate, channel and sample rate
- Options to trim, schedule, edit ID3, rename and preview
- Powerful video editing software to cut, convert, repair, compress, etc.
Step 1Open Screen Recorder on Joyoshare VidiKit
Get official Joyoshare VidiKit toolkit downloaded and installed on your Windows 10. Simply launch it and start "Screen Recorder" program. Now get "Record audio" mode ready by switching to
 icon.
icon.
Note: Joyoshare VidiKit also comes with a dedicated Audio Recorder. You can also directly apply it to record computer audio on Windows 10.
Step 2Set sound source and output format
Enable "System Audio"/"Microphone" by simply pressing on the icon. You can meanwhile conveniently adjust the volume. Next, in the lower right corner of the program, find and click
 to show all options. Firstly go to "Format" under "Basic record options" to select "WAV" and specify related parameters. Then, according to your actual needs, decide whether to configure other settings, like shortcuts, location and recording task.
Step 3 Start to record WAV on Windows 10
Now click on the blue "REC" button in the program and play your WAV file after three-second countdown. Once the audio is successfully detected and captured on your Windows 10, you can see the fluctuating sound spectrum. During the process, cut WAV audio and skip content if you want.

Step 4 Manage and edit recorded WAV file(s)
As long as your WAV file is captured on Windows 10, you can hit the "Stop" button to save it locally. In the pop-up History window, find "Audio" tab and check your finished WAV file. You are allowed to rename, play, trim and edit, such as genre, cover, year, artist, etc.

Part 3. More Windows 10 WAV Recorder Recommendations
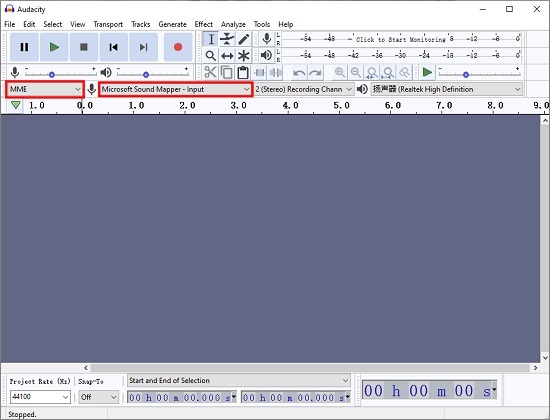
Audacity
Audacity can be your priority if you'd like to use a free open source. As we all know, it comes with strong compatibility to Windows, Mac and Linux. Besides, it professionally records audios on your PC, no matter what you speak and what you hear. It captures sound at 192,000 Hz sample rate and allows to export files as MP3, WAV, AIFF, OGG and FLAC. Also, it lets you trim, cut, add effects, set parameters, denoise, mix audio and more as you like.
- Guide:
- Step 1: Install and open Audacity on your Windows 10;
- Step 2: Select and confirm the sound source (or more settings) you want to record on Device Toolbar;
- Step 3: Click on the red recording icon in Audacity to start recording your WAV audio;
- Step 4: Stop and edit audio file as per your requirements;
- Step 5: Press on "File" > "Export" > "Export as WAV" to save the recorded audio.
- See More: Audacity Records Computer Audio
-
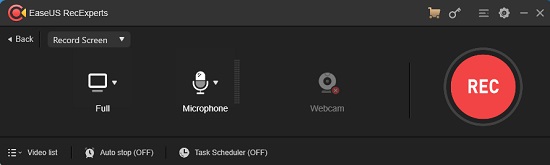
EaseUS RecExperts
EaseUS RecExperts can be taken into your consideration. It offers the option to record screen video with audio, and grab audio independently with high quality. It supports capturing narrator voice from microphone and system sounds from the computer itself. Moreover, it enables you to create scheduled task at a specific time. You can even apply it to record game, webcam, streaming movie, etc.
- Guide:
- Step 1: Run the downloaded EaseUS RecExperts on your Windows 10;
- Step 2: Go for "Settings" > "Audio" > "Output format" > "WAV";
- Step 3: Return to the main interface and click on "Record Audio";
- Step 4: Select audio source to record from, like system sound, and hit "REC" to begin recording;
- Step 5: Finish recording WAV on Windows 10 with "Stop" button and check it in your video list.
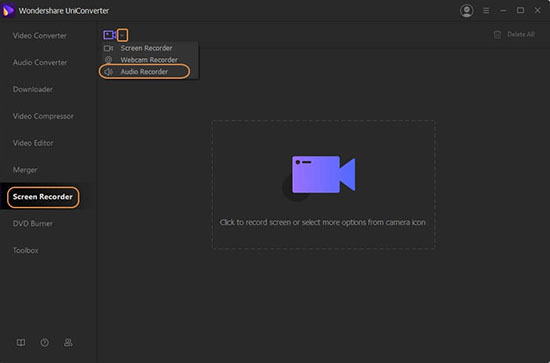
Wondershare UniConverter
Wondershare UniConverter is not only a video converter as it name suggests but also a video editing toolbox with function to record screen and audio. By using it, you can effortlessly record WAV files on Windows 10 from microphone and speaker. Without complicated operation, you can completely initiate a recording task. Sure, it can perfectly support more popular formats to meet different needs.
- Guide:
- Step 1: Run Wondershare UniConverter on your PC and head to "Screen Recorder" to choose Audio Recorder from the drop-down box;
- Step 2: Make sure you set speaker and microphone correctly;
- Step 3: Now play your appointed WAV file and hit REC button to record it;
- Step 4: End the recording with stop button and go back to the main interface to check it by using Open option.
