Honestly speaking, we can always encounter some scenarios where we need to record and save Internet audio of an online course, a video of a live concert of our favorite singer, an on-demand blockbuster movie, a meaningful voice chat, etc. Examples are too many to list. How to find a free and handy audio recorder is probably what you are keeping thinking about. Well, you can leave a place for Audacity on your long list. Read on to find out how to make Audacity record computer audio using only a couple of simple clicks.
- Part 1. Record System Audio with Audacity on Windows
- Part 2. Record System Audio with Audacity on Mac
- Part 3. Record Micro Sound with Audacity on Windows/Mac
- Part 4. Best Audacity Alternative to Record Internal/External Audio
- Part 5. FAQ
Part 1. How to Make Audacity Record Computer Audio on Windows
Audacity comes in handy when you need to record computer audio, whose Timer Record will enable users to schedule when a recording begins and ends. In addition to this, Audacity can also be used for post-processing of all types of audio by adding effects. You will be able to make the most of it to mix entire albums without any difficulty.
-
Step 1 Download Audacity for Computer
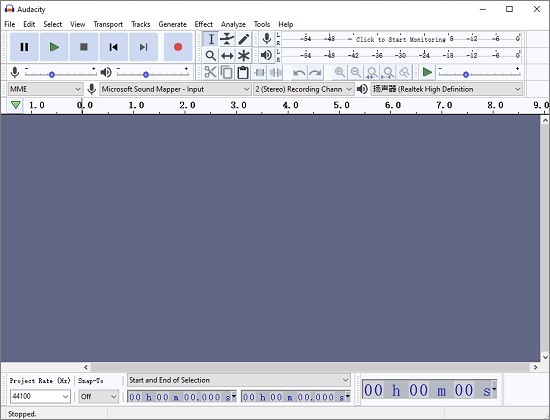
Open the official site of Audacity in your computer's web browser and begin to download the program. After that, follow the on-screen instructions to install and open it on Windows computer.
-
Step 2 Confirm Recording Settings
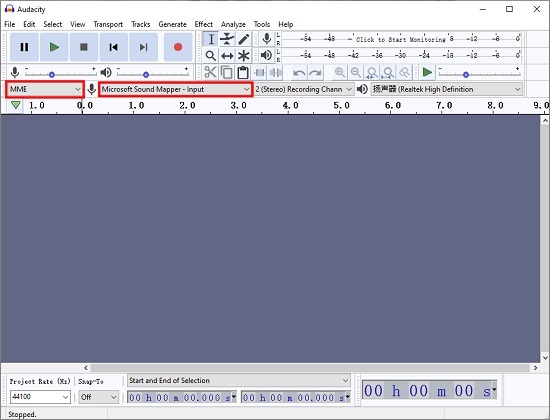
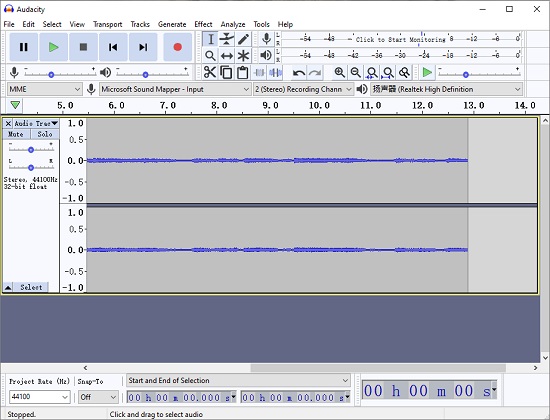
Next, click the "Audio - Host" dropdown list (which has "MME" selected by default) near the upper-left side of the main screen. You are ought to choose "Windows WASAPI", which will enable Audacity to record sound from other apps on the computer. Then, you need to click the "Recording Device" button to select an appropriate loopback device.
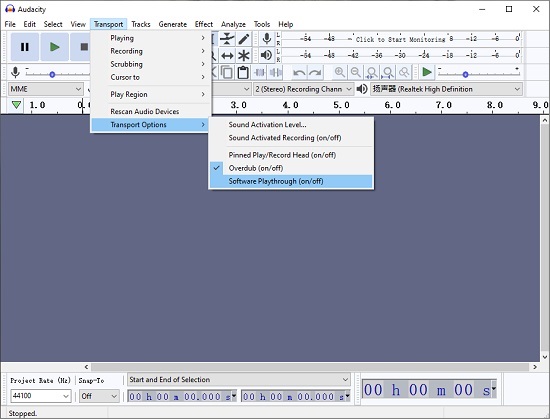
To ensure that your audio can be captured without any feedback and distortion, you need to disable the "Software Playthrough". To do so, you are supposed to navigate to Transport > Transport Options > Software Playthrough (on/off) and remove the checkmark. If there is none, then there is no need to make any changes.
-
Step 3 Get Ready to Record Computer Audio
You can find a red circle near the top-left corner of the main screen. Click the "Record" button and then begin to play your audio so that the whole audio can be recorded by Audacity. Finally, hit on the square button to stop recording.
-
Step 4 Play and Save Recorded Audio
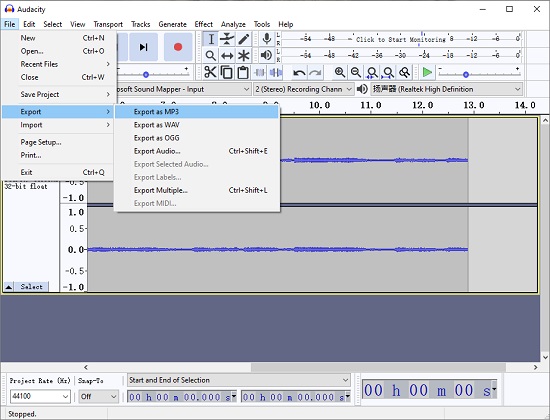
In order to play your recorded audio, you need to switch the "Audio - Host" menu back to "MME" and then click on the triangle "Play" button. To save and output your audio recordings, you are capable of heading to File > Export so that you can export your audio file as your desired format, such as MP3, WAV, OGG, etc.
Part 2. How to Record Desktop Audio with Audacity on Mac
Tip 1Use Loopback Cable
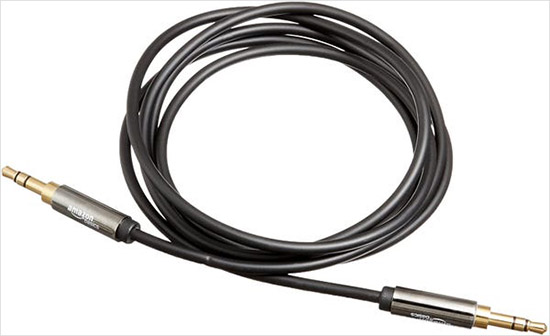
- Step 1: Prepare a loopback cable with 3.5mm plug on each end. Connect your headphone and Mac's microphone jack using this loopback cable.
- Step 2: In your Mac computer, activate Apple Menu and open the System Preference program. Then, select Sound - Output - Line Output and click Input - Line Input.
- Step 3: Launch Audacity, click Recording Device and select line-in.
- Step 4: Confirm that Software Playthrough is not checked by clicking on the Transport Options. Then, you can start to record your system audio without any hassle.
Tip 2Use Additional Software
- Step 1: Choose an add-on like Soundflower, iShowU Audio Capture and install it on your Mac computer for free.
- Step 2: Open your System Preference and choose Sounds option. Set your output device as add-on by clicking Output tab. Open your add-on and set it as inbuilt output.
- Step 3: Open Audacity and select add-on under the Device tab. Select Software Playthrough in the Transport Options and save your settings. Then, you can start and finish the recording process by clicking the appropriate buttons.
Part 3. Record Micro Sound with Audacity on Windows/Mac
-
Step 1 Launch Audacity and Select Microphone Device
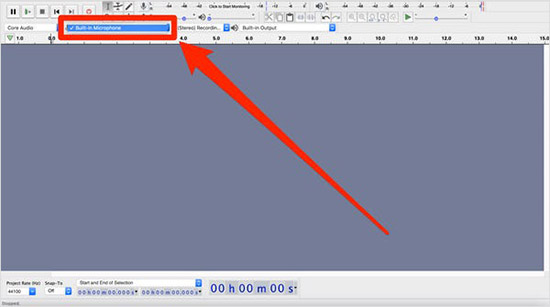
Download and operate Audacity on your computer. You can find and click the Recording Device tab, which has a microphone icon to its left, at the top right of the interface. All your available recording devices appear in the dropdown menu. You should find and select the desired microphone to grab your sound. Make sure your microphone device is set up correctly if you don't find it.
-
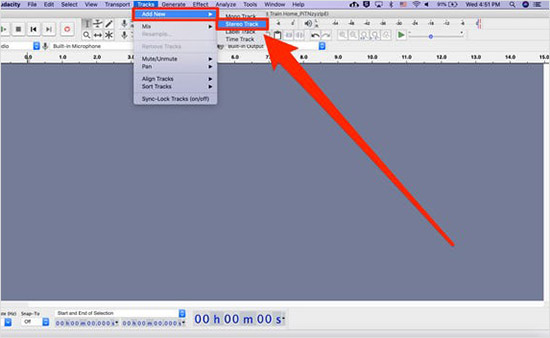
Step 2 Select Type of Track
Click Tracks and select the Add New option at the top of your screen. Here, you can select the type of track according to your need, including Stereo Track, Label Track, Time Track and Mono Track.
-
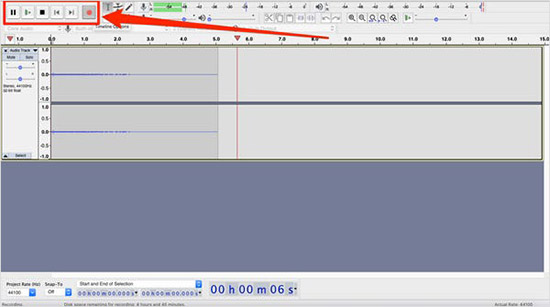
Step 3 Start and Stop Recording
To start the external audio recording process, click the red circle button at the top of screen. Press Shift + R to add a recording. If you want to finish the process, you can click the black square option.
Part 4. Record Computer Audio Using the Best Audacity Alternative
Recognized as the best alternative to Audacity to record computer audio, Joyoshare VidiKit - Screen Recorder is introduced here for every beginner and professional. Compared to other competitors, Joyoshare VidiKit has shown an outstanding performance in capturing any Internet video and audio in high quality with zero latency. Whether you need to record gameplay, download streaming videos, grab online music or record video and voice chat from Discord, Skype, WeChat, Facebook, etc. and more, this program will help you fulfill your tasks in an extremely easy manner.
- Support all video and audio formats like MP3, MP4, FLAC, AAC, AIFF, etc.
- Record both internal and external sound in high quality
- Manage and edit the ID3 tags of audio recordings
- Set the start/end time to make an unattended recording
- Record audio from video, YouTube, Dailymotion and many more
-
Step 1 Install and Launch Joyoshare VidiKit
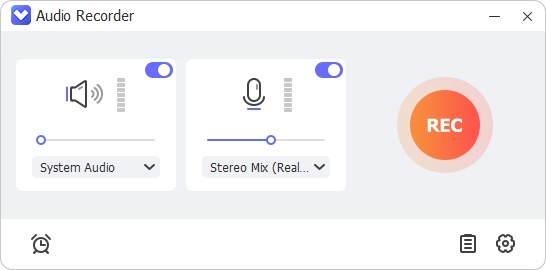
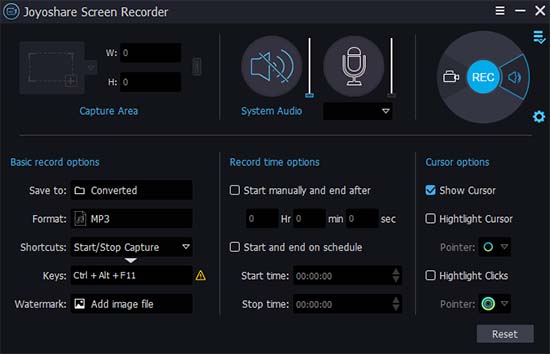
Make sure you have downloaded and installed the right version of Joyoshare VidiKit on your computer. Double click to run it and click Record - Screen Recorder. As you can see, there are two available recording modes. In this case, you are supposed to choose "Record audio" mode by clicking the speaker-like icon on the right side of the main screen. Don't forget to turn on the "System Audio" and optionally turn off "Microphone" in the middle area of the main screen.
Note: Any attempt to record videos with or without sound can be accomplished by tapping the camera-like icon to open the "Record video and audio" mode.
-
Step 2 Set up Recording Preferences
There is a little gear icon at the lower-right corner of the main screen. After unfolding the settings window by clicking it, you are able to use a number of additional flexible features. A distinguishing characteristic this program has is that it enables you to schedule your recording tasks. You can make it start and stop recording automatically as you set it. You can also click on the "Format" button to choose your favored audio output format.
-
Step 3 Begin to Record Desktop Audio
Now you can click the "REC" button on the main screen, and begin to play any audio you like during the three-second countdown. There are three buttons on the minimized toolbar. Click the "Pause" button to skip unwanted parts, "Cut" button to split recordings and "Stop" button to end recording. Once the recording is finished, you will be able to playback your audio and edit its ID3 tag.

Part 5. FAQs
Q1. How to split audio in Audacity?
A: Download and open Audacity. Use the selection tool to select the content that you want to split. Choose Split option after selecting Edit - Clip Boundaries.
Q2. Do I need to download LAME for Audacity?
A: LAME is an inbuilt encoder in Audacity if you are a Mac or Windows user. However, you should download this third-party encoder if you are a Linux user.
Q3. Is Audacity the best free software?
A: Yes, Audacity is the best free software as it provides multiple functions and is compatible with almost every audio format. Also, it is an open-source audio recording tool.
