Supposed that you are listening to music that is streamed from Internet radio stations or websites, and you would like to record streaming audio for later playback, what will you do? Maybe the first idea that occurs is to download it directly. But it seems hard to do so considering various factors. Luckily, this article will provide you with four approaches aiming at giving you a hand to solve this problem easily. The tools mentioned below can capture any streaming audio from thousands of audio sources. Any sound, like system audio, microphone voice, commentary, online radios and others output by your computer can be grabbed by such kinds of programs perfectly.
- Part 1. Joyoshare VidiKit (Handy and Smart)
- Part 2. Audacity
- Part 3. SoundTap Streaming Audio Recorder
- Part 4. Free Sound Recorder
Part 1. How to Record Streaming Audio - Joyoshare VidiKit
It is necessary to equip your computer with a professional streaming audio recorder in order to well create streaming audio files from online sources with delighting performance. Here Joyoshare VidiKit comes to rescue. As a full-featured video and audio recording program, it can capture any audio on your computer, such as streaming music, online radio, microphone voice, system sound, etc. What's more, you are allowed to output the recorded streaming audio with multiple popular formats, including MP3, AAC, MAV, FLAC, M4A, M4B, etc.
The resulted audio is available to edit. You can revise streaming audio file's name and its ID3 tags, like title, album, track, composer, etc. Most importantly, you can keep high quality as same as the original one while recording. You will find a wealth of thoughtfully designed settings that enable you to create a scheduled task by setting up exact start time and stop time in advance, show cursor, choose output format and so on. Of course, Joyoshare VidiKit can at the same time work as an advanced video recorder to capture any desktop activities if you need.
- Record any streaming video and audio in high quality
- Offer multiple formats like MP3, AAC, FLAC, M4A, M4B, etc.
- Customize output streaming audios with supportable options
- Capture sound easily from microphone and computer system
- Support stereo mix, line input, audio cutting, ID3 tags editing, etc.
Step 1 Install and Launch Joyoshare VidiKit
Once you have installed Joyoshare VidiKit on your computer, you can directly run it and then choose the "Record" panel on the pop-up window to open the screen recorder. Here you are supposed to find the
 icon on the right side of the main screen. Click on it to activate the "Record audio" mode. Besides, you'd better disable "System Audio" to avoid unnecessary interference.
Step 2 Customize Audio Recording Settings
To show all setting options on the interface, you can simply click the little gear icon in bottom right corner, presenting the following personalized designs: basic record options, record time options together with cursor options, among which you can customize your streaming audio recording based on your preferences.

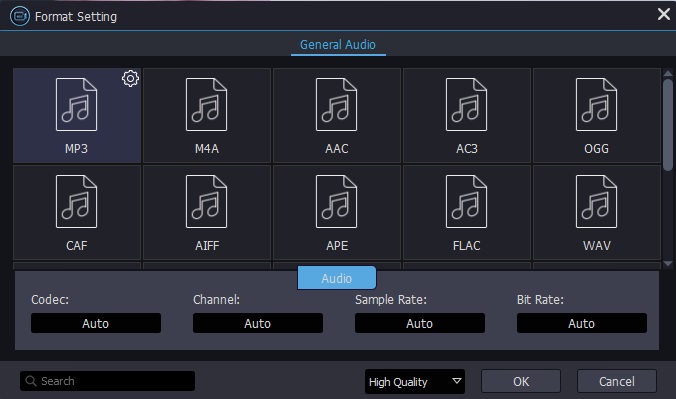
You are able to press the "Format" button under "Basic record options" to adjust your output format. Various audio formats are supported, such as MP3, AAC, MAV, FLAC, M4A, M4B, etc. which have been widely used for audio files by plenty of users.
Step 3 Start to Record Streaming Audio
Now it is time for you to open one of your favorite live music, radio shows, or other kinds of streaming audio and then click the blue "REC" button. A minimized toolbar will show up, with three buttons on it. You are able to tap the "Pause" button to skip unwanted content, the "Cut" button to divide the live audio into several pieces, and the "Stop" button to stop recording streaming audio.

Step 4Manage Recorded Streaming Audio Files
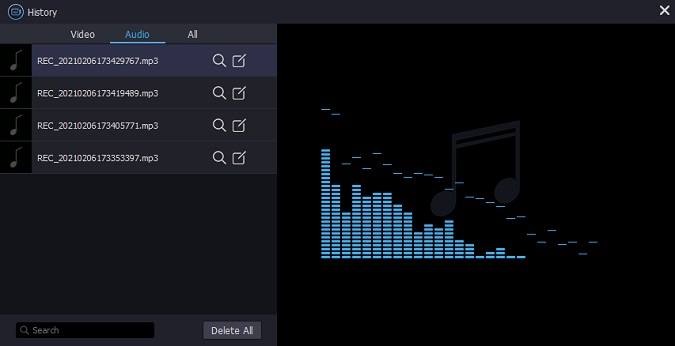
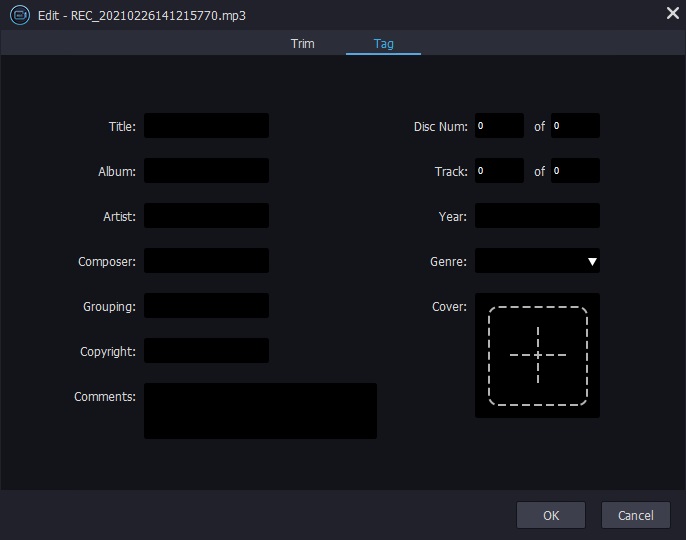
The destination streaming audio files will be listed in the History window as below. You can easily play and rename them. The "Edit" icon can be found at the rear of each audio title. You can take advantage of it to perfect your live audio recordings.
After choosing the "Tag" option in the editing window, you can edit many ID3 tags of the selected audio, including its title, album, artist, composer, year, cover and so forth.
Part 2. Record Streaming Audio - Audacity
You may have heard about Audacity more or less. This multi-track audio editor and recording application software can be used for post-processing of all types of audio. With the help of it, you will be able to record and mix entire albums, use normalization and trimming, apply fading in and out, etc. It has different versions for Linux, Windows, macOS, as well as other Unix-like operating systems. The following steps will show you how to let Audacity record computer audio streamed on the Internet.
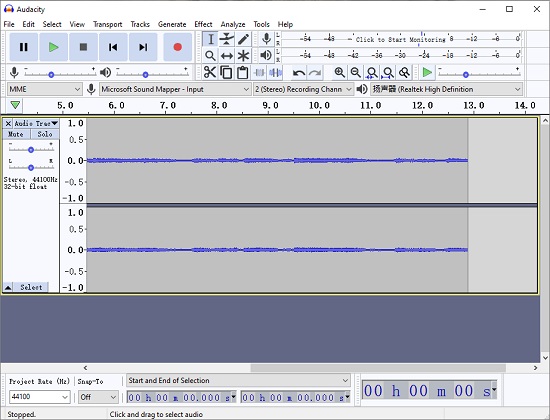
Step 1: After downloading and installing the right version of Audacity on your computer, open it and press the "Audio Host" dropdown menu, which usually has "MME" selected by default;
Step 2: Choose "Windows WASAPI" to enable Audacity to capture live audio from other apps;
Step 3: Tap the "Recording Device" button to choose a suitable loopback device;
Step 4: Navigate to Transport > Transport Options > Software Playthrough (on/off) to remove the check mark so that your streaming audio can be captured without any distortion;
Step 5: Click the red "Record" button near the top-left corner of the main interface to begin recording your live audio, and you can press the square button to stop recording;
Step 6: Now head to File > Export to save and output your audio recordings as WAV, OGG, MP3, etc.
Part 3. Capture Streaming Audio - SoundTap Streaming Audio Recorder
SoundTap Streaming Audio Recorder is able to convert any streaming audio playing through your computer to WAV or MP3 files with a wide range of selected codec and compression options. You will be able to use it to record VoIP phone calls, streaming audio conferences, internet radio webcasts, lectures, live webinars and more with no quality loss. Surprisingly, this software directly links to an editor and a mixer so you can edit what you have recorded and mix it with other audio files.
Step 1: After running SoundTap Streaming Audio Recorder, open the "Options" window;
Step 2: Next, customize recording desired settings related to the output format, selected microphone, etc.;
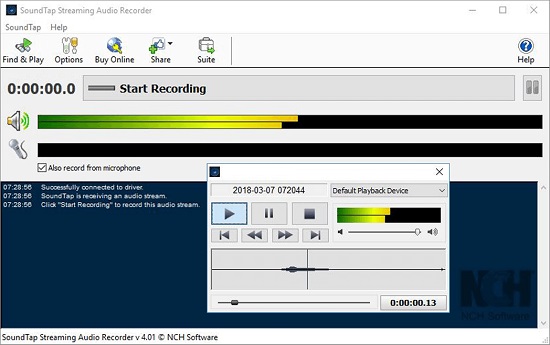
Step 3: Now you can play your live streaming audio and click on "Start Recording" to enable the software to start recording;
Step 4: You are able to press the "Pause" button to the right of the start/stop recording button to pause recording, and to stop recording, you are free to tick the "Stop Recording" button, and your audio file will be created successfully.
Part 4. How to Capture Streaming Audio - Free Sound Recorder
Free Sound Recorder has ability to record almost any sound passing through your sound card. It can support many popular audio formats such as OGG, WMA, MP3, or WAV and export audios in near-perfect quality. You will be able to record live music, Internet broadcasts, etc. from Satellite radio, cassette, DVD player, etc. More amazingly, this oftware is able to detect the recording format automatically that your sound card supports and then set responding parameters for the best possible performance.

Step 1: Launch Free Sound Recorder and after that, tick the dropdown arrow on the radio player so as to pick a radio station from the menu;
Step 2: You will hear the sound when the radio player start buffering, and next, press the "Record" button to activate the recorder;
Step 3: Tap the "Show mixer window" button to select sound source and the "Recording Device" button to choose proper recording device;
Step 4: Press the "Options" button to open a new window, where you will be able to specify an output format, adjust the recording quality, select an output folder, etc.;
Step 5: Tap the "Start recording" button to begin recording live audio and the "Stop recording" button to end the recording process, and after that, the recorded audio files will be displayed in the file list.
