








 VidiKit (21-in-1 Toolkit) >





Microsoft Teams, a powerful collaboration platform developed by Microsoft, comprehensively integrates meetings, calendars, communities, chats, events, channels, storages and tasks. It spices up meetings with stunning features such as PowerPoint Live, AI-powered meeting notes, and interactive whiteboards. As its popularity continue to increase, many users, including you, may wonder how to record yourself on Teams for creating impactful tutorials, educational videos, or professional presentations. No worries. This post will walk you through the process of recording on Microsoft Teams in various scenarios to record both screen and your face.
- Part 1. Prerequisites and Permissions for Teams Recordings
- Part 2. How to Record Yourself on Teams Directly
- 2.1 Record Yourself on Microsoft Teams with Meetings
- 2.2 Record Yourself on Microsoft Teams without Participants
- Part 3. How to Record Yourself on Teams No Time Limits
- Part 4. FAQ about Microsoft Teams Recordings
Part 1. Prerequisites and Permissions for Teams Recordings
To ensure a smooth recording experience in Microsoft Teams, you should first understand what requirements to meet. See whether you have the proper recording permissions to record yourself during a meeting below.
- 1. Check Your Microsoft Teams License
- Whether it is the meeting organizer or the recorder, recording in Teams requires a premium license: Office 365 Enterprise E1, E3, E5, F3, A1, A3, A5, M365 Business, Business Premium, or Business Essentials.
- 2. Get Recording Permission from IT Admin
- Though you have a paid licenser, there may still be times when the recording option is missing due to lack of recording permission from the IT administrator. Before recording yourself on Teams, ensure your IT admin authorize both the meeting organizer and the recorder to record.
- 3. See If You Can Start a Meeting Recording
- Not every participant can record a meeting on Teams. Only the meeting organizer and the user from the same organization with a valid Microsoft license are allowed. If you are a guest, anonymous or federated user, you cannot access the meeting recording feature.
Part 2. How to Record Yourself on Teams Directly
As long as you meet the recording prerequisites, you can start recording video, audio, screen sharing activity, and even your face on Microsoft Teams. It's straightforward to conduct a recording task for reference later or share with others.
2.1 Record Yourself on Microsoft Teams with Meetings
It's handy to start a meeting on Teams and record yourself. Once begin, all attendees will be notified automatically.
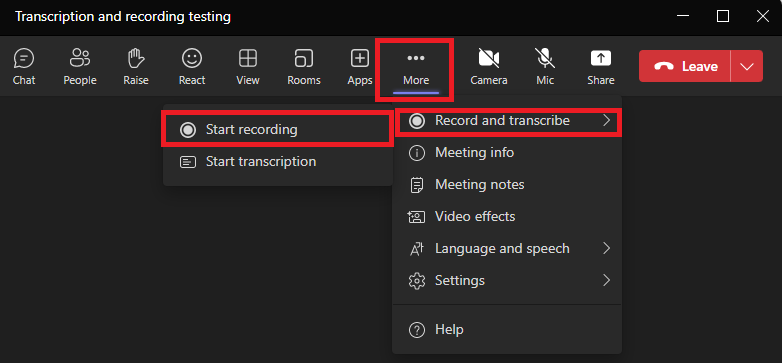
- Step 1: Download, install and launch Microsoft Teams desktop application on your computer.
- Step 2: Start a new meeting or join a scheduled meeting.
- Step 3: Go to meeting controls and click on … More actions → Record and transcribe → Start recording to initiate recording on Teams.
- Step 4: To record yourself and voices, you should enable Camera and Mic. Then share target screen with participants in the meeting.
- Step 5: Simply click on … More actions → Record and transcribe → Stop recording to stop the recording and live transcription. The final video will then be processed and saved automatically.
2.2 Record Yourself on Microsoft Teams without Participants
Want to record yourself on Teams only without other participants? Sure, this can be done easily. Microsoft Teams makes it possible to record yourself without joining or starting a group meeting. Here you can see complete steps.
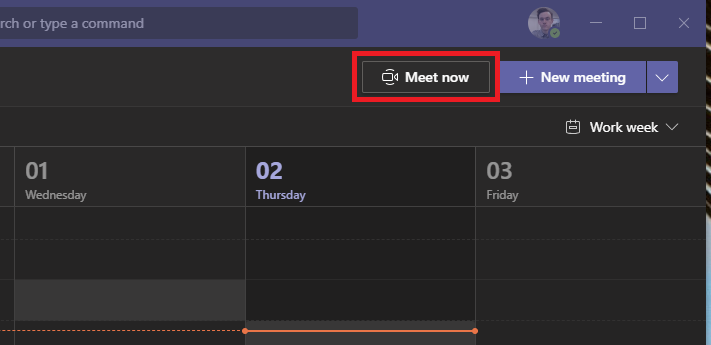
- Step 1: After run Microsoft Teams on your computer, go ahead to the left panel and click Calendar.
- Step 2: Then click on Meet now at the top, rename the meeting, and click Start meeting button.
- Step 3: Once enter the meeting, go to the top of the screen and click on … More actions → Record and transcribe → Start recording.
- Step 4: To add your face to the video and grab your voice smoothly, enable Camera and Mic. Meanwhile, click Share content to share whatever you want.
- Step 5: Then click … More actions → Record and transcribe → Stop recording to complete the recording.
Troubleshoot Microsoft Teams Recording Not Available
Microsoft Teams recording not available, recording button missing or start recording option greyed out? Check this post to learn 8 workable solutions.
Read More >>Part 3. How to Record Yourself on Teams No Time Limits
Unluckily, Microsoft Teams sets the maximum meeting recording length to 4 hours or 1.5GB. Once the limit is reached, the recording will be ended automatically and restarts again. This will undoubtedly interrupt the recording process and inevitably cause the loss of some important points.
To ensure that you can freely conduct Teams recordings without being restricted by annoying recording time limits, here Joyoshare VidiKit would be the ideal choice for you. This software allows you to record any application, including a Teams meeting, without interacting with Teams' internal controls. You can flexibly switch recording mode to record shared screen, capture your voice, and capture self-defined webcam.
- Record meetings from Teams, Zoom, Google Meet, and more
- Capture screen with webcam and audio during any meeting
- No recording time limit, no lag and no watermark
- Schedule recording for any upcoming meeting
- Support real-time annotation and snapshots during meeting
Step 1 Open Screen Recorder in Joyoshare VidiKit
Launch the latest version of Joyoshare VidiKit on your computer. You can see many practical tools on the main interface. Choose Screen Recorder under Recorder section to proceed.
Step 2 Select Area and Allow Permissions
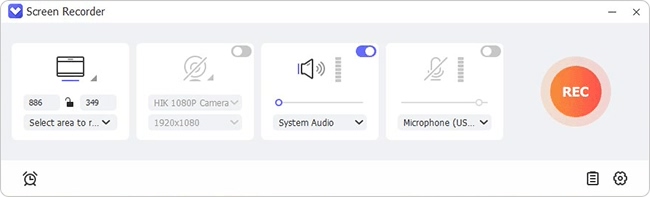
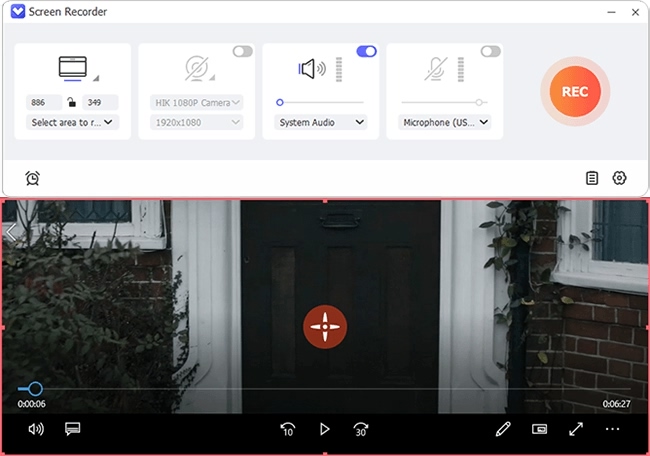
Open Microsoft Teams on your desktop and click on Select area to record to decide where to record. Then turn Camera on to record yourself and configure your audio sources (e.g., system sound and microphone).
Step 3 Set Recording Preferences
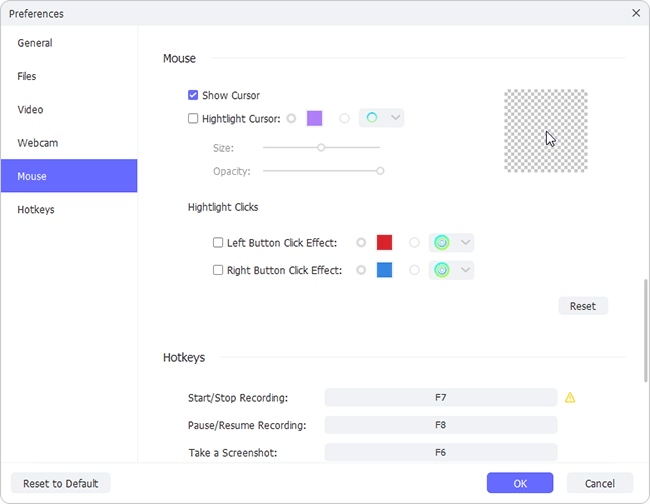
Head to the right bottom of the program and click on the gear-shaped Preferences icon. You can set an output video format, customize parameters like resolution, encoder, frame rate, quality and bitrate. Besides, it's available to set hotkeys, mouse effect, and more.
Step 4 Start to Record Yourself on Teams Meeting
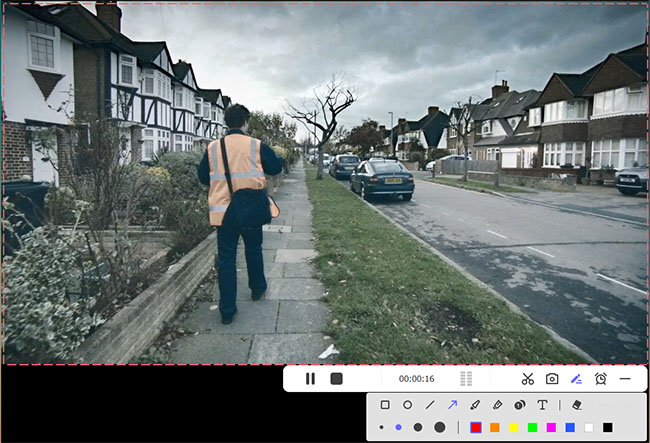
Join or start a meeting on Microsoft Teams and then click on the REC button in Joyoshare VidiKit to begin recording. You can use the recording menu bar to annotate in real time, cut content in meeting, take snapshots, and schedule to stop.
Step 5 Save Teams Meeting to Computer
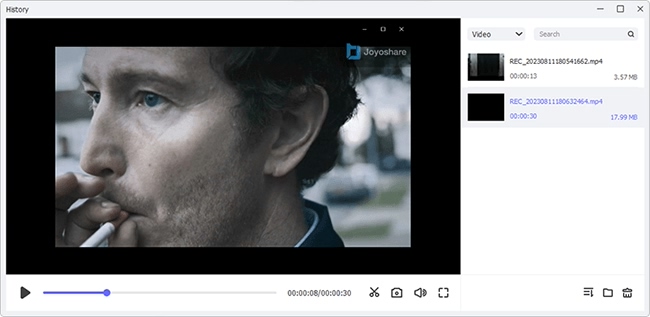
Simply click on the Stop button in Joyoshare VidiKit to end the recording and save Teams video. You'll be taken to History window to further play, rename, trim and edit all recordings.
 Note:
Note:
Part 4. FAQ about Microsoft Teams Recordings
Q1: Where are Teams recordings stored?
A: Teams recordings are processed and stored to OneDrive for Business. However, if the organizer still uses Stream, the recording will be saved in the meeting chat or channel.
Q2: Can Teams calls be recorded without notice?
A: No. When you record Teams calls using the built-in recording feature, Microsoft Teams will automatically send a notification banner to all participants, informing them that a recording has started.
Q3: How to share a recorded Teams meeting?
A: Find Recordings folder in the meeting organizer's OneDrive for Business, then you can share with "Copy link" or share with specific people. Note to set the permissions, especially be cautious when setting the "Edit" permission.
Conclusion:
After learning how to record yourself on Teams in this post, you can now create recordings without hassle. As you can see, the built-in recording feature on Teams can help you record with or without meetings easily. However, sometimes the native Teams recorder isn't enough. You might be blocked by an admin policy, lack the proper license, or being interrupted by the recording time limit. In these cases, a third-party screen recorder like Joyoshare VidiKit offers a flexible alternative.