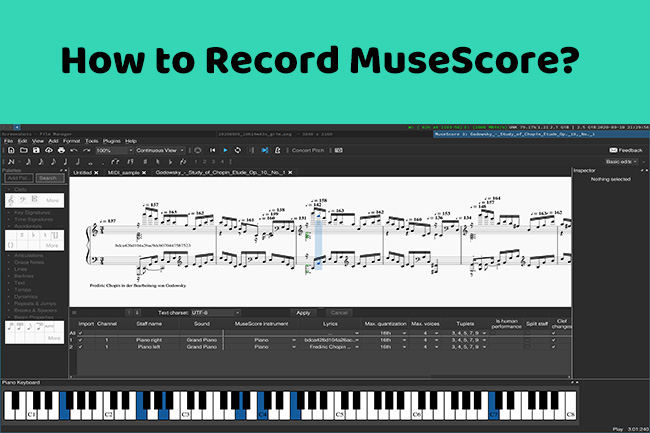
MuseScore comes with impressive and useful features that music lovers, composers, and educators will like. It is a music notation software for Windows, Linux, and Mac and users could take it to create music for piano, guitar, choir, band, and much more. Its easy-to-use interface and powerful features have made it one of the most popular notation software. MuseScore is valuable for musicians of all levels, allowing users to create scores easily and quickly. If you have created a melodious score and wish to share it on social platforms, then you might need to make a recording. Sadly, how to record MuseScore while it does not support this feature so far? In this post, we will introduce 5 ways to help record your scores easily.
- Part 1. Turn Score on MuseScore into a Video Directly
- Part 2. Record MuseScore with Screen Recorders
- Part 3. Conclusion
Part 1. Turn Score on MuseScore into a Video Directly
If you want to share your videos on YouTube, you could achieve that as long as having a YouTube account. It is because MuseScore has the feature of Send to YouTube and you can export your scores as videos with ease. There are many MuseScore users who have posted their work on YouTube in this way, receiving many views and likes. Here are the steps to guide you to send your MuseScore to YouTube.
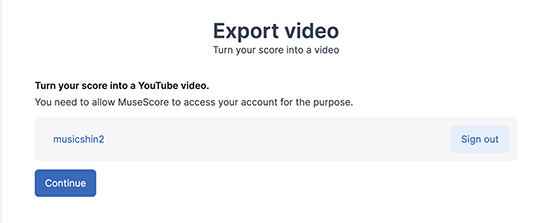
- Step 1: You need to have a YouTube account and connect the account to MuseScore.
- Step 2: Open MuseScore and locate the Send to YouTube feature next to the three-dotted icon.
- Step 3: The score sent to YouTube will play the same sound of MuseScore by default. If you want to make an audio track with other sounds, you could click the Upload audio track button to upload an MP3 format at the bottom of the interface. Then you can use that format as your video's audio.
- Step 4: It is suggested to combine the Send to YouTube feature with the Upload audio track feature, allowing your score to use customized audio. However, you could only turn your score on MuseScore to YouTube once a day using a free account.
Part 2. Record MuseScore with Screen Recorders
1. Joyoshare VidiKit
It is obvious that scores on MuseScore could only be shared on YouTube. If you want to share them on multiple platforms, you could use the most popular Joyoshare VidiKit. It is a comprehensive and prominent screen recorder for you to capture all screen activities on PCs. It is also salient in the recording audio feature, allowing you to record all sorts of audios from websites, Chrome, lectures, games, movies, and much more. More than that, the audio creation process on MuseScore could be grabbed in any format with no lag, which means you could get a high-quality recording video.

- Record all screen in high resolution with no delay
- Customize your recordings with an excellent recording optimizer
- Smart audio recorder to independently capture all audio activities
- Support recording schedule, taking screenshots, adding watermarks and desired effects, etc.
Step 1 Launch Joyoshare VidiKit for MuseScore
You need to download the official Joyoshare VidiKit on your computer first, then start it with double-click. In the interface of it, locate Record option and click Screen Recorder next.

Step 2 Define Recording Area
The recording area could be customized by clicking the + icon in Capture Area. You could adjust the area to match the score screen freely. Then you can turn on the System Audio while turning off Microphone to avoid possible noise. The volume could be adjusted manually as well.

Step 3 Adjust Recording Settings
To create a better recording, you can configure settings by clicking the Options in the right corner of the interface. In Basic record options, you can click the Format to select the format you want and reset its video and audio parameters as you wish. If you want to protect your recordings from unauthorized use, you could add a watermark in Watermark option.

Step 4 Record MuseScore Video
Prepare your score in advance, and click REC button to start recording with no lag. You could skip the content you don't like during the recording process by clicking Pause button.

Step 5 Preview and Edit MuseScore Recording
When the score is over, you could click the Stop button. The files would be preserved in History list. You could preview them with the built-in media player and edit them by heading to Edit feature.

2. OBS Studio
Open Broadcaster Software is also a good Musescore recorder for Windows, Mac, and Linux. It is proficient in video recording and live streaming. What makes it more attractive is that it enables you to put your game streams on Twitch, YouTube, and other platforms. OBS can help you even create professional-level MuseScore recordings.
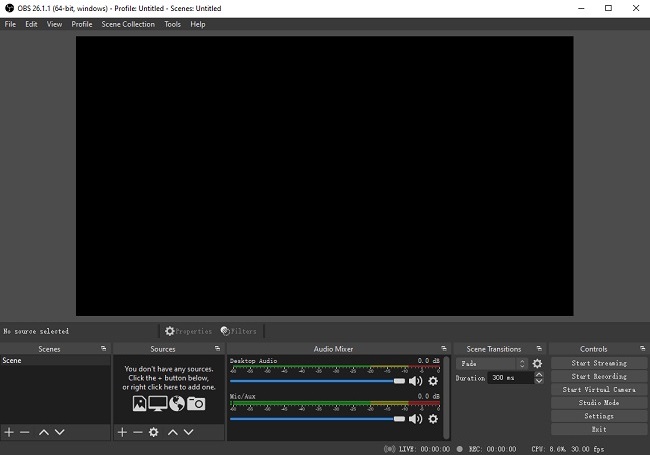
- Step 1: Install OBS Studio on your PC and briefly browses the interface.
- Step 2: At the bottom, find Sources section and click the + icon. Then you are supposed to choose Display Capture as a source. And confirm OK when a new window comes out.
- Step 3: Before recording, you could adjust settings in Controls section in the bottom right. Then in the same section, you can click Start Recording to record on MuseScore and end recording with clicking Stop Recording.
3. QuickTime Player
If you are a Mac user, QuickTime Player is also an alternative option for you. As a famous multimedia player, it could also be used to record screen activities. Though the recording feature is limited compared to other tools, you don't have to download a third-party screen recorder to record a MuseScore video.
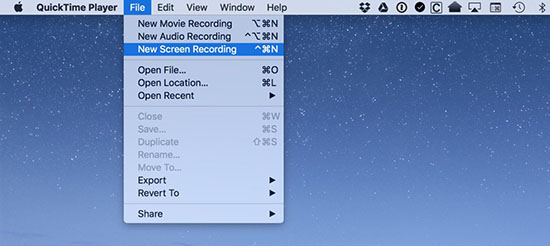
- Step 1: Open QuickTime Player on your Mad and navigate to Files at the top taskbar.
- Step 2: Select New Screen Recording. A new window would show up and you could click the arrow near the red button to reset settings. Next, tap the Record button.
- Step 3: Then a popup will occur and you can drag over the area you want to record. Last, click on Start Recording to make MuseScore videos and end it by clicking the Stop button.
4. Bandicam
Bandicam performs well in screen recording for PCs. It could be used to record online videos, take screenshots, and edit recordings with simple operations. With this software, you could record gaming sessions via DirectX, OpenGL, and Vulkan graphics technologies. Meanwhile, Bandicam is able to protect the quality of your export video. Here are the steps guiding you to create MuseScore files.
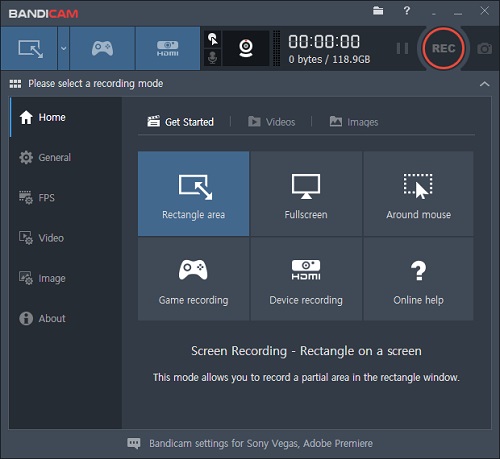
- Step 1: Install Bandicam first and run it on your PC.
- Step 2: Then select the Rectangle on a screen mode. When the capture frame comes out, you could drag the edges to define the custom area.
- Step 3: Click the REC button on the top-right of the interface and start recording MuseScore. And click that button again to end the process.
Part 3. Conclusion
MuseScore is widely appraised by users as it is powerful and free. In the article, we have summarized 5 ways to answer how to record MuseScore. Next time you want to post your scores on different platforms, you could try these methods and test your favorite one. And if you want to own a full-featured screen recorder, Joyoshare VidiKit is a nice try.
