With the rapid development of the information age, more and more people now tend to have lectures online. Whether for a student or an office worker, the convenience of online classes is obvious. We are not limited to the place and time of lectures, making study a simple thing. But sometimes, in order to review offline or share key points with others, it is also necessary to record the course. Want to know how to record lectures on Mac by yourself? Just follow us here!
- Part 1. Joyoshare VidiKit
- Part 2. Command + Shift + 5
- Part 3. QuickTime Player
- Part 4. iMovie
- Part 5. Record Lectures
Part 1. Best App to Record Lectures on Mac - Joyoshare VidiKit
Joyoshare VidiKit - Screen Recorder is worth your expectation. It records various types of video and audio on a Mac computer, such as online lectures, meetings, desktop screen, gameplays, call chats, remote sessions, etc. In addition to save video with high resolution, you can simultaneously capture sound from Mac system or microphone. It gives users unlimited recording time and stores your lectures as MP4, YouTube, Facebook and more. The quality can be customized, up to 1080p and 4K. Best of all, it has a timer to accurately and easily initiate any recording task in a specific time.

- Record lectures on Mac with audio in high quality
- Customize capture area for online lectures
- Preset output format, resolution, frame rate, sample rate, etc.
- No watermark, no lag, no recording length restriction
- With useful options to trim, schedule, highlight, take snapshot, etc.
Step 1 Open screen recorder on Mac
Finish program downloading and installation on your Mac. Then quickly get Joyoshare VidiKit run, start "Screen Recorder" tool, and get ready on "record video and audio" mode.
Step 2 Select a capture area on Mac
You have to choose a region on Mac under "Capture Area" section in Joyoshare VidiKit. To do it, you're able to straightly lock customized width & height, get a systematic ratio from drop-down list, or click "+" to designate an area that fits for your online lecture window.
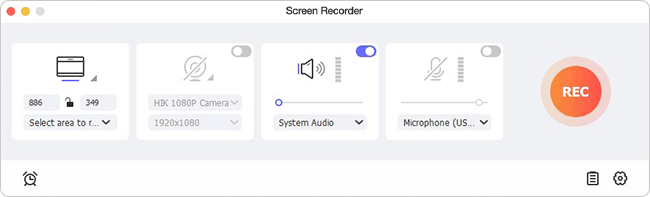
Step 3Confirm recording options
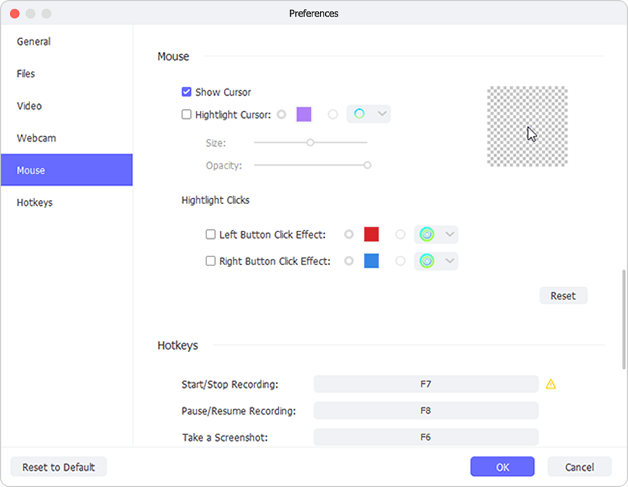
Press on "System Audio" and "Microphone" to turn on/off sound as you like. Next, go for the lower-right corner to hit "Options" icon. You're allowed to set shortcuts, add image watermark, select output format, create recording task on schedule, show cursor and spotlight clicks.
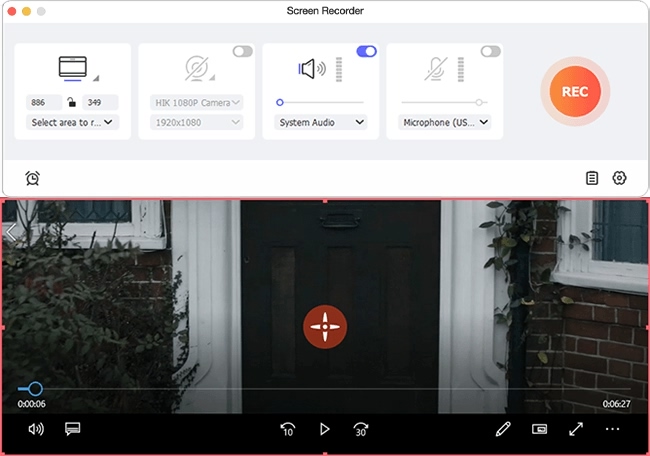
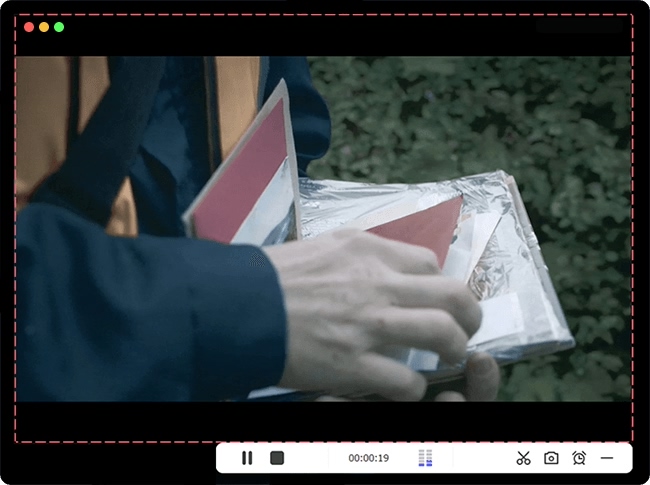
Step 4Begin to record lectures on Mac
Now open your online lecture and click on the blue "REC" button to start recording on Mac. You can handily re-adjust the capture area within the 3-second countdown. During the process, it's possible to cut lecture video based on the content, skip whatever you don't need and take snapshots.
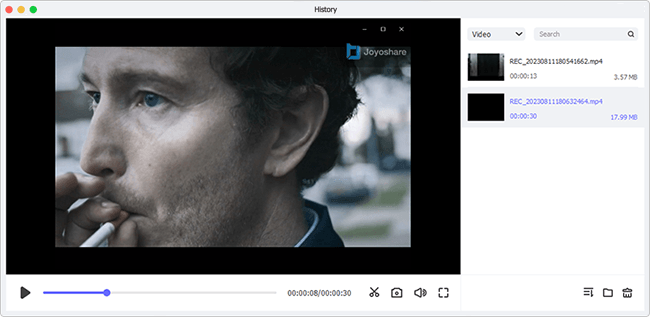
Step 5Save and edit recorded lecture video
End up your lecture recording process on Mac with "Stop" button. Afterward, you'll see a pop-up "History" window, from where you can preview, rename and edit the complished lecture videos easily.
Part 2. Best Way to Record Lectures on Mac - Command + Shift + 5
Are your computer running MacOS Mojave and the later? Good news is that you can simply pressing Command + Shift + 5 to call out a screen recording tool, which works well to record lectures with audio in either entire screen or selected portion. It's possible to screenshot still images for quick saving. You can now see how to operate it.

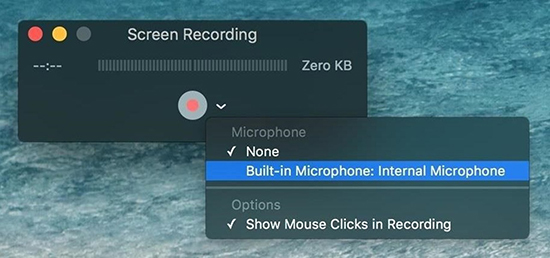
- Step 1: Press "Command + Shift + 5" on your keyboard and a recording tool will pop up on Mac desktop;
- Step 2: In the toolbar, you can choose "Record Selected Portion" to only designate a part of area;
- Step 3: Then click on "Options" to confirm where to save your recordings, whether to enable timer and open microphone;
- Step 4: After finish all settings, click on "Record" to start recording a lecture on your computer;
- Step 5: Click the recording button on the top of your screen to stop recording, preview and trim it, and then save the video with "Done".
Part 3. How to Record Class Lectures on Mac - QuickTime
QuickTime is pre-installed on your Mac computer to let you not only play media files but also record screen. This freeware is simple to operate and can be a good choice to record lectures. However, you should note that it has no ability to only capture internal audio unless you have Soundflower installed on your Mac.
- Step 1: Get Soundflower downloaded and installed on Mac. Simply go to "System" → "Sound Preference" to set it as your input audio source;
- Step 2: Open QuickTime on Mac and start your lecture video. Head to the top menu and click "File" → "New Screen Recording". Hit the triangle icon near to red recording button and choose Soundflower to grab sound from lecture;
- Step 3: As long as everything is ready, you can press on the red recording icon in QuickTime to capturing lecture video with audio;
- Step 4: Finish your recording using the stop button and save the recorded lecture video in MOV format on your Mac computer.
Part 4. How to Record Lectures on Mac - iMovie
iMovie is another popular Mac application you can take into consideration. It's capable of recording screen and editing videos in a professional way. If you'd like to capture online lectures on Mac, resort to it for help by following the easy steps below:
- Step 1: Open iMovie and click on "File" → "New Project";
- Step 2: Name your project and set "Aspect Ratio" from the pull-down menu;
- Step 3: Now find and hit "Create" button to craete a new project;
- Step 4: Run the Import pop-up window by clicking the "Open Camera Import Window" button in iMovie and choose FaceTime HD Camera;
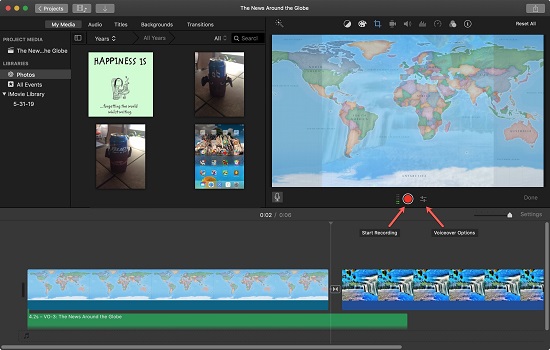
- Step 5: Open your online lecture and click "Record" on iMovie to start recording video with audio;
- Step 6: Press on Record again to stop recording and Save file locally.
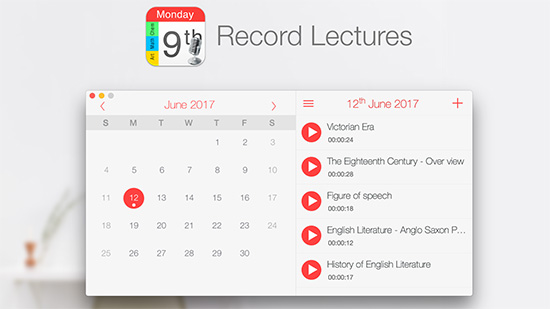
Part 5. Good Lecture Recording App for Mac - Record Lectures
Record Lectures is a new app that's designed for users running macOS 10.10 or later. Aside from lectures, it allows you to record conversations, meetings and more, providing great convenience to store recordings in calendar for quick sharing and later playback. Each lecture file has topic title, notes and poniters to easily differentiate. After the recording, you can share lecture via email, export to iTunes and even show in Finder.
- Step 1: Install and open Record Lectures on Mac;
- Step 2: On a designated date, click "+" at the upper right corner to start recording;
- Step 3:Add topic title, notes and pointers for your lecture and click on "Done" to finish recording.
Conclusion:
After reading this article, you should have no doubts about how to record lectures on Mac. No trouble at all, you can directly use the built-in shortcut "Command + Shift + 5" and QuickTime to create recordings. However, you should note that both of them export MOV files in large size. You'd better divide your long lecture into small sections. If you'd like to record a lecture on Mac and edit it for free, iMovie is also a good option. To manage lecture recordings easily, just try Record Lectures. Certainly, don't hesitate to use Joyoshare VidiKit if you want diverse recording and editing options, as well as high quality output.
