As a screen recorder that's pre-installed on Mac, QuickTime is frequently used by a large amount of users. In fact, the functionality this basic freeware offers is not too hard to understand, especially for multimedia professionals. But for novices, you probably can't figure out how to record screen with QuickTime. Don't worry. To provide substantial assistance, we'll focus on recording screen using it on Mac, iPhone and iPad in this article.
- Part 1. Record Screen in QuickTime on Mac
- Part 2. Record Screen Using QuickTime on iPhone and iPad
- Part 3. Alternative to QuickTime to Record Screen
Part 1. How Can QuickTime Record Screen on Mac
Step 1 Run QuickTime and create new recording
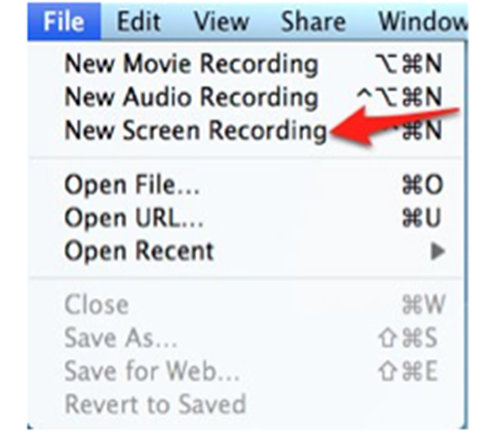
Launch QuickTime app from Application folder on your Mac computer. Go for its top menu bar to click "File" > "New Screen Recording" option.
Step 2 Choose microphone recording options
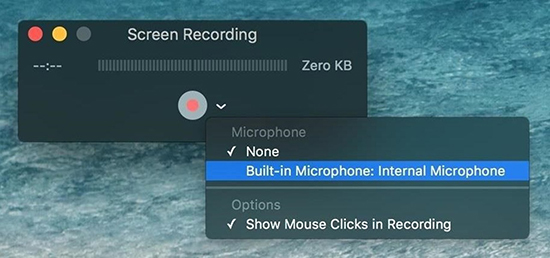
A "Screen Recording" pop-up window will be shown in your sight immediately. Go forward to hit its drop-down menu to see what you have to preset according to your actual requirements. Choose "None" to make a screen recording without sound or choose "Built-in Microphone" to grab both system sound and external audio. Moreover, it's also available to show mouse clicks in recording.
Note: There is no way you can apply to record system audio only. If you'd like to make it, you'll have to download SoundFlower software, restart Mac, set System Preferences > Sound to set audio input.
Step 3 Start to record screen with QuickTime
Now you can press the red button and choose a recording type. Hit anywhere only once on your Mac screen to record activity in full screen. Or draw to select a definite portion of the screen and then click "Start Recording" to capture designated place.
Part 2. Use QuickTime to Record Screen on iPhone and iPad
Step 1 Connect iPhone/iPad to Mac
Use a USB cable to establish connection between your iPhone/iPad and Mac computer.
Step 2 Open QuickTime and enable recording function
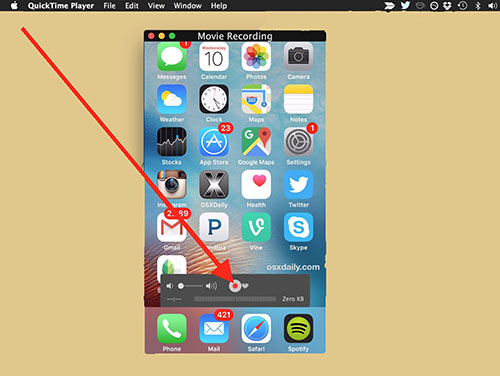
Next, you can simply run QuickTime on the desktop. Pull down "File" tab in the top menu and press "New Movie Recording".
Step 3 Select recording options
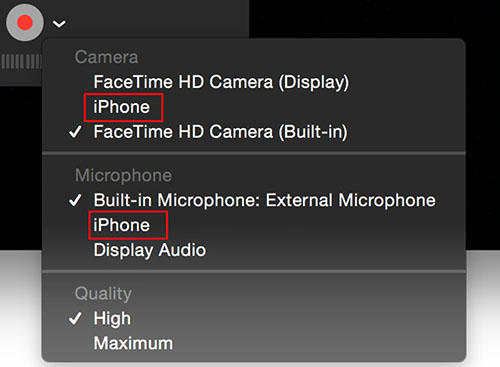
In the screen recording window on Mac, you can define the options by clicking the drop-down button to the right of the red record button. You need to choose your connected iPhone/iPad device for both "Camera" and "Microphone". Then set quality as you like.
Step 4 Record iPhone/iPad screen with QuickTime
The screen recording window on your Mac will 'mirror' the screen of your target iPhone or iPad. Unlock your iOS device and click on the recording button on Mac to begin capturing iPhone/iPad screen.
Step 5 Save recorded video
Hit the Stop button on your Mac to complete the recording assignment. QuickTime can trim down the finished video. If you don't want, you can directly go to "File" > "Save..." to output as MOV on Mac.
Part 3. QuickTime Alternative to Record Screen - Joyoshare VidiKit
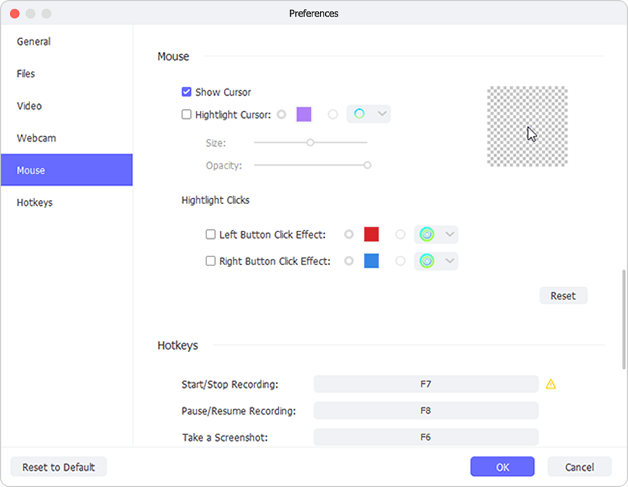
Joyoshare VidiKit - Screen Recorder can give you liberty to capture any desktop activity, including videos and audios, on Mac and Windows screens in high resolution. Other than that, it's flexible enough to create a recording in full screen or in customized size. Essentially, you have right to grab system audio or microphone sound in switchable mode. It also offers capability to take screenshots, set shortcuts, make scheduled task, highlight cursors, etc. Thanks to its full supports to diverse formats and devices, you can export a finished recording to MP4, M4V, AVI, FLV, WMV, MOV, MP3, AAC, M4B, iPhone, Apple TV, iPad, etc.

- Allow task-creating and screenshots-taking
- Offer ability to specify output format configuration
- Capture area in customized size or preset standard ratio
- Support a wide variety of output formats and popular devices
- Record Mac screen video and audio activity in high quality
Step 1 Launch Joyoshare VidiKit on Mac
Fit out your computer with Joyoshare VidiKit for Mac and simply run it. You can see many tools in its interface, find and open "Screen Recorder". To capture screen video on Mac, you have to start with "Record video and audio" mode, which is usually set by default by the side of "REC".
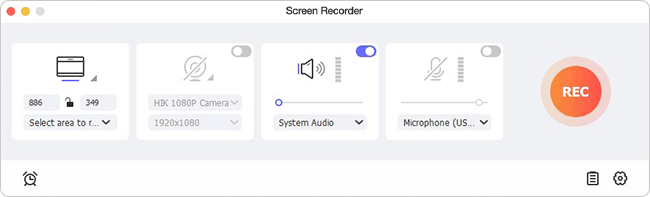
Step 2 Choose capture area
You should firstly select a recording area in the "Capture Area" section. Click "+" button to adjust the pop-up window in front of your screen. Or tap the drop-down icon to choose a preset systematic ratio, like 320x240, 640x480, 1280x720, full screen, etc.
Step 3 Setup audio preferences
You can record Mac screen with/without system audio or microphone sound in the way you like. To exclude unexpected intervention and noise, you are supposed to open your system audio only but keep the microphone sound disabled.
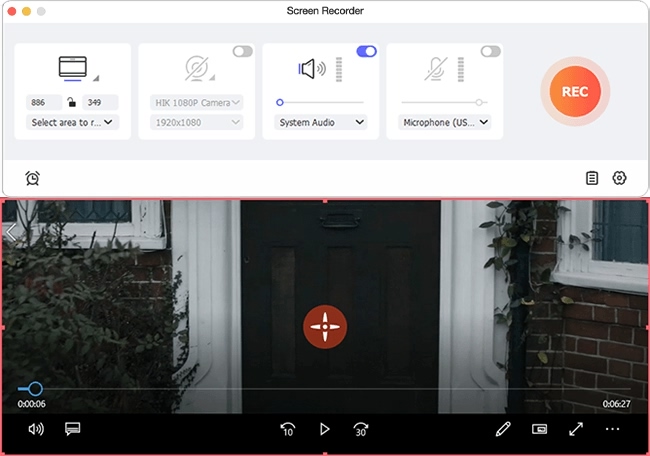
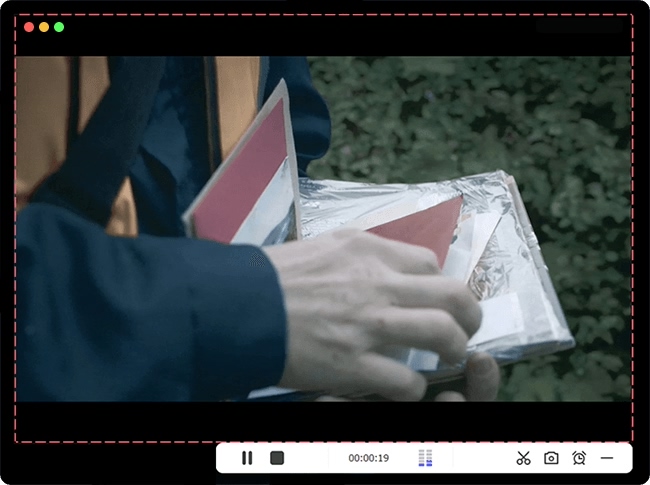
Step 4 Record screen video with audio on Mac
There is a gear icon at the lower right corner. Press it to bring up more hidden recording settings, for instance, storage location, output format, recording time, cursor effects, etc. Afterwards, you can go to click the "REC" blue button to execute a recording assignment on your Mac. Utilize shortcut to make screenshots or hit the scissors to cut your recording.
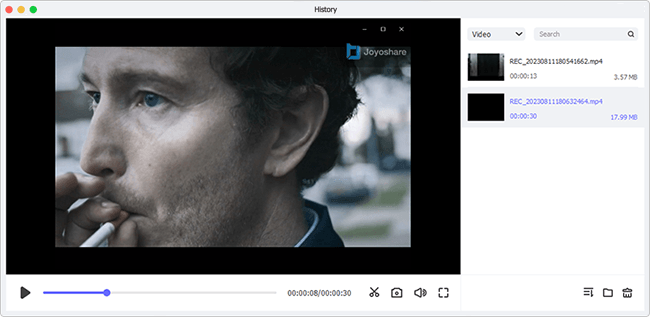
Step 5 Save and edit video files
Once you click the "Stop" button, Joyoshare VidiKit will end its recording process. Then a "History" folder will pop up with all recorded files. You can preview any one, edit ID3 tag info, change file name, delete useless one and trim to remove certain sections as per your needs.