Q:"How do you record a video directly into iMovie?" - From Quora
iMovie is a well-regarded video editing software developed for iOS, iPadOS and mac OS devices. It provides most powerful and unique features that other programs miss to help Apple users create Hollywood-style videos. Knowing how to record video in iMovie is definitely an essential skill for YouTubers, vloggers, or anyone that would love to share their daily life stories with others at any time. You will be able to add a video directly from the camera on your Apple devices to your iMovie project. Record, edit, and then share. Isn't it amazing? Get ready to meet the guide below to learn how to do it.

- Part 1. iMovie Records Video
- Part 2. More Tips to Use iMovie
- Part 3. Best iMovie Alternative to Record Video
Part 1. How to Record Video on iMovie
1 Record Video in iMovie on Mac (Internal and External Cameras)
Make the full use of the FaceTime HD camera built into your Mac to record video directly to iMovie. You can simply check and follow the steps below:
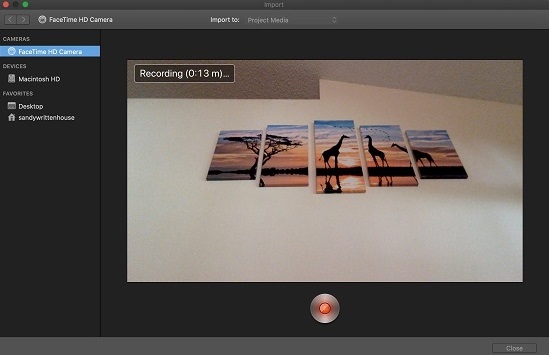
- Step 1: Open iMovie app on your mac computer;
- Step 2: Hit on the "Import" button in the toolbar to open the Import window;
- Step 3: Select the built-in camera in the "Camera" section of the Import window sidebar to activate live video image;
- Step 4: At the top of the window, there is an "Import to" menu. You could choose an existing event, create a new event, or select the open project;
- Step 5: Tap the "Record" button at the bottom of the screen to start recording videos;
- Step 6: Click the "Record" button again to stop recording and hit on the "Close" button to return to the iMovie main window.
The one who uses an old Mac device will have to connect additional external camera hardware before recording videos in iMovie. Just connect it to your Mac computer via FireWire cable and it will then be listed in iMovie's camera drop-down menu, which is available to choose. You can at the same time easily adjust the camera angle as you wish.
2 Record Video on iMovie on iPhone/iPad
You can also record videos in iMovie straightforwardly. Notice that your recorded videos will be saved in your photos library.
- Step 1: Open your project in iMovie to scroll the timeline so that the whiter vertical line (the playhead) appears where you would like to add your new video;
- Step 2: On iPhone, you need to tap the "+" button and then the "Camera" button. On iPad, you only need to press the "Camera" button;
- Step 3: Utilize the camera controls to adjust many options like resolution and flash, and then begin to click the "Record" button;
- Step 4: Hit on the "Stop" button when you're done;
- Step 5: Press the "Use Video" button to place the video clip you recorded just now in the timeline of your project. You could also click the "Retake" button to discard the previous and start to record a new one.
Part 2. More Tips to Use iMovie
1 How to add videos to your iMovie project on Mac?
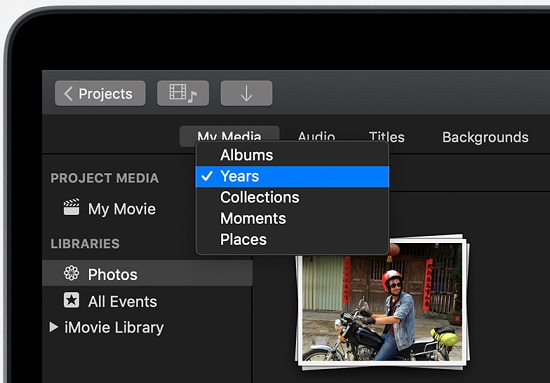
- Step 1: Open the iMovie window and select "Photos";
- Step 2: Choose a content category such as "Albums", "Years", "Collections", etc. and find the video you would like to add to iMovie;
- Step 3: Drag it into the timeline of your iMovie project.
Another easy way for you is to drag the videos you would like to use from Photos to your desktop, and then drag the video from the desktop into the timeline of your iMovie project.
2 How to record voiceover in iMovie on iPhone, iPad, or iPod touch?
- Step 1: Open your project and scroll through the time line so that the white vertical line appears at where you want to add your voiceover;
- Step 2: Press the "Voiceover" button and then click the "Record" button to record your voice after a three-second countdown;
- Step 3: Finally, hit on the "Stop" button when you're done, and after that, you could choose to "Review", "Accept", "Retake", or "Cancel" your recordings.
3 How to change the volume of a clip in iMovie on iPhone, iPad, or iPod touch?
- Step 1: Tap your clip in the timeline and then press the "Volume" button at the bottom of the window;
- Step 2: Adjust the slider to either increase or decrease the volume.
4 How to Share your iMovie video to YouTube?
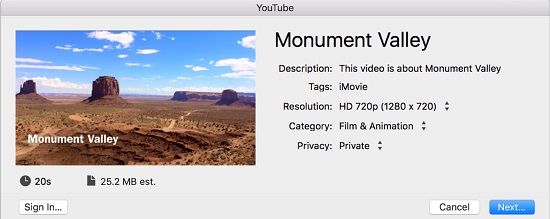
- Step 1: In the iMovie app, choose your video in the browser;
- Step 2: Hit on the "Share" button in the toolbar to select "YouTube";
- Step 3: Adjust the title, description, tag, resolution, category, as well as the privacy setting of your shared movie;
- Step 4: Tap "Next" and a progress indicator will appear on the right side of the toolbar.
- When the process is completed, you are able to click "Visit" to view your movie on YouTube.
Part 3. How to Record a Video on iMovie Alternative
As you can see, iMovie only supports recording of camera built into the Apple devices. But this is far from enough. Sometimes we may need to record gameplay, online music, virtual meetings, streaming videos and then import them into iMovie, etc. So under such circumstances, one may need to look for a more professional video recorder. Here Joyoshare VidiKit - Screen Recorder will never disappoint you in capturing any video and audio from any source in high quality. Having tons of additional features with intuitive user interface, it enables you to schedule recording tasks, choose any output format you like, customize video configuration, capture sound from computer system, and more.
- Record video on Mac and Windows in high quality
- Capture internal and external sound
- Grab a particular window or the entire screen
- Support a variety of output formats, including 4K video
- Record screen without time limitation, product watermark, and latency
-
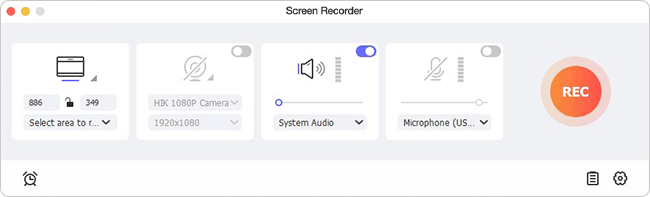
Step 1 Download Joyoshare VidiKit
After installing Joyoshare VidiKit on your Mac, you can launch it immediately. What you need is "Screen Recorder" and please choose the "Record video and audio" mode by clicking the camera-like button on the right side of the main screen.
-
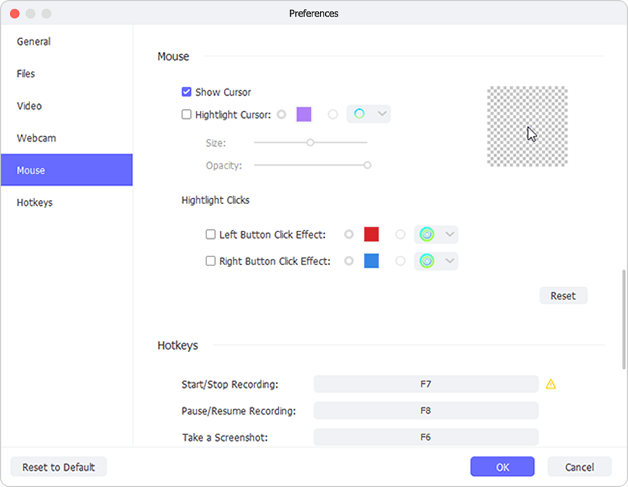
Step 2 Adjust Recording Settings
Tap the little gear icon at the corner of the main screen to unfold a new window. This program specially offers a wide range of options for you. You are free to select your output format such as MP4, FLV, MKV, AVI, etc. add an image watermark, let the program stop recording automatically, highlight mouse movements, etc.
-
Step 3 Grab Recording Area You Want
There is a "+" icon on the main screen. Tap it to activate a blue frame so that you could drag its edges to specify your capturing area. You could also click the small triangle button right next to it to select from a list of standards. Remember to turn on/off system sound and microphone.
-
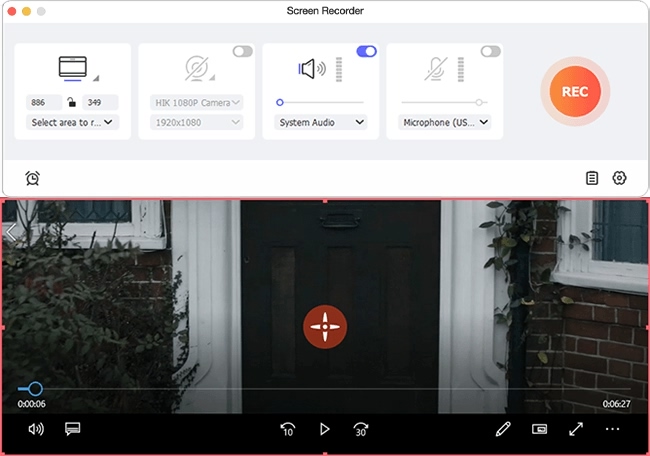
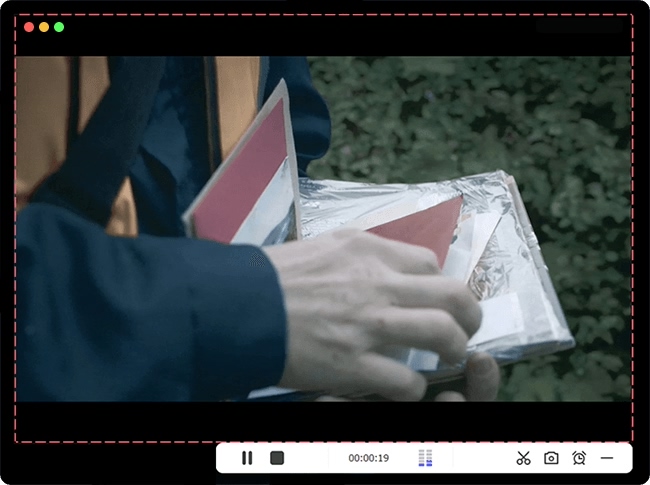
Step 4 Start to Record Desktop Screen
Now you can press the "REC" button to start recording your desktop activities. After a three-second countdown, you will see a minimized toolbar outside the blue frame. You are capable of using the "Pause" button to skip your unwanted content or the "Cut" button to cut your recordings into several small segments.
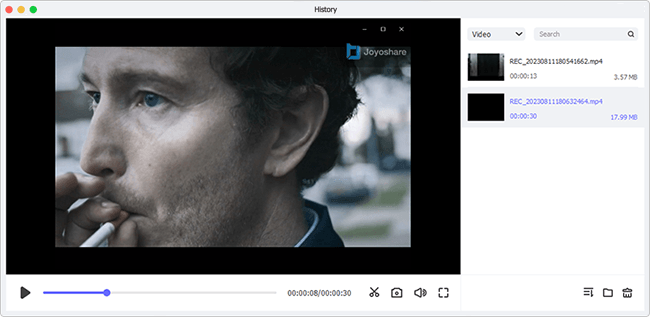
Step 5 Save and Edit Finished Video
When you tap the "Stop" button, the History library window will pop up so that you could manage your recordings. If you would like to locate your recordings, please navigate to Preferences (at the top of the main screen) > Convert > Location of Output Files.