If you are into gaming, we can skip the introductions and understand that you know about NVIDIA and the GeForce Experience. The app allows users to customize the interface with valuable features that help enhance the gaming experience. If you face the trouble of GeForce Experience recording not working on your computer, then this article is for you! Although it is a cool feature, there are circumstances where it fails to record or behaves erratically. So, let us dive into the eleven fixes that will help you solve the issue.
- Part 1. Check System Requirements
- Part 2. Check Supported Games
- Part 3. Uninstall or Quit Third-Party Audio Software
- Part 4. Get the Latest Graphic and Update Display Drivers
- Part 5. Uninstall and Reinstall the Display Drivers
- Part 6. Switch on Windows Aero
- Part 7. Check the Disk Space
- Part 8. Adjust the Default Directory
- Part 9. Joyoshare VidiKit as Alternative to Record
- Part 10. Allow Desktop Capture
- Part 11. Restart Nvidia Streamer Service
Part 1. Check System Requirements
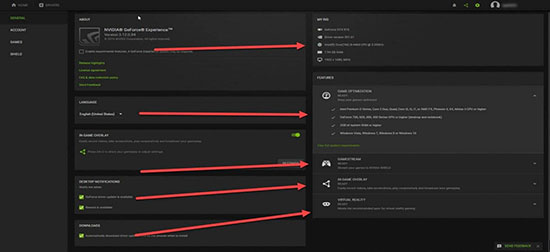
The fix to my GeForce Experience won't record is to check the system requirements. There is always a minimum system requirement for an application to run correctly. Therefore, it is vital to check the system's specifications to ensure that GeForce Experience is compatible. Fortunately, you can check it without leaving the software.
- ● Windows 7 and above OS
- ● 2GB system memory minimum
- ● 20MB minimum disk space
- ● Intel Pentium G series, Quad-Core i3, i5, i7 or higher and AMD FX or higher CPU
Part 2. Check Supported Games
GeForce Experience doesn't record when the game that you are playing is not compatible. To ensure that you can record while playing your favorite game, you can check the complete list of games compatible with the video recording feature. The in-overlay supports all the DirectX 9, 10, and 11-based games.

Part 3. Uninstall or Quit Third-Party Audio Software
If you can't record with GeForce Experience, the third solution is to uninstall or quit any third-party audio software installed on your computer. Generally, any third-party audio enhancement software can become a hurdle while playing the game and interfere with the GeForce Experience recording capacities. If you have recently installed such audio enhancement software, you can follow the steps below to uninstall the same.
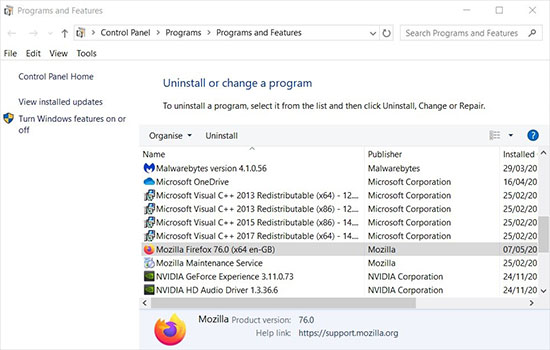
- Step 1: Use the search bar to input "Control Panel" and press the "Enter" key.
- Step 2: Select "Programs."
- Step 3: Click on the "Programs and Features" option.
- Step 4: Select "Uninstall a Program."
- Step 5: Now, click on the "Uninstall" button.
- Step 6: Make sure no other applications are running. After completion of the uninstallation of the program, restart the computer and try recording using GeForce Experience.
Part 4. Get the Latest Graphic and Update Display Drivers
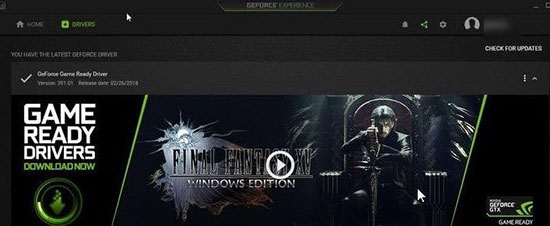
GeForce Experience won't record gameplay because of outdated graphic and display drivers. Therefore, if you face an issue when trying to record a game using GeForce Experience, it is preferable to check for the latest updates. The Game Ready Driver Update is an incorporated feature into GeForce Experience. It checks for the updates automatically and sends you a notification about the availability of new drivers. Alternatively, you can head to the Preferences screen and check for the updates manually.
Part 5. Uninstall and Reinstall the Display Drivers
GeForce Experience not recording is a significant problem. If you face such an issue, it is preferable to uninstall and reinstall the display drivers once again. However, even if you are using the latest display drivers, corruption of files is high due to several reasons. You can use a specialized tool to uninstall the display drivers professionally and proceed with a fresh driver installation by visiting the official website.
Part 6. Switch on Windows Aero
Although GeForce Experience functions on all the Windows operating systems, erratic behavior could be due to non-functional support from Windows. As Windows stopped official support and security updates to Windows 7, switching the Aero effect could potentially solve the issue of GeForce Experience not recording sound on the computer. You can enable any of the Aero themes by the following steps.
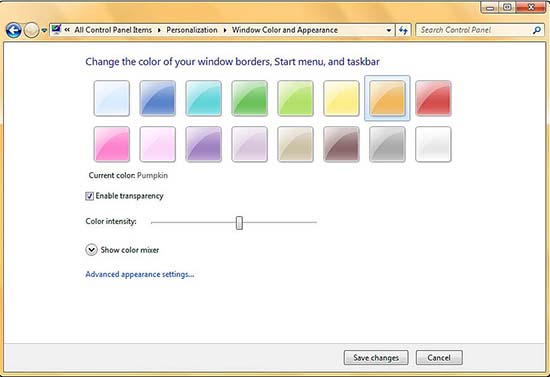
- Step 1: First, head to "Control Panel."
- Step 2: Then, select "Appearance and Personalization."
- Step 3: You can now select the Window Color and enable the transparency option.
Part 7. Check the Disk Space
Nvidia GeForce Experience recording not working could be due to insufficient disk space. However, if you find enough space on the C drive and you see a message that there is not enough space for extracting, you can avoid the error by changing the TEMP environment variable. The steps below will help you resolve the problem.
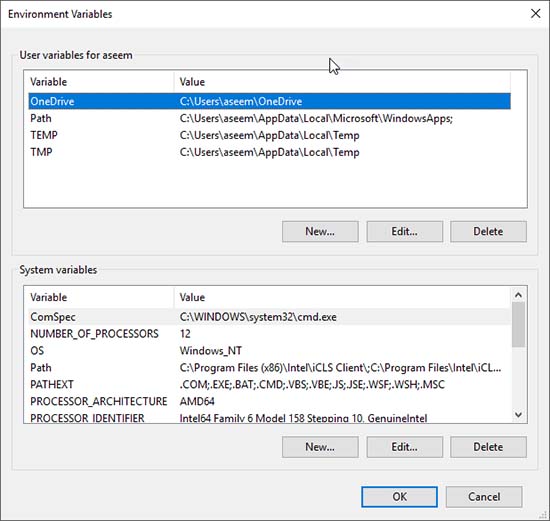
- Step 1: Open the Control Panel.
- Step 2: Open System.
- Step 3: Head to the Advanced tab.
- Step 4: Click the Environment Variables button.
- Step 5: Change the TMP or TEMP user and system variables to a point or location that has more space.
Part 8. Adjust the Default Directory
As the reasons for GeForce Experience stops recording are many, addressing it at the earliest is essential. The possibility of triggering such an error could be due to insufficient disk space in the default directory. A corrupted recording path could also be the other reason. A simple way to fix the issue is by adjusting the default directory. You have the chance to change the recording path to a different location on another hard disk drive. Alternatively, creating a new directory on a different location on an existing directory also helps overcome the error.
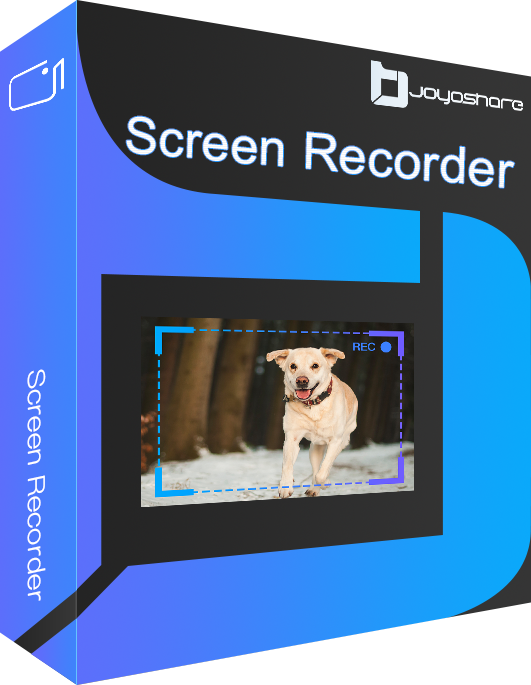
Part 9. Joyoshare VidiKit as Alternative to Record
Joyoshare VidiKit - Screen Recorder is a single platform that helps you with different features. The software is an alternative to the recording performed by GeForce Experience, as it does not cause any error. The software utilizes and adapts to the computer hardware and ensures smooth performance while recording the screen. Therefore, you can avoid GeForce experience doesn't record while you are playing a game.
- Dual-mode to customize recording area
- Support recording gameplay smoothly and no time limit
- Record Battlefield, Pokemon, RuneScape gameplay and more
- Specify codec, sample rate, bitrate, etc.
- Schedule recording task to save time
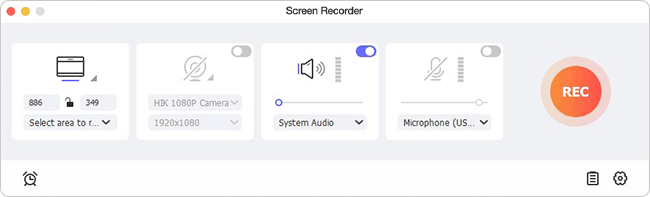
Step 1 Install Joyoshare VidiKit on Your Computer
First, install Joyoshare VidiKit on your computer and click the icon to launch the program. Select Record section and hit Screen Recorder. Choose Record video and audio mode by tapping camera-shaped icon. You will see the following interface.
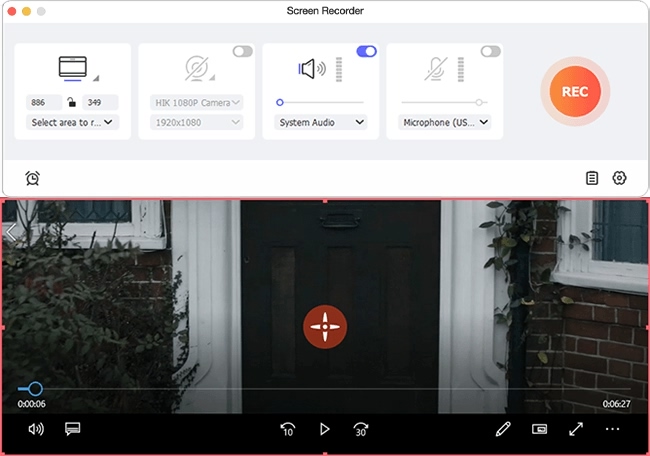
Step 2 Choose the Area You Want
Press the "+" sign from the Capture Area section, and you will notice the recording window pop up on the screen. You can now choose the custom size of the recording window according to the need. You can also select standard recording area in the drop-down list by pressing the triangle icon.
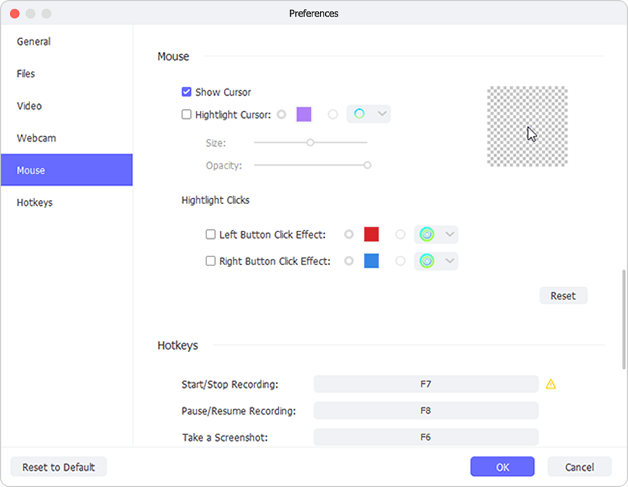
Step 3 Confirm Recording Preferences
Click on the Options icon at the bottom to customize the recording settings. For example, you can change the output folder, the video and audio format, recording shortcuts, and personalize cursor effects. The screen recorder supports all popular formats and devices. You can also choose gaming consoles and smart TVs and specify codec, quality, frame rate when you customize format.
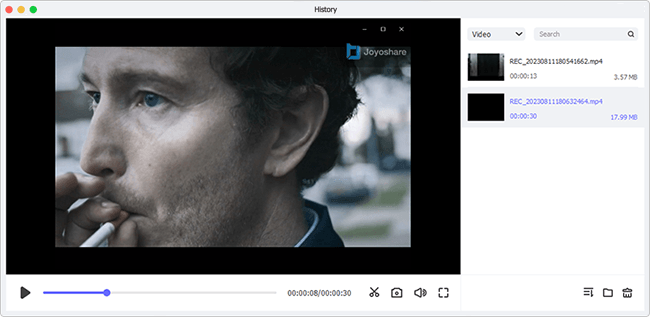
Step 4 Edit Recorded Video
Now, you can begin playing the game and press the "REC" button to start the screen recording in high quality. You are able to review the recorded files from the History window and edit the ID3 tags during the process.
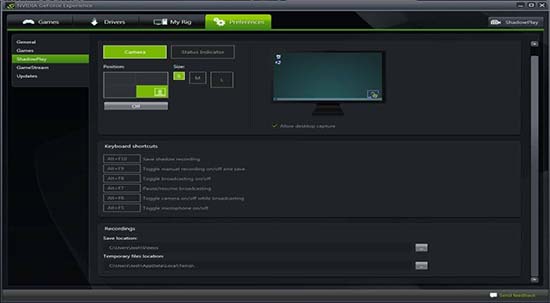
Part 10. Allow Desktop Capture
My GeForce experience won't record! The reason is that GeForce fails to detect a game if you are playing in a full-screen mode. However, you can change the settings to allow GeForce Experience to capture the screen. The steps are as follows.
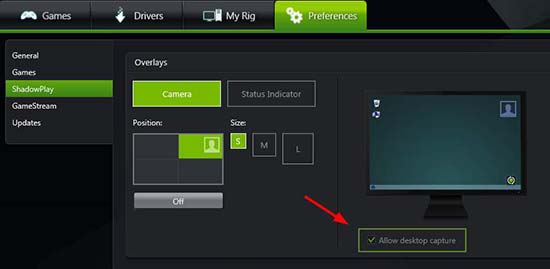
- Step 1: Open ShadowPlay and click the "Preferences" button.
- Step 2: Navigate to the Overlays section and activate the "Allow desktop capture" button.
- Step 3: Open the game and start recording the desktop using the assigned hotkey.
Part 11. Restart Nvidia Streamer Service
Make sure that the ShadowPlay is running to avoid GeForce Experience doesn't record a game.

- Step 1: Open the Run prompt using Windows + R keys.
- Step 2: Type "services.msc" and press Enter.
- Step 3: Search for the Nvidia Streaming Service from the Services window. Ensure that the start-up type is Automatic.
- Step 4: Open ShadowPlay using the hotkeys to confirm the action.
Conclusion
You now have tested solutions to fix the GeForce Experience recording not working issue. Next, you can check out the appropriate solution that works for you that resolves the recording feature so that you can begin recording and sharing your gameplay highlights. If you want to find an advanced yet easy-to-operate screen recorder, I highly recomend you use Joyoshare VidiKit. All you need to do is head to Joyoshare website and download it.
