AnyMeeting is a full-featured tool for web conferences and webinars. Users can participate in online meetings and share their computer screens with others via the network. This web-based software application supports screen sharing, HD videos, artificial intelligence, and many other powerful collaboration features. If you need to save some of the points discussed in the AnyMeeting meeting, please stop taking notes and start recording the meeting. Using a screen recorder will make things much easier. Today's article is going to show you how to do this in two popular ways. Whether you are a Pro plan user or not, you can always record your webinars perfectly.

- Part 1. Record AnyMeeting with No Limit - Joyoshare VidiKit (for Every User)
- Part 2. Record AnyMeeting Using the Built-in Function (for Pro and Enterprise Users)
- Part 3. FAQs about AnyMeeting Recording
Part 1. How to Record a Line Video Call on Desktop - Joyoshare VidiKit
If you would like to record any online meeting in HD or 4K quality, then you can choose Joyoshare VidiKit (upgraded from Joyoshare Screen Recorder) without any hesitation. Its powerful screen recording utility will allow you to record Zoom meeting, Google Meet, etc. or any other desktop activities with no watermark, no time limit, and no lag at all.
Joyoshare VidiKit gives you full control of your custom recording. You can utilize a number of editing tools to perfect your meeting video on AnyMeeting, Zoom, ClickMeeting, Webex, Google Meet, Microsoft Teams, etc. For instance, you can customize your output format, add a company logo to screen recording, highlight cursor and clicks, and more.
- Create a scheduled task to start/end recording automatically
- Record the entire computer screen or any selected region
- Record videos in up to 4K with sound from system and microphone
- Support many output formats and various built-in editing tools
- Trim webinar recording to easily cut out unnecessary content
- Change video resolution, codec, quality, bitrate, ID3 tags, etc.
Step 1Run Joyoshare VidiKit and Open Screen Recorder
You can open the screen recorder on the "Record" panel after starting Joyoshare VidiKit on your computer. Having opened the user interface, you can press the
 icon to enable the "Record video and audio" mode, which will allow you to record AnyMeeting video with sound from computer system and/or microphone.
Step 2Choose Recording Area
Now you can open your AnyMeeting window at first and then click on the "+" icon that can be found on the "Capture Area" section of the program. After that, you will be able to drag the pop-up blue capturing frame to select your recording area that fits your meeting window. You can also tap the triangle icon nearby to choose recording area from a list of preset standard resolutions.
Note: Don't forget to turn on/off system audio and/or microphone and change the volume according to your needs.

Step 3Gain Access to More Settings Options
Joyoshare VidiKit has a number of settings options for customization. They will be available when you click the little gear icon near the "REC" button. You can choose to show and highlight your cursor and clicks so that other viewers can keep up with the meeting easily. You are also able to customize your output format and add a scheduled recording task.

Step 4Record AnyMeeting Conference
You can tap the "REC" button at any time and, after a three-second countdown, Joyoshare VidiKit will start to record AnyMeeting video in high quality. There is a minimized toolbar outside the dynamic capturing frame. You are able to click on the "Cut" button to split recording, the "Pause" button to skip content, and the "Stop" button to quit recording.

Step 5Edit AnyMeeting Webinar
Once the History window shows up, you are allowed to rename your recordings and play them using the built-in media player. You are also capable of clicking on the "Edit" icon to cut and trim your recordings easily.

Part 2. How to Record AnyMeeting Using the Default Screen Recorder
The features available in AnyMeeting vary with each plan. Only Pro and Enterprise users have the right to record meetings using the screen recording capability, use unlimited recording cloud storage, customize meeting background, etc. You can use the default screen recorder to record your AnyMeeting video and then share it with others. But the ability to record webinars is not yet available for the mobile app.
Step 1: There are a few buttons in the top menu, and you can click on the Record button;
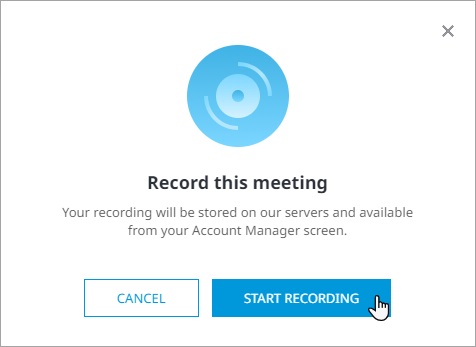
Step 2: Press the "Start Recording" option in a prompted message, and your AnyMeeting recording will be stored on the servers;
Step 3: You are able to tap the red Record button to stop recording your AnyMeeting video;
Step 4: Now you will be asked to choose if you would like to Append or Overwrite; If you select Append, then it will continue from where you left off; if you select Overwrite, your previous AnyMeeting recording will be erased.
Part 3. FAQs about AnyMeeting Recording:
1 What I can record on AnyMeeting using the built-in function?
After pressing the Record button, you will be able to record the screen you are sharing, the MP4 videos you are playing, PowerPoint and PDF documents as well as polls.
2 What plan do I need to use the recording feature?
The AnyMeeting recording utility is offered on Pro plans instead of Starter and Meeting Lite.
3 Are there any limits to the recordings I can have?
No, there aren't. The size of your AnyMeeting recording video and the number of files is unlimited. More importantly, your recording will remain on your account until you decide to delete it or downgrade to a plan that does not feature the recording function.
4 What is the output format if I want to download my recording?
Your recorded AnyMeeting conference will be saved as MP4 videos. You are free to play your recordings on any MP4 compatible player.
5 How can I share my AnyMeeting recording with others?
To begin with, you need to open the My Meetings page in your AnyMeeting account, then select the Recordings tab, and you will be able to view all your recordings. There is an Audience URL beside each recorded video. You can send this URL via email or by other means to share with others.
Conclusion:
Using the recording feature in AnyMeeting to record screen brings us a lot of conveniences. However, it's not available for everyone. Moreover, Joyoshare VidiKit (originated from Joyoshare Screen Recorder) has edges over the default screen recording utility as it allows you to record any desktop action in extremely high visual quality. You will be able to record webinar instantly and perfectly.
