
Q: "I'm trying to restore the back up to my new phone but am error pop up box keeps coming up saying "iTunes could not connect to this iPhone. An unknown error has occurred (0xE800000A)". — KBeee from Apple Discussion
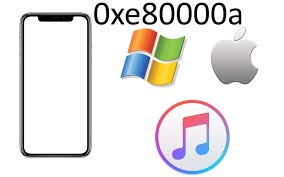
Well, as it turns out, KBeee is not alone. A good number of users are posting about the same issue when connecting their device to iTunes when searching for "0xE800000A" in Apple Support Communities. When this situation appears, it means that your PC cannot recognize your iDevices.
As a fellow sufferer, I still have words on this topic. A couple of days ago, my PC greeted me with a strange error message: "iTunes could not connect to this iPhone. An unknown error has occurred (0xE800000A)" and left me in a bind. The good news is that iTunes-related errors can usually be fixed if you try certain troubleshooting tips. So, without any further talk, I will show you some reasons for this error, then introduce several methods about how to fix iTunes error 0xe80000A.
- Part 1. Why Does iTunes Error 0xe80000A Occur?
- Part 2. Is There an Easy Way to Repair the iTunes Error 0xe80000A?
- Part 3. How to Fix iTunes Error 0xE80000A in Common Ways?
- Fix 1. Check Some External Factors
- Fix 2. Inspect Some Internal Conditions of Device & Computer
- Fix 3. Upgrade iTunes to the Latest Version
- Fix 4. Reset Lockdown Folder
- Fix 5. Restart iTunes
- Fix 6. Stop iTunes Related Process
- Fix 7. Disable Third-Party Antivirus
- Fix 8. Reset Privacy Settings
- Fix 9. Uninstall & Reinstall iTunes
- Part 4. The Bottom Line
Part 1. Why Does iTunes Error 0xe80000A Occur?
* Damaged Apple USB cable/port
* Your iTunes is not the latest version
* The iTunes software is installed incompletely
* Your iOS or iPadOS device is locked
* Influenced by your other devices plugging on PC
* Some processes in your system background disturb
* Something wrong with your computer
Knowing the possible causes of the error, fixing it should not be a problem for you now. To fix the error, you must avail of the right solutions. You are required to simply take a sneak peek into the below-noted solutions:
Part 2. Is There an Easy Way to Repair the iTunes Error 0xe80000A?
Want to take a shortcut? Joyoshare UltFix iOS System Recovery is the right choice for you. It is an extraordinary iOS repair tool. It can fix 150+ system issues with several clicks, including most iTunes errors (0xE80000A, 9006, 14, 54), black screen, stuck in DFU mode, etc. Joyoshare is compatible with the latest iOS 15. Most important of all, this kind of iOS system recovery can ensure no data loss. In addition, it offers a free Enter/Exit Recovery Mode, which can solve some basic system problems.
Why do you choose Joyoshare:
Easy to use
Not lose your data
Fix more than 150 system issues
How to fix iTunes error 0xE800000A with 4 simple steps:
Step 1Download, Install and Launch Joyoshare UltFix
When the main screen display, you can click the Enter Recovery Mode first, and then click the Start button.
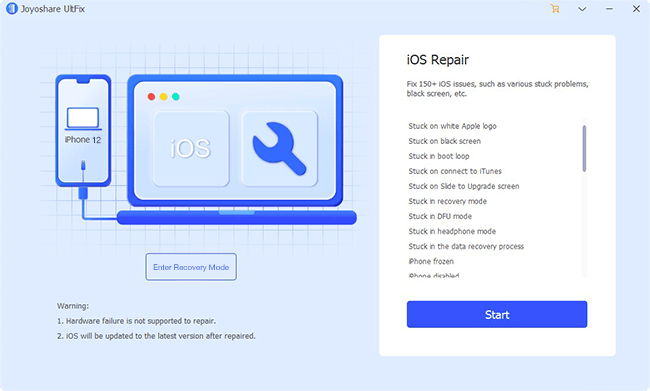
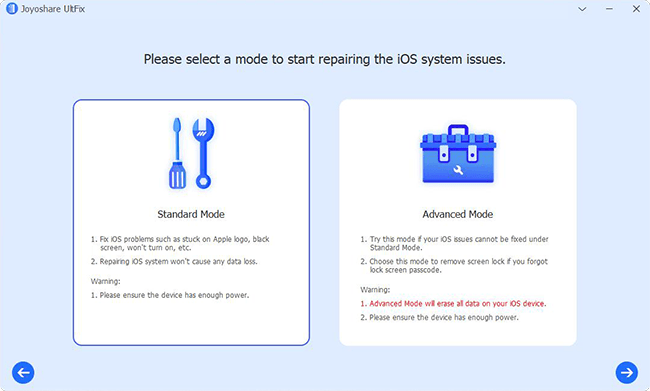
Step 2Select Repair Mode
The Standard Mode can effectively fix the error 0xE80000A. Advanced Mode has more powerful functions. If you want to remove your screen passcode or get your device into Factory Reset, the latter will be better.
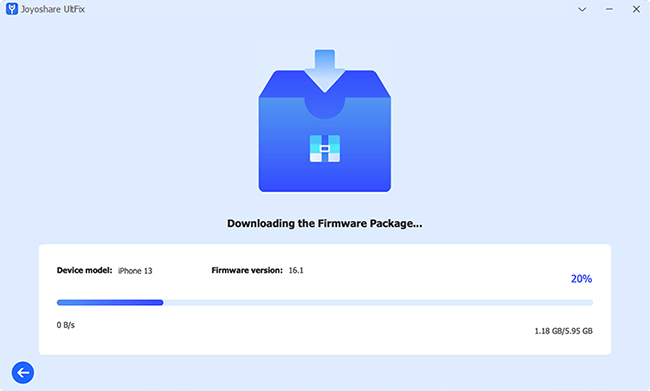
Step 3Download Firmware Package
It can automatically recognize your device's version and Download a suitable one. In this process, you can downgrade your iOS version. And then verify the package.
Step 4Begin to get rid of the iTunes error 0xE80000A
Press the Repair button and wait for it to finish. You have to make sure the cable connects the device and the computer in the whole repairing process.

Part 3. How to Fix iTunes Error 0xE80000A in Common Ways?
If the error exits all the time, your iOS device is equal to a useless one. Here will recommend you some ways targeted to different situations.
Fix 1. Check Some External Factors
1. Inspect the connection between your iDevice and computer. Is the cable loose? Then reconnect it. The cable cannot work? Try another cable.

2. Check for the network on your iOS device.
3. Try another computer.
Fix 2. Inspect Some Internal Conditions of Device & Computer
1. Upgrading your Windows operating system.
2. Restart both your device and computer.
3. Select Trust the computer when your iDevice plugging in.
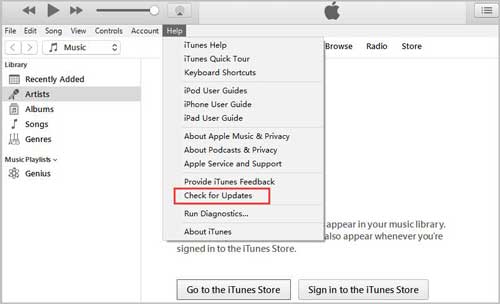
Fix 3. Upgrade iTunes to the Latest Version
If the cable works well, then there may be something wrong with iTunes, such as its outdated version. You can try the second solution as the following step:
Run iTunes → Click the Help button → Select Check for Updates.
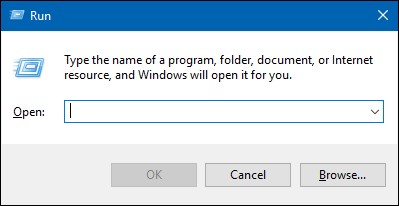
Fix 4. Reset Lockdown Folder
If the iTunes version is the latest, iTunes error 0xe80000A still displays. Then you can try to reset the Lockdown folder. Security certificates are stored in the Lockdown folder and used by iTunes to communicate with previously connected iOS devices. You may get 'Unknown Error 0xE80000A' errors if files in the Lockdown folder are corrupted on your computer.
Here's how to reset the Lockdown folder on windows may fix it:
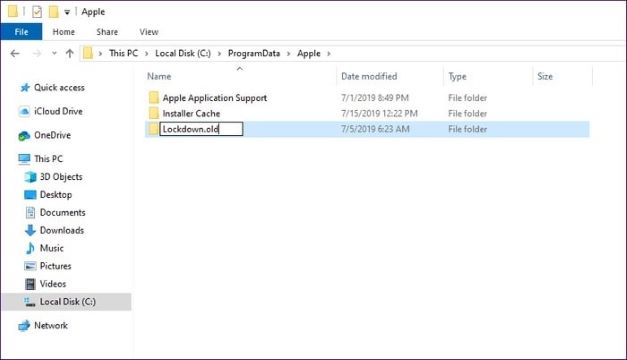
Step 1: Press Windows + R to the Run box. Input %ProgramData% into the Open field, and then click OK.
Step 2: Select the Apple file and double-click it.
Step 3: Choose the Lockdown folder with right-click. Rename the folder to Lockdown.old.
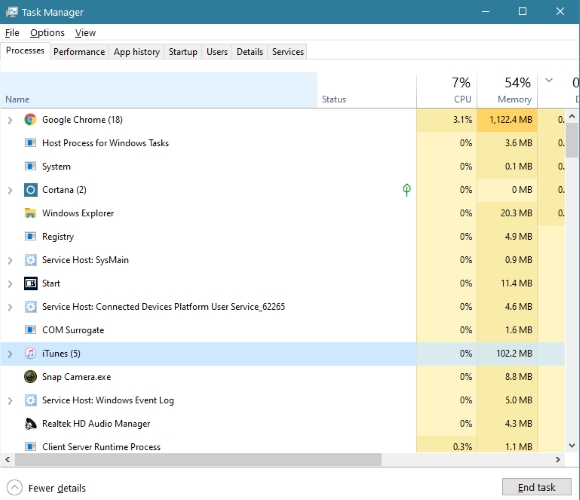
Fix 5. Restart iTunes
Another option is to restart the app directly if iTunes cannot connect to iPhone because of error 0xe80000A. Occasionally, iTunes is likely to encounter an error within its resource files that prevents it from performing some functions.
The following steps will help you restart iTunes properly:
Step 1. Press Windows key + X to start the Quick Access Menu.
Step 2. Next, click on Task Manager → Processes tab → hit iTunes.
Step 3. Finally, click on the End Task button, which can stop it from running on your computer.
Fix 6. Stop iTunes Related Process
When it comes to connecting your iOS device to iTunes, extensions like AppleMobileDeviceService.exe and iTunesHelper.exe are crucial. The USB drivers contained within these programs are necessary for computer recognition of iOS devices like your iPhone. The error message 0xE80000A may be caused by a temporary error in one of the two programs.
In this case, you can fix this by closing the two programs in Task Manager:
Step 1. On your keyboard, press the Windows key + X to start the Quick Access Menu.
Step 2. After that, hit Task Manager → Services tab → locate AppleMobileDeviceService and iTunesHelper in the list.
Step 3. Lastly, simply right-click on the two programs and select Stop from the menu to stop them from running.
Fix 7. Disable Third-Party Antivirus
Having an antivirus program that keeps your system safe from malware can be great, but it can sometimes cause problems when other apps, such as iTunes, are mistakenly flagged as threats and blocked. During the process of connecting your iOS device to iTunes, try to temporarily disable your antivirus software to see if that is the cause of the error.
In addition, you can install the built-in Windows Defender software and permanently remove the antivirus software. Windows Defender will also protect your system from viruses and malware.
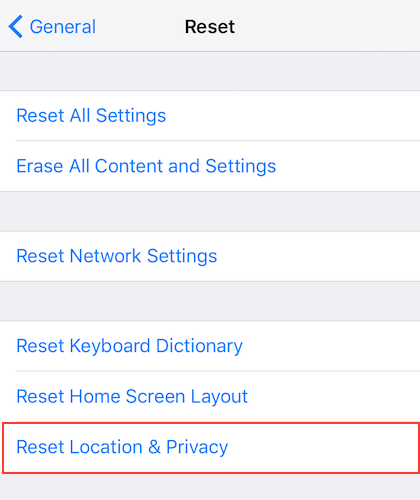
Fix 8. Reset Privacy Settings
iTunes error 0xe80000A can also be caused by corrupted privacy settings on your iOS device. Whenever you connect your device to iTunes for the first time, you grant your computer the trust permissions that relate to privacy settings.
The following steps will help you fix corrupted privacy settings on your iOS device:
Step 1. On your iPhone, open Settings.
Step 2. Inside the Settings, tap on the General → Reset → Reset Location & Privacy → tap on Reset Settings.
Fix 9. Uninstall & Reinstall iTunes
Here's how to delete iTunes and reinstall it:
Step 1: In the search bar, type iTunes.
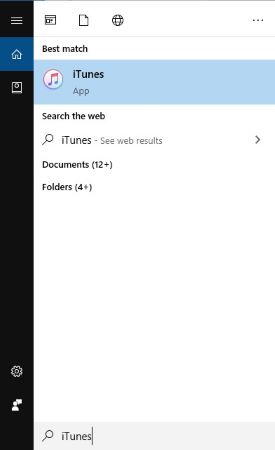
Step 2: Right-click the iTunes application on the search results and select the last option Uninstall.
Step 3: Wait for the process to complete.
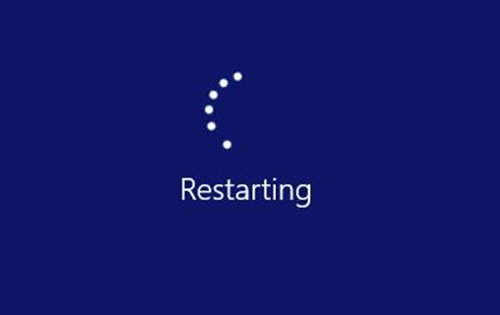
Step 4: Restart your PC and open the Control Panel.
Step 5: Select Apps & Features.
Step 6: Remove the following programs in chronological order:
1. iTunes
2. Apple Software Update
3. Bonjour
4. Apple Application Support (32-bit)
5. Apple Application Support (64-bit)
After uninstalling iTunes successfully from your Windows 10 computer, reinstall iTunes. Get the latest version of iTunes from the Microsoft Store. Follow its guide to install it. Restart your computer again.
Note: If something wrong with iTunes, these methods above can help you to fix it. But they are kind of complicated. If you have taken all the measures and the error still occurs, then you can try a system repair tool as follows. You don't need complex operations to use it. With Joyoshare, you can repair iTunes error 0xE80000A with only some clicks.
Part 4. The Bottom Line
Encountering the unknown iTunes error 0xe80000A on your iPad can be pretty annoying, but fortunately, in this post, we listed down numerous ways you can troubleshoot. Joyoshare UltFix iOS System Recovery should be your best bet for diagnosing the root cause of this problem and permanently fixing it.
