
Q: "Hello! My XR storage is full, but my phone will not allow me to delete photos. I have deleted almost all of my apps, still full. When I try to delete photos, it will either let me delete them. Then they will just reappear, or nothing will happen when I tap the trash bin icon." - jmps1234 from Apple Community
When you have limited storage on iPhone, you may want to delete some files to create more space. Everything is going well while you delete some unwanted apps, messages, and apps. Yet you seem to be unable to delete photos whatever you do. You are not the only one in this kind of situation. Many iPhone users share a similar experience in Apple community and express their doubts. You might wonder why iPhone won't let me delete photos. In this post, we'll explain what you can do to successfully put photos in the trash bin.
- Part 1: Reasons for Photos Won't Delete from iPhone
- Part 2: Fixes to iPhone Won't Let Me Delete Photos
- Part 3: Conclusion
Part 1: Why Won't My iPhone Let Me Delete Photos?
There are three main reasons why you can't delete iPhone photos. If the photos are synced with iTunes or Finder, they could only be deleted when you connect the device to your computer. Besides, once the feature of iCloud Photos is enabled on your iPhone, you would possibly face the same result. Also, there might be a potential software problem with your device, causing the anomaly of photos. Next, we'll explain how to address this problem in these scenarios.
Part 2: How to Delete Photos from iPhone that Won't Delete
With the reasons unveiled, you can make use of the methods below to solve the problem that iPhone won't allow you to delete photos.
2.1 Sync Your iPhone
When your photos are synced to another device, you are unlikely to delete them easily. To solve that, you can connect your iPhone to the computer and remove those photos using iTunes. If you are using a Mac running macOS Catalina10.15 or later, Finder can play the same role.
- Step 1: Plug your iPhone into your PC via a lightning cable. Open iTunes/Finder on your computer.
- Step 2: Click the tiny device icon in iTunes. Alternatively, choose your iPhone under Locations in Finder.
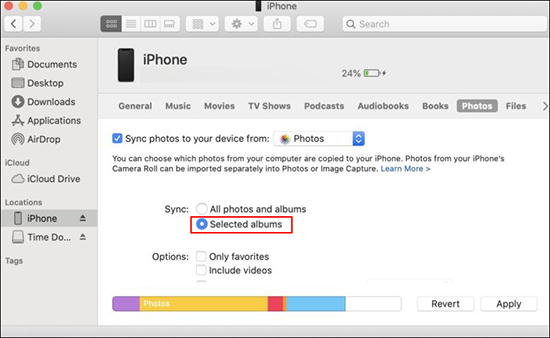
- Step 3: In iTunes, click Selected folders to unselect those photos you want to delete. Then click Apply.
- Step 4: In Finder, choose Selected Albums and unselect those unwanted photos. Then sync your iPhone again and your photos should be removed after that.
2.2 Disable iCloud Photos
If you don't sync your photos to another device with iTunes or Finder, an enabled iCloud Photos option may also stop you from moving your photos to the trash bin. With this feature on, it will keep all photos and videos you store in iCloud. To turn it off, you can:
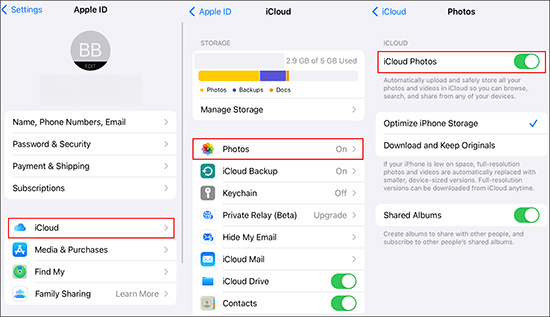
- Step 1: Open Settings app and tap your ID account.
- Step 2: Choose iCloud and click Photos on the next screen.
- Step 3: Locate iCloud Photos and toggle it off.
2.3 Use Repair Tool [Most Effective]
If neither of the methods above could erase photos, the software glitch may be the biggest hindrance. The optimal fix you can try is using a repair tool. Joyoshare UltFix is predominant in fixing iOS system issues. It has built-in dual repair modes, allowing you to fix more than 150 iOS problems. It can quickly solve iPhone unable to load photos or delete photos in the easiest steps. Another major advantage of Joyoshare UltFix is that it won't cause any damage to your data. You can get access to all your data without hassle after the repair process. Meanwhile, it is also convenient to restore iTunes errors with it. And it keeps up with updates. You can use it to fix iOS issues on iPhone running iOS 17 beta.
- Fix iPhone won't delete photos in several clicks
- Update to iOS 17 beta or downgrade it simply and safely
- One click to enter/exit recovery mode for complete free
- Available to factory reset iDevices, restore iDevices, etc.
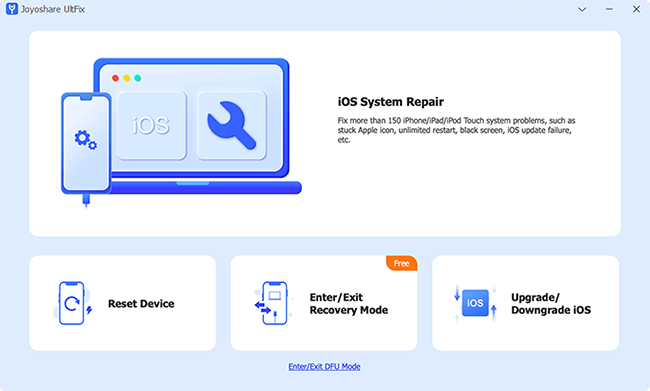
Step 1 Plug iPhone into Your Computer
When you install Joyoshare UltFix on your computer, you need to plug your iPhone into the computer using a USB cable. Open the tool, and select iOS System Repair. Next, continue your operation by clicking Start.
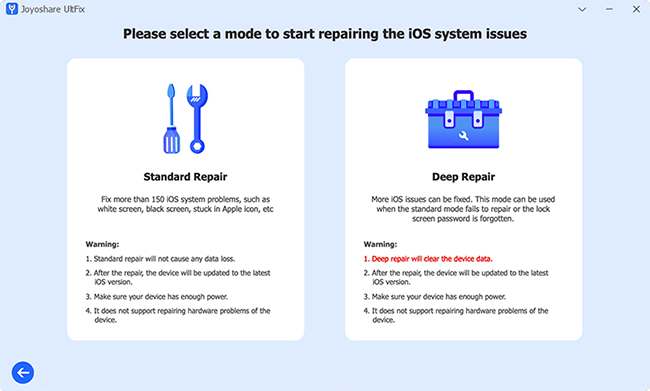
Step 2 Pick Standard Repair Mode
Now, you can gain some fundamental understanding of this tool's dual modes. Standard Repair mode is suitable to solve common iOS problems, while Deep Repair mode is basically for those particularly serious issues. You can select Standard Repair mode to fix iPhone not deleting photos with no data loss.
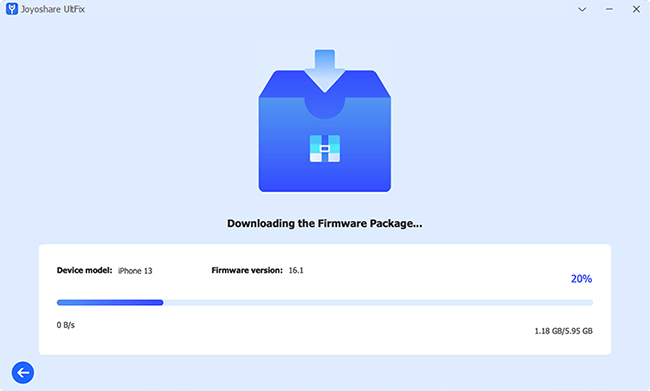
Step 3 Download Matching Firmware Package
Before downloading the firmware package, you need to check the device information carefully. Once there's inaccurate and false, you can correct it manually. Then click Download button to get a matching firmware package.
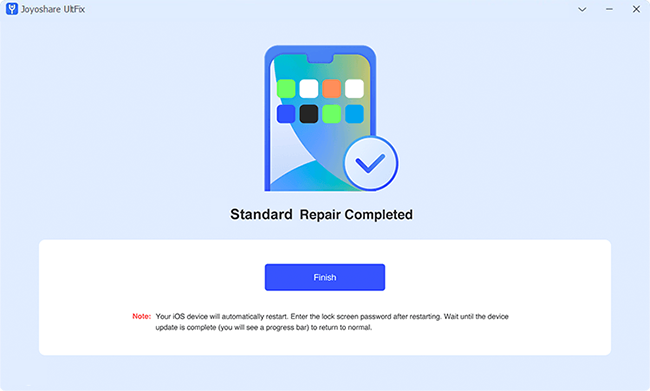
Step 4 Fix Photo Deletion Issue
After the downloading process, click Repair button to unzip the package. Then Joyoshare UltFix will fix the problem automatically in several minutes. Wait patiently and check whether the photos could be removed after repair.
2.4 Restart iPhone
Restarting iPhone is also effective to solve minor iPhone software glitches. When you shut your device down, it will clear the cache and refresh the device's memory. Hence you can reboot your device and see if the photos can be managed.
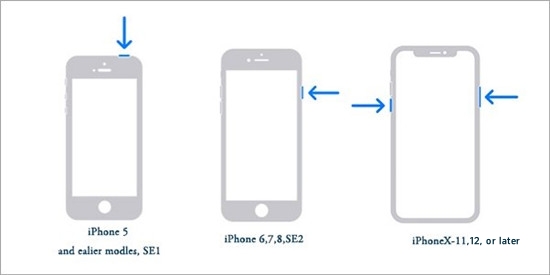
For iPhone X and later: Keep holding the Side button and either Volume button until you see the power slider. Drag that slider to the right. Wait 30 seconds for your device to close down thoroughly. Then keep holding the Side button to open your iPhone.
For other iPhone models: Keep holding the Power button until the power slider shows up. Swipe the slider and wait 30 seconds. Then press the Power button again until the Apple icon appears on your screen.
2.5 Update Software
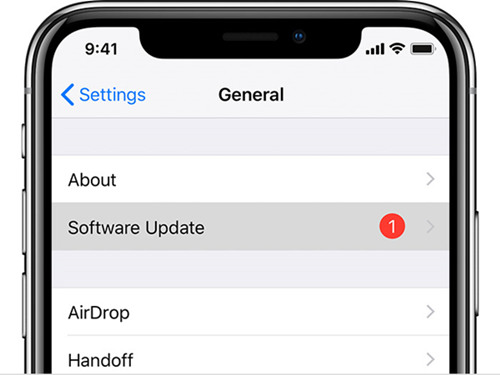
There are many benefits for installing the latest iOS update on your iPhone, such as introducing new features and functions, improving security, and fixing bugs. If you still can't delete photos, you can update your iPhone to fix the problem. To see if there's an available update, open Settings. Then go to General → Software Update. iPhone would detect updates automatically. Tap Download and Install if you see a new update.
2.6 Free Up iPhone Storage
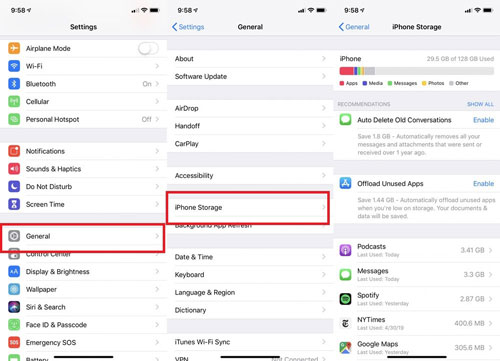
If you are running low on iPhone storage, your iPhone may be reluctant to carry out instructions. That's why you want to delete photos but iPhone won't complete that. You can free up iPhone storage to leave your device running more smoothly. Navigate to Settings → General → iPhone Storage. Then you can get a vivid result that how much space each app occupies. And you could offload or delete some unwanted files to free space.
Part 3: Conclusion
To sum up, we primarily talk about how to fix the problem - iPhone won't let me delete photos. You can sync your iPhone or turn iCloud Photos off to erase photos. If this isn't the case, you can use a professional repair tool, restart your iPhone, update iOS, and manage your storage space. We confirm that your problem would be fixed with all these methods.
