Screen Recorder
Record computer screen without time limit
For most people, a great video recording software would be of great importance to help them record computer screen, including games, streaming movies, Skype video chats, webinars, presentations, etc. Joyoshare VidiKit (Screen Recorder) is such a tool with a comprehensive recording solution to rescue. As a full-featured video recorder, it's able to record desktop screen, gameplay, webcam video, and specific window. Please download and install it as below:
Download, install, and quickly launch Joyoshare VidiKit on your computer. In its main interface, find Recorder → Screen Recorder and click to open it.

To confirm where you'd like to capture, you should click on the drop-down menu on the first section. Then select Full Screen or the fixed recording size, such as 1920x1080, 1024x768, 1280x720, etc. You can also select area to record by scaling and moving the recording window according to your own needs.

Note: Joyoshare VidiKit can record video with audio simultaneously. But if you don't want to capture audio while recording the screen, you can click both System Audio and Microphone Audio icons to disable them. You are also allowed to select different microphone speakers when recording voices from video conference, Skype chat, etc. If you are about to record streaming videos, such as from YouTube, Netflix, you are highly suggested to turn off the microphone sound but only keep the system audio on in order to avoid unexpected noise during the recording process.
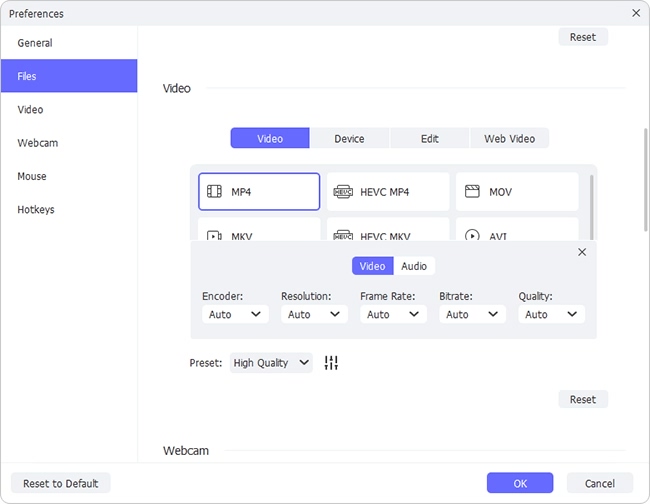
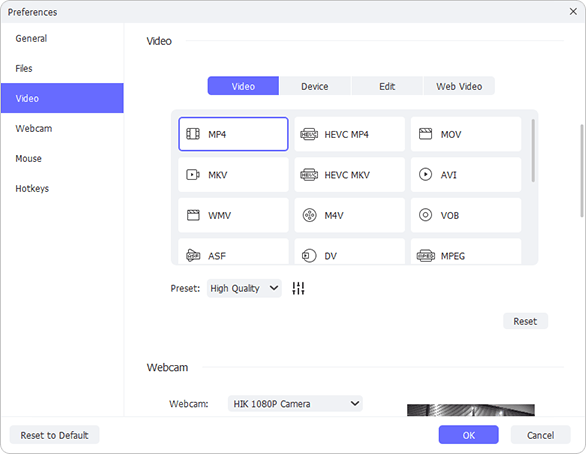
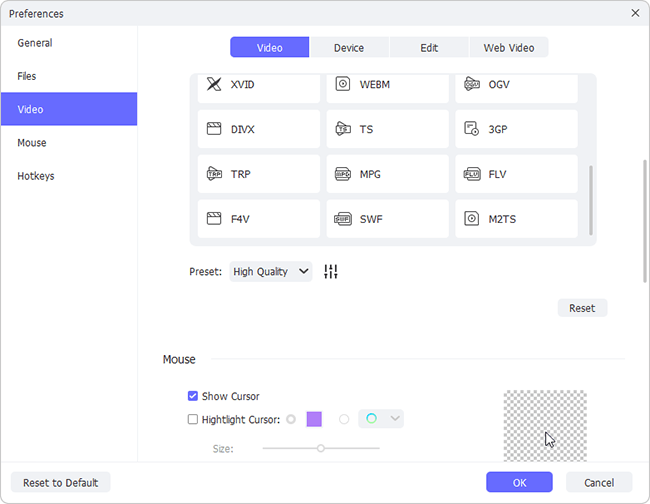
It's handy for you to check recording settings before capturing the screen. Simply click Autostop if you want to stop your recording automatically. Besides, you can click on Preferences to set file output location, choose video format, customize recording hotkeys, personalize cursor effects, and designate webcam based on your requirements.

Currently Joyoshare VidiKit supports a wide range of output formats, including MP4, M4V, AVI, MOV, FLV, YouTube, TikTok, Instagram, iPhone, iPad, Xbox One, PSP, iMovie, Final Cut Pro, ProRes, etc. You can choose whichever you like and set paramters, for instance resolution, codec, frame rate on your own.
Now do anything you want on your computer screen and simply click REC button to start recording ongoing activity in high quality. You can take screenshots, cut videos, and pause anywhere you desire during the recording process.

To finish recording, simply click the Stop button. Then you can preview the recorded files in History window, edit the name, trim the video, and snapshot in your way.

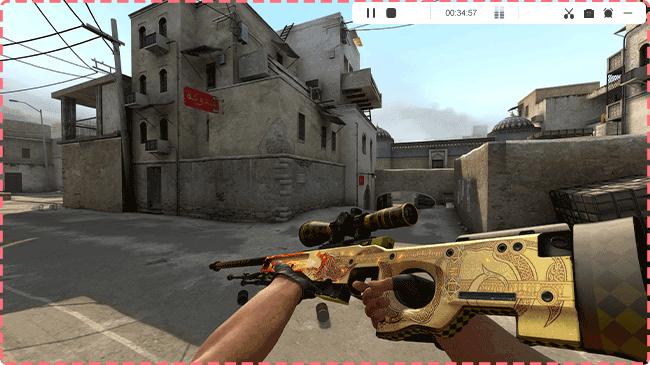
Joyoshare VidiKit supports many mainstream games and helps you to record your highlights. You can at the same time capture in-game music, microphone sound, and your face. The whole recording process can be smooth without frame drops and lag.

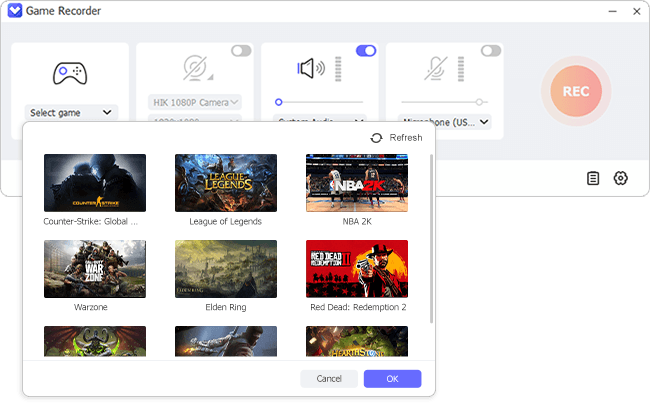
Run Game Recorder under Recorder section in Joyoshare VidiKit. Make sure the game you'd like to record is already open on your computer. Then head to the bottom left corner and click Select game. In the drop-down menu, choose your game and confirm with "OK".
There are System Audio and Microphone Audio sections for you to decide which sound source to capture audio from, and how high the volume is. Also, you can simply click on the clock-shaped "Autostop" button to set a specific end time. If you want the best game recording experience to match your needs, you can hit "Preferences" at the right bottom to set output folder, video format, webcam, mouse, hotkeys and more.
Note: once you select a video output format, you can preset quality and furtherly click on "Setting" to change parameters, like frame rate (up to 240 fps), resolution (up to 4K), encoder, bitrate, etc.
It's time to initiate a game recording process by clicking on the REC button and you can immediately start to play a game. The video alongside audio and webcam will be recorded together. You can take snapshots, trim game footages, and pause to skip unwanted content. As long as you get what you like, click on Stop button and go to pop-up History window for a check.
Launch Joyoshare VidiKit and find Webcam Recorder to open. This program will automatically detect and recognize all camera devices available on your computer and you can freely select the one you want. Moreover, you're allowed to capture system audio and microphone sound. So, make sure you set them based on your own needs.
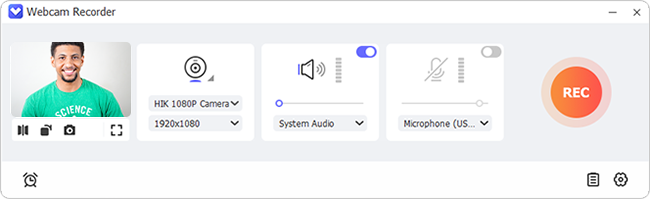
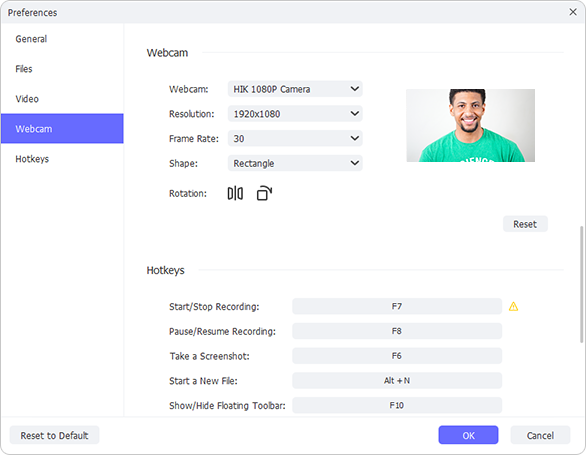
Hit Preferences button at the bottom and a window will pop up that allows you to customize your webcam settings in the way you wish, such as resolution, frame rate, shape, and rotation. Surely, you can check output format, hotkeys and more options at your disposal.
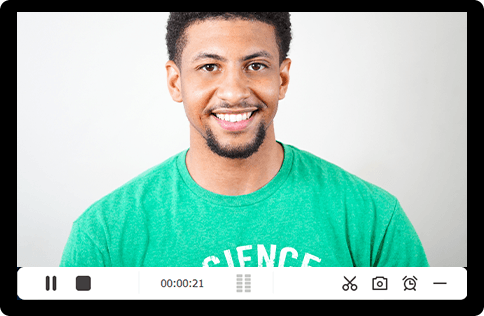
Quickly click on REC button in the main interface and Joyoshare VidiKit will begin webcam video recording. Anything that show in your selected webcam will be captured. Afterwards, you can Stop to save your video(s) and play it in History window.
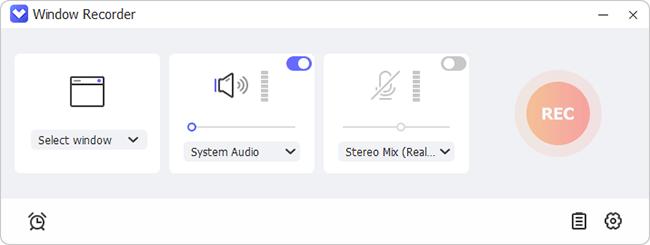
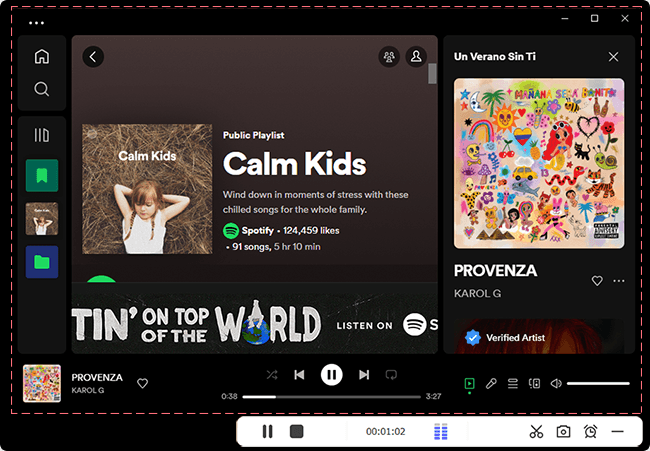
Open Joyoshare VidiKit → Window Recorder and in the main interface you can hit Select window to choose an active window. The program will smartly detect all available windows on your computer so ensure you have made it accessible already. In addition, you can set audio as you want, especially when you capture music from an app.
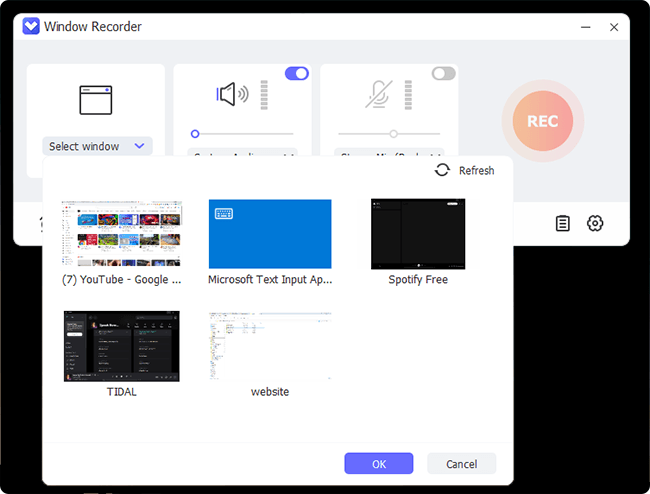
Go forward to the bottom right corner and click on Preferences to call out a new window. Here you should confirm different options for file location, video and screenshot formats, mouse, and hotkeys. Once everything is ready, click on OK to save.
Now you can click on REC button in the program. The target window will be automatically placed in capture area and the recording process will begin soon. You can do anything else on your computer and make the window run in the background. When get desired content recorded, use Stop button to export your file and have a further look at History window.
Record screen video and audio, high quality, no time limit, no watermark!
Copyright © 2026 Joyoshare Studio. All Rights Reserved.