Screencastify extension is reputable and well-known as a screen video recorder for Chrome. It comes without complicated features and satisfies most of users' basic recording needs. Making full use of this free add-on, you can record, edit and share videos without a hitch, no matter you're a student, teacher, corporate trainer, manager, marketer or freelancer. Requiring no additional software installation, you're able to create how-tos, demos, presentations, courseware and more by combining browser tab's activities, audios and webcam. Want to get a closer look at it? Just learn how to use Screencastify extension with us.
- Part 1. How to Use Screencastify Extension for Chrome
- Part 2. Key Features
- Part 3. Pricing
- Part 4. Best Alternative to Screencastify Extension
Part 1. How to Install and Use Screencastify Extension
For users who haven't heard of Screencastify Extension, they may not know where to add and install this plug-in for Chrome, let alone how to use it. If this happens to you, take a moment to read our tutorial below.
Step 1 Install Screencastify Recording Extension
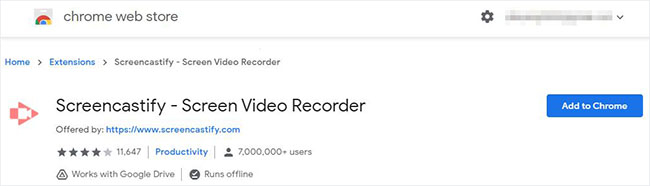
You have two available ways to get this recording extension for Chrome. One is visiting Screencastify official homepage and finding "Add to Chrome (It's free)" button under "Video from everyone" section, which leads you to the Chrome Web Store. The Other is directly Google searching Screencastify extension and heading to Chrome Web Store, which then shows "Add to Chrome" > "Add extension" for you to install it.
Note: Some Mac users who run Catalina system version have reported an error where a "Failed to Start Recording" message appears. If you are the one, you can go to "System Preferences" on Mac > "Security & Privacy" > "Privacy" > "Screen Recording" to check "Google Chrome". By doing this, you can successfully authorize Chrome to make screen recording.
Step 2 Set up Account and Give Permissions
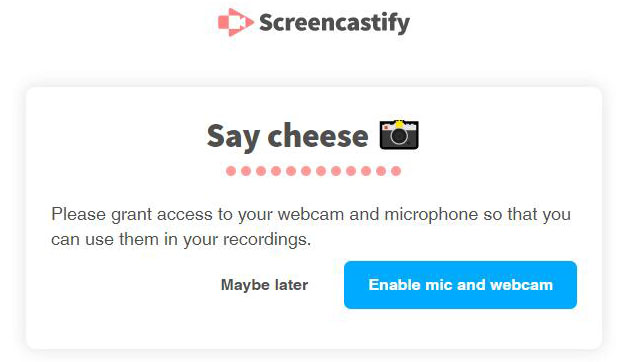
After quick downloading, the icon of Screencastify extension will be automatically shown on your Chrome's top toolbar (if not, you can go to "Extensions" in Chrome to find, enable and pin it). Next, you will be asked to sign in with your Google account, finish personal info settings, authorize to your webcam and microphone, and enable annotations.
Step 3 Configure Recording Settings
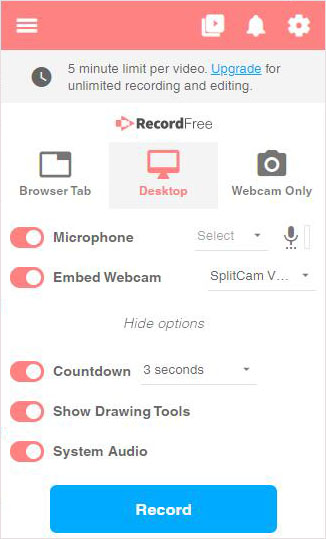
Left-click the extension icon of Screencastify in your Chrome's top toolbar. A window of this screen recording tool will soon pop-up. You can decide whether to record "Browser Tab", "Desktop" or "Webcam Only". Besides, turn on "Microphone", select audio source and enable "Embed Webcam". To press on Show More Options, you can furtherly set Countdown, Show Drawing Tools and System Audio based on your own preferences.
Notably, Screencastify offers more for you to confirm. A gear-shaped "Settings" button is located at the top-right corner, letting change Resize Tab, Limit Resolution, Max Frame Rate and Auto-stop. Or you can right-click the icon of this extension and find "Options". It's possible to change file location for your recorded videos, when to get notifications, configure keyboard shortcuts, make recording settings, optimize microphone audio for voice, enable single application recording, etc.
Step 4 Start to Record Screen Video Using Screencastify
Simply click on "Record" to begin your recording process. You have to choose if you record full screen or a window. After a specific countdown, the on-going activity will be captured and you can use mouse pointer, pen, stickers, rectangle and eraser to edit in real-time. If necessary, you're entitled to stop webcam.

Step 5 Save or Share Recorded Video
Afterward, ask Screencastify to finish the process by using "End Recording" option. A new window will appear in your sight, from where you can name your video, "Open in Editor" to cut, zoom, crop, blur and text. Or directly share with link, publish to YouTube, export as MP4/GIF, etc.

Part 2. Main Features:
After learning through the whole steps above, you know more or less about Screencastify Google extension. To make the main points clear, we've listed its key features as follows. However, how you regard it finally depends on your experience.
- Available to Windows, Mac and Linux
- Three recording modes: Browser Tab, Webcam Only, Desktop
- Get sound from microphone and system and specify audio line
- Embed webcam into recording
- With drawing tools to make annotations in real time
- Offer built-in editor to crop, cut, add text and blur videos
- Advanced options to optimize mic audio and record a single application
- Save recording videos to Google Drive or generate a shareable link
- Publish video to YouTube, send in email, or share to Classroom
- Download file as MP4, animated GIF or export audio only
- No watermark on recorded file in the free version
Part 3. Pricing
Disappointingly, this Screencastify Chrome extension isn't entirely free. As you use it, you'll find that it has 5-minute limit per recording, 5-minute limit per export and one active assignment at a time. Not to be constrained, Screencastify develops different purchasing plans for individuals, teachers and schools. Taking individual pricing as an example, $49 per year for unlimited recording, $49 per year for unlimited exporting, and $99 per year for unlimited active assignments. If you're teacher, a 40% off discount can be offered, with which the Screencastify extension can start with $29 per year for independent function.
Best Alternative to Screencastify Extension
Even though Screencastify extension is quite convenient to install and use, there is also bad feedback from users, such as the fact that it clashes with other installed Chrome extensions, lacks post-processing capabilities, and is relatively time-consuming to save files. In the long run, if you want a good recording experience, a stable, professional and similarly simple-to-operate alternative to Screencastify extension is essential.
Joyoshare VidiKit - Screen Recorder is here one of the most trustworthy tools you can resort to. It synchronously records screen video and audio. The output files can be 1080p 60 FPS. Better yet, it ideally captures sounds from both microphone and system, customizes an area to record, set a schedule, trim video, take screencasts, embed watermark, show clicks, highlight cursor, etc.
- Record video on PC and Mac securely and stably
- High-resolution output without lag
- Record for an unlimited amount of time
- Detect and recognize accessible sound sources to grab audio from
- Options to preset format, shortcuts, effects, watermark, parameters, etc.
