Q:"How to trim just a section in middle of video - leaving beginning and ending?" - Nick from Microsoft Community
There are a lot of situations that come up around us to require post-processing of video files in the way we like. Removing the middle of the video to get only the beginning and end for later use, as Nick asks, is one of the most common basics and what novices often want to know. In fact, it's pretty simple on any operating system, including Windows and Mac. Having checked your needs, this informative post is here to comprehensively demonstrate how to cut the middle of a video, helping you get rid of the noisy and undesired section soon.

- Way 1. Photos App - Windows Video Editor
- Way 2. Joyoshare VidiKit - Windows & Mac
- Way 3. QuickTime - Mac
Part 1. How to Cut Middle Part of Video - Photos Video Editor
Windows users are always enthusiastic about Photos app and willing to ask its built-in video editor to edit media files. There are a set of simple tools, such as Trim, Split, Text, Motion, 3D effects, Filters and Background music, with which you can effortlessly enhance your videos, including cutting out the middle of it.
Step 1: Go ahead to the bottom left corner, click on "Type here to search" tool, type "Video Editor" or "Photos" to have a quick search, and open the program.
Step 2: You'll need to create a new project by clicking on "New Video" and "New Video Project". Name the video file as you want, and next, click the "+ Add" button to add a prepared video file to Photos app. After that, drag it from project library to the bottom storyboard.
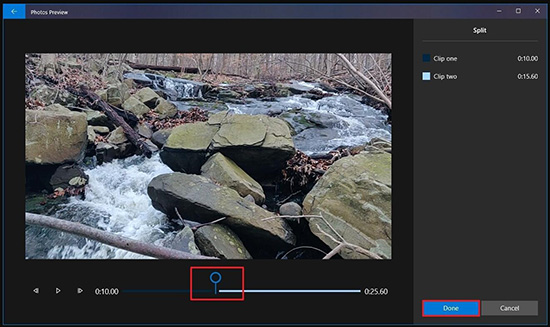
Step 3: Click to choose your video file in the storyboard and afterward hit the "Split" button in the toolbar. In the pop-up window, move the playhead to a wanted place and confirm it with "Done" to successfully split your video into two clips.
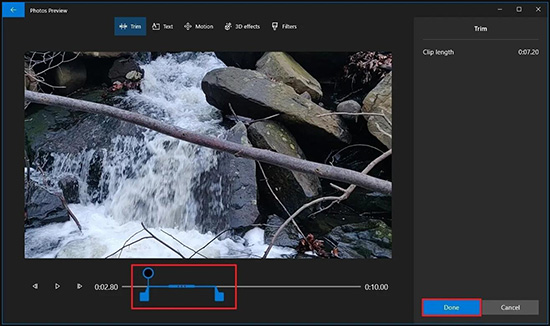
Step 4: Here you can get two clips in the storyboard. Select the second one and click on "Trim" option in the toolbar. You'll have to slide the blue handles to choose the beginning part, that is, the middle section of the whole original imported video file. Click on "Done" button to cut out it.
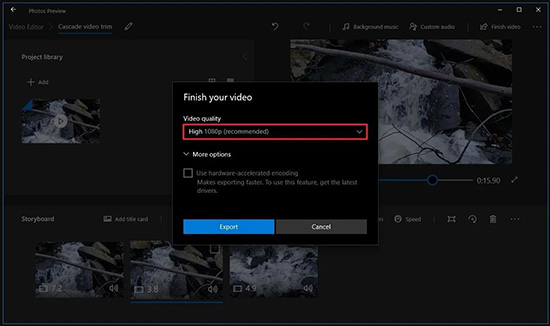
Step 5: The left clips in the storyboard are the beginning and the end of your original video. You can now click on "Finish Video" at the top-right corner to set quality and export video without the middle part.
Part 2. How to Delete the Middle of a Video - Joyoshare VidiKit
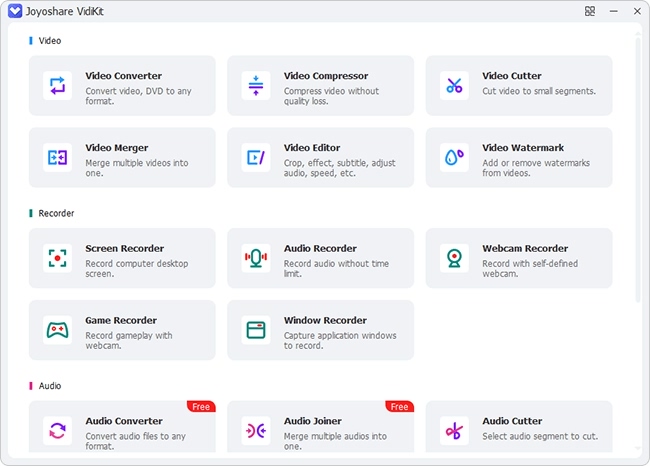
Joyoshare VidiKit - Video Cutter is definitely the best at cutting videos. It perfectly keeps original quality, and at the same time, ideally offers fast speed and high accuracy. By means of this excellent tool, you can freely trim and remove whichever section you want without trouble. Also, it has no format limit so that you can deal with MP4, MPEG, MKV, AVI, MOV, ASF, WMV, FLV and more with ease. The editing tools it provides make it even more special. Taking advantage of it, you can professionally convert, watermark, add effects and filters, change saturation and more.

- Trim the middle of a song and a video easily
- No degradation in quality, 100% original one
- The speed to cut and trim video can be fast, up to 60X
- Set time adjuster with millisecond to improve trimming accuracy
- Provide editor to effect, watermark, add subtitle, etc.
- With stunning options to change resolution, aspect ratio, hue, saturation and more
Step 1 Open video file in video cutter
Download Joyoshare VidiKit to your computer, and finish installation. Have a quick launch of it, and then open "Video Cutter". You can now click on "Open File" button to choose a local video, or straightly drag to add it.
Step 2 Cut out middle of video
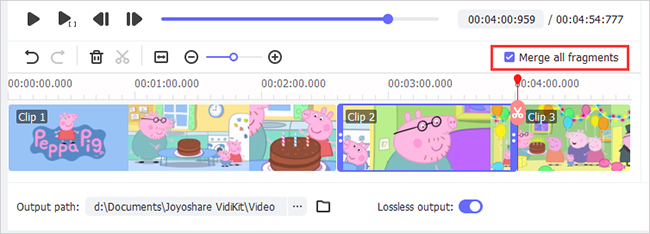
Close the pop-up format window and go back to the main interface of Video Cutter. You can here click on "+" to add one more segment in the list, which is just the same file as what you import. Choose the first one and move the blue sliders to decide which section you want as the beginning. Then for the second one, repeat the same operation to select a section as the end. You therefore, cut out the middle part, and can simply use "Merge all fragments" option to combine both the beginning and the end into a new whole one.
Step 3 Save video and check local file
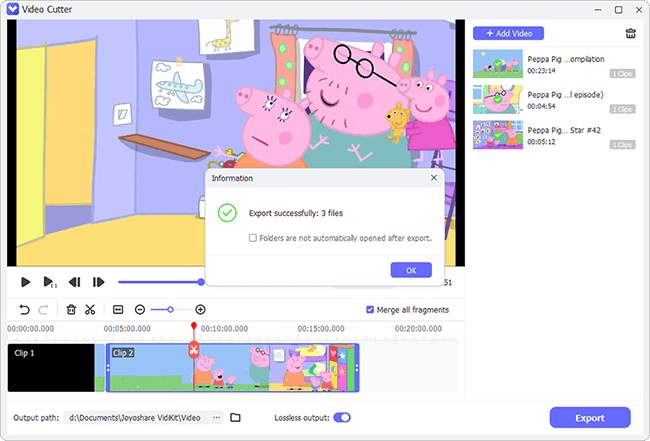
Click on "Export" button on this video cutter in Joyoshare VidiKit. Soon after, your new file will be saved. Go for "Open Folder" to play and check it. See if it meets your needs.
Part 3. How to Trim the Middle of a Video on QuickTime
QuickTime, which comes pre-installed on Mac computers, is popular and appreciated by many users because of its simplicity. More than just playing media files, most people are used to using this official tool for editing videos, such as segmenting and removing certain parts. If you're going to cut out a middle section of your video, don't miss steps as below:
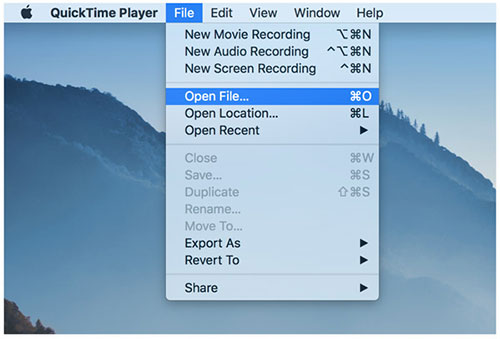
Step 1: Find and open QuickTime Player on your Mac. Then you can simply go to the top toolbar and click on "Open File..." to import a target video that you'd like to edit. Or you can directly right-click your video file and select "Open with" option to play it in QuickTime.
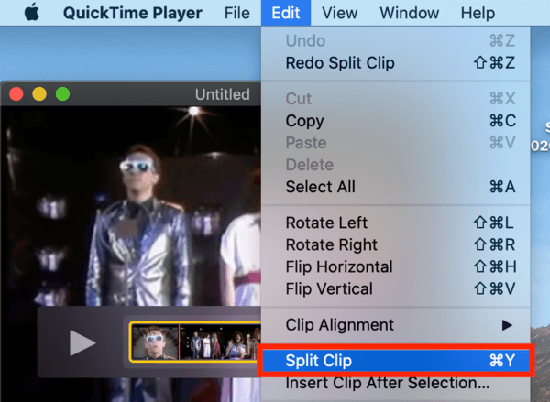
Step 2: Head to "View" on the top menu and choose "Show Clips". You can go to play it right to the point that you'd like to cut it out. If you want locate a position precisely, you can actually make the most of the arrow keys on your computer's keyboard to move a little bit at a time. Once the playhead move to a designated place, you can go to "Edit" → "Split Clip" → "Done", which split your video into two clips. Repeat the same operation for the second clip and as a result you can separate the beginning, the end and the middle.
Step 3: Now click on the independent middle part in the video and press "Delete" on the keyboard to get rid of it. Confirm with "Done". In QuickTime, there are only the beginning and the end.
Step 4: To save your video without the middle part, you can here click on "File" and "Save" in QuickTime on Mac. If the Save button gets grey, you're supposed to go for the upper left corner and click the red close button, simply enter relevant information about your video clip and then finish it with "Save".
Conclusion:
Is it a simple thing for you to process your files after learning how to cut the middle of a video in this post? Right here, the Video Editor from Windows Photos app and QuickTime Player from Mac are pre-installed tools you can resort to. The way to delete the middle part is not complicated. However, if you prefer a more efficient, lossless yet professional solution, don't forget Joyoshare VidiKit. It gives you superexcellent experience in cutting!
