
Running on one of the most raved, efficient, and secure OS, the iPhone is one of the world's most envied smartphones. However, even with its high-performing iOS software, the device is not immune to developing glitches, and iTunes errors are some of the most common issues. Among them is the dreaded and annoying iTunes error 2009, which occurs when restoring or updating your iPhone with iTunes.
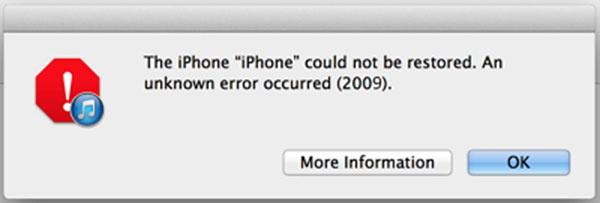
A pop notification will most often display on your screens saying "iPhone could not be restored. An unknown error occurred (2009)", which means that you cannot restore or update your iPhone to the latest software version. If you have been experiencing this problem, you are looking at the right post. In this piece, we will look at some of the most effective solutions for probable cause and how to fix the error code 2009 iTunes.
- Part 1. What Does Error 2009 Mean on iTunes?
- Part 2. How to Fix iTunes Error 2009?
- Method 1. Fix iTunes Error 2009 with Zero Loss in Joyoshare UltFix [Easy & Effective]
- Method 2. Check USB Connection
- Method 3. Reboot Computer and iPhone
- Method 4. Update, Run and Disable Antivirus Software
- Method 5. Disable iTunes Helper
- Method 6. Update iTunes to the Latest Version
- Method 7. Uninstall iTunes and Re-install
- Part 3. How to Avoid iTunes Error 2009?
- Part 4. Conclusion
Part 1. What Does Error 2009 Mean on iTunes?
There could be several causes when you seriously experience iTunes error 2009. You should know the main reasons for this error. The reasons are listed below:
* Outdated iTunes version
* Outdated security software
* Corrupt iTunes or OS files
* Virus or malware infection
* Deleted iTunes related files
* Using a faulty USB cable
* Damaged operating systems
* Bad Connection between iPhone and computer
Part 2. How to Fix iTunes Error 2009?
Method 1. Fix iTunes Error 2009 with Zero Loss in Joyoshare UltFix
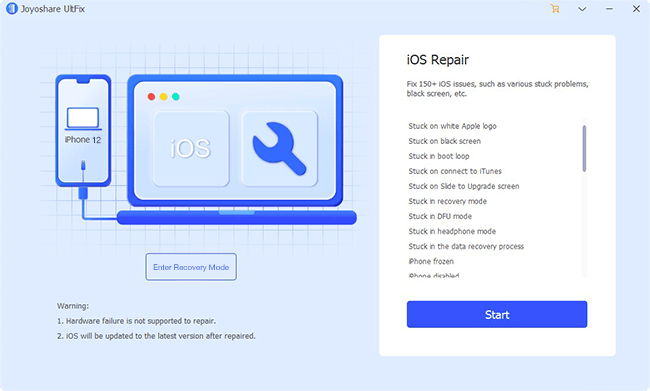
If your iPhone has a software glitch, don't hesitate to use this time-saving solution. You need the right tool for the job. Here, we highly recommend that you use the Joyoshare UltFix iOS Recovery Tool. It is a top and professional tool built to help iOS device users fix iOS related problems and, at the same time, update their devices to the latest iOS version without data loss. The program comes with two flexible fixing alternatives, i.e., Standard Mode and Advanced Mode, and is available for Windows and Mac OS.

- Best iOS system recovery tool to fix various iTunes errors
- Support all iDevice models and the newest iOS version
- Standard Mode to repair iOS system issues without data loss
- It can repair 150+ possible iOS problems
- One-click to let any iDevice enter/exit recovery mode for free
Here is a detailed guide on you can solve the iTunes error code 2009 using Joyoshare UltFix:
Step 1Launch Joyoshare and Connect Your iPhone
Launch Joyoshare UltFix on your PC and go to connect your iPhone to the PC using a genuine USB cable. After the iPhone is detected, one-click "Enter Recovery Mode" to put your device into recovery mode. Then, proceed with the "Start" option.
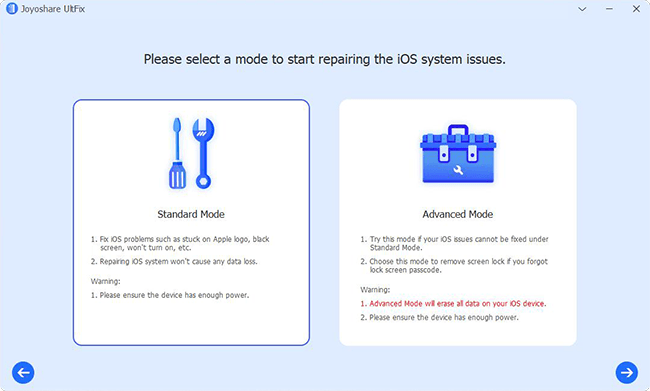
Step 2Select Repair Mode
Two repair options will appear on the next screen. Select the Standard Mode, which ensures that your iPhone data remains intact. When the issue couldn't be repaired with Standard Mode, use the Advanced Mode as a last resort.
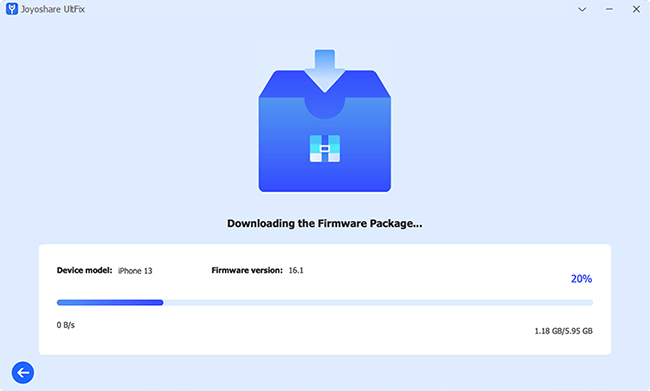
Step 3Download and Verify Firmware Package
Click on "Next" to get ready to download the firmware. Confirm whether the package matches your iPhone device info before hitting "Download" to begin the download process. Once downloaded, it is going to be verified automatically.
Step 4Fix iPhone Restore Error 2009
Hit the "Repair" option to get the firmware package unzipped and begin the repair process. Ensure that your device is connected all through the process. When it is done, boot your device to see if the problem is solved. This should fully resolve the iTunes error 2009 issue.

Method 2. Check USB Connection
Before moving to more complex solutions, you should begin by taking care of the basics, like checking your USB connection. Remember, using a faulty cable could result in an "iPhone could not be restored error 2009" notification.
See if the cable is connected as required. Also, make sure that you are using a genuine Apple USB cable. You can borrow a working cable from your friend just to ensure that the problem is not from using a faulty cable.

Method 3. Reboot Computer and iPhone
Sounds like a cliché, does it? I mean, it is the most common thing you will hear people saying every time their devices misbehave, "try restarting your device." Well, for sure, it works. Restarting both devices helps eliminate occurring software errors that could be the reason for your predicament. This means your devices get a fresh start.
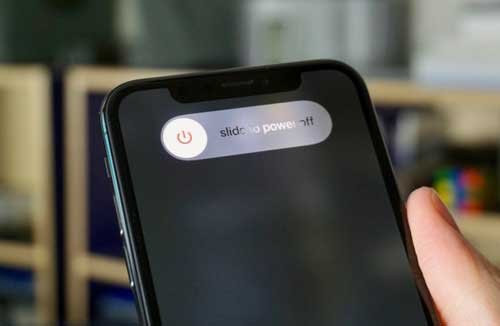
Step 1: Simultaneously holding the Sleep/Wake button and the Lower Volume button. A Sleep/Wake button is located on the right side of the iPhone X, as well as later models.
Step 2: Move the Slide to Power Off slider to the right.
Step 3: When the screen is black and nothing is showing on it, press and hold the Sleep/Wake button until the Apple logo appears and the phone is turned back on.
If you are an iPhone SE, iPhone 8, or earlier user, you can simply turn off your iPhone by holding down the Sleep/Wake button until the slider appears.
Method 4. Update, Run and Disable Antivirus Software
As we said earlier, it is quite possible that the iTunes error 2009 could result from a virus infection. To eliminate this possibility, consider updating your security software, do a full scan of your PC to clean up any malware.
After that, you need to disable it temporarily. Most third-party security software is equipped with a firewall that may be barring iTunes from accessing the Apple servers and hence the error. Go to the settings menu on your security software to see how you can disable it.
Method 5. Disable iTunes Helper
If the previous solutions fail to work, maybe the iTunes helper is responsible for the error 2009 iTunes. It would help if you considered disabling it first. Here is how you get around that!
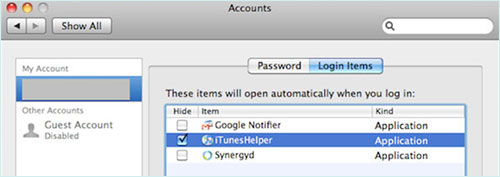
On Mac:
Go to the System Preference → Account and click on the "Login Items". You find the "iTunes Helper" on the items list and disable it.
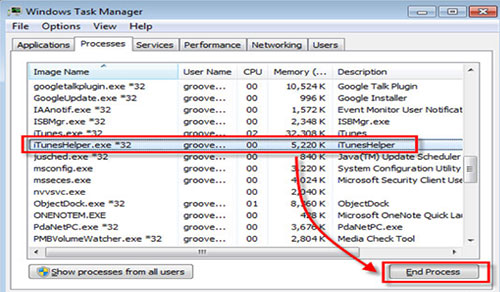
On Windows:
Click the "Start" option, open and run Command. Type 'MsConsfig', and hit "Enter." Find "iTunes Helper" and disable it.
Method 6. Update iTunes to the Latest Version
If the unknown error 2009 on iTunes still, apply the next solving unique and precise techniques. Now, you should check whether there is an available update for iTunes.
On Windows:
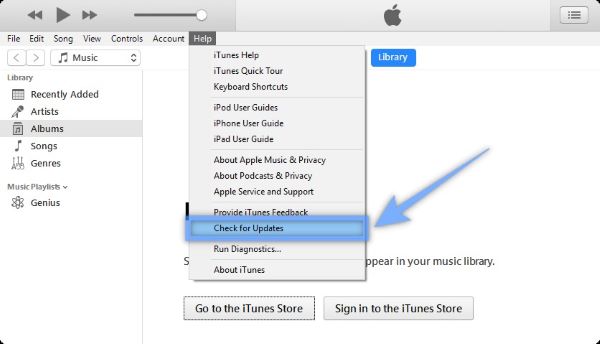
Step 1: Start by opening iTunes on your computer.
Step 2: On the top menu bar, tap on the Help option.
Step 3: Inside the drop-down menu bar, click on Check for Updates.
Step 4: Follow the on-screen instruction to finish the update.
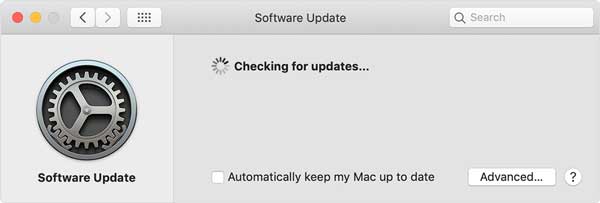
On Mac:
Step 1: Open iTunes and click on the iTunes menu.
Step 2: Choose Check for Update.
Step 3: iTunes will connect to Apple's servers and check for updates.
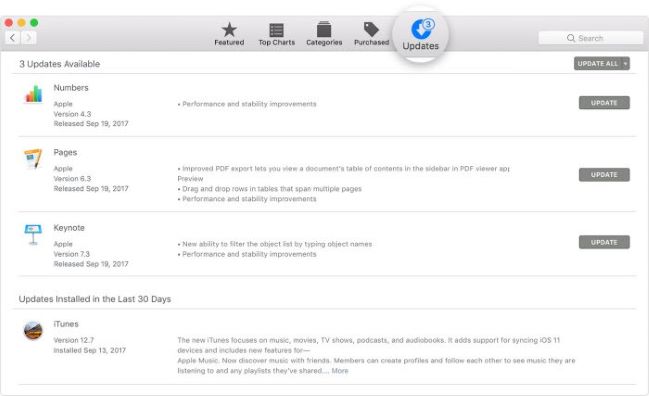
Updates for iTunes can sometimes be found in the Mac App Store if they aren't available in iTunes.
Here's how to use the Mac App Store to check for iTunes updates:
Step 1: Ensure you've quit iTunes.
Step 2: Open the Mac App Store.
Step 3: Click on the Update tab.
Step 4: The Mac App Store will check Apple's servers for updates. When an update is found, an Update button will appear. You can download the update by clicking the button.
Note: If you use a Mac with macOS Catalina or newer installed, there is no need to make update. Apple has separated it into different apps and you can directly connect your iPhone for update or restore in Finder.
Method 7. Uninstall iTunes and Re-install
You must be running an up-to-date iTunes app. Also, to ensure that the files are not corrupt, you should install new software. First, you need to uninstall the existing one. To install it again, browse https://www.apple.com/itunes/download/. It is here that you will get the update and legit iTunes application. After that, check if iTunes error 2009 has been rectified.
Part 3. How to Avoid iTunes Error 2009?
You should practice effective methods to prevent and get rid of this iTunes error 2009, or if you have already experienced it, you should implement them now to prevent it from happening again.
The key point is to keep your original USB cable with your device at all times. Apple users are advised to do this anytime they connect their iOS device to a computer or USB port. You could try switching to a USB cable that comes from Apple if you don't have the original. USB cables shouldn't be plugged into keyboards. If necessary, change the USB port using another computer.
Part 4. Conclusion
If you have been having a problem restoring or updating due to the iTunes error 2009, we hope you have found the curing pill for your suffering. We have in this article featured some top solutions to remedy your problem. The ball is now on your coat; all that is required of you is to try them out and find the best solution for yourself.
For instance, you can try using the Joyoshare UltFix to fix the issue. The program is easy to use, efficient and solves your problem within no time and without data loss. You can always download the app for the Joyoshare UltFix official site. If the problem persists, you can contact Apple customer support for more alternative solutions.
