Q:"I shot some Live Photos with my iPhone X and want to save them as videos. I searched on the web but couldn't find a way. Is there anyone who can give me some advice? Thank you." - Ale from Apple Forum
With the introduction of Live Photo by Apple, you can now take interesting animated pictures. But when you want to share these Live Photos with others or use them further, they will become static images. So, how to export Live Photos as videos or GIFs with ease? Don't be desperate now, because that is what we're going to take about in this article.
- Solution 1. Export Live Photo as Video by Joyoshare
- Solution 2. Export Live Photo from Photos on a Mac
Part 1. Professional Live Photo to Video Converter – Joyoshare LivePhoto Converter
In case you need to export Live Photo as video or GIF, one of the easiest ways is to use a third-party tool like Joyoshare LivePhoto Converter. This is a professional and smart photo converting tool that can help users easily convert any Live Photo to video in high quality at a super fast speed.
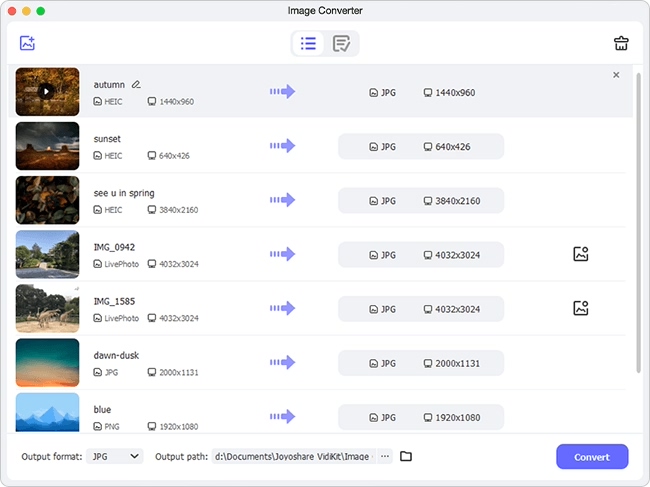
Joyoshare LivePhoto Converter not only enables you to convert Live Photos to GIFs, it can also convert them to other static pictures in the formats of PNG, JPG, BMP, WEBP and BMP, etc. individually or in bulk. Additionally, you're also allowed to preview and selectively choose from dozens of different frames of the original live picture file and convert Live Photo to still images. Moreover, you can also customize output preferences as you like such as adjusting resolution, output quality, and aspect ratio and so on.
Main Features of Joyoshare LivePhoto Converter:
Easily Turn Live Photo into video with high quality retained
Allow users to preview and edit photos in real time
Support both single and batch conversion
Convert Live Photo to GIF, as well as other still images
Now let's go to see how to export Live Photo as video with Joyoshare LivePhoto Converter at every step. Joyoshare program is available for both Windows and Mac system and here we will show you the Mac version.
Step 1 Sync required Live Photos to Mac
First of all, connect your device to your Mac with a USB cord, and then transfer your target live pictures to the computer. Then launch Joyoshare LivePhoto Converter for Mac on the desktop.
Step 2 Add Live Photos
Now you can import these Live Photos to Joyoshare LivePhoto Converter app by clicking "Add file" button or simply dragging and dropping to your Mac. Remember that one .jpg file and one .mov/.mp4 file consist of one Live Photo file, so you need to import them both at a time.
Step 3 Choose output format
Then click the "Format" icon to select output formats. Here we choose GIF option to export Live Photo as video. You can also change the resolution or keep the original aspect ratio according to your needs.
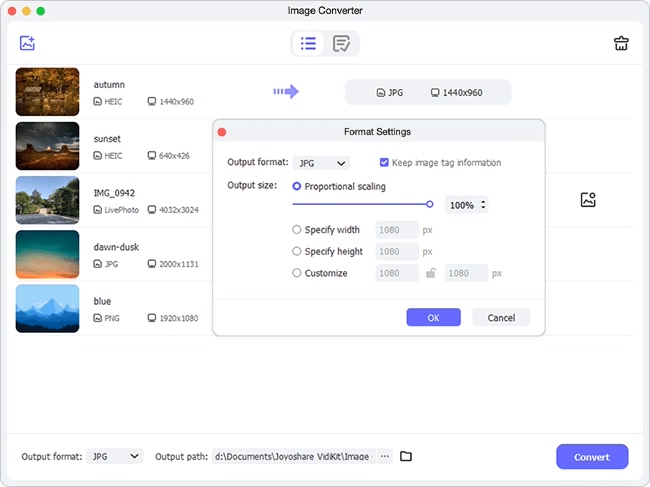
Note: Joyoshare Mac LivePhoto Converter also gives users freedom to preview and edit Live Photos before conversion, such as rename the files, delete unwanted photos, play the Live Photo files, etc.
Step 4 Turn Live Photo into video
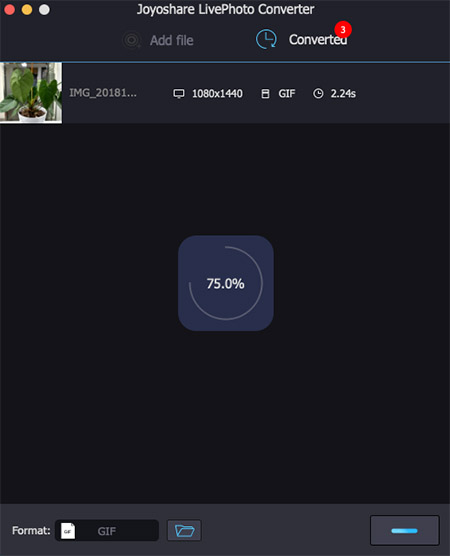
Afterwards, you can press the "Convert" button at the lower right corner to start to extract video from Live Photos and save it in shareable GIF format. A few seconds later, you can find all converted Live Photos in the "Converted" file.
Part 2. How to Export Live Photos as Video on Mac Directly
The second method to save Live Photos as video is to export photos in their original file format. So, a Live Photo will be exported as two separate parts: a still image file and a video file. You can have a try by following the step-by-step guide below:
Step 1: Transfer Live Photos into your Photos library on Mac and then select the ones you want to export;
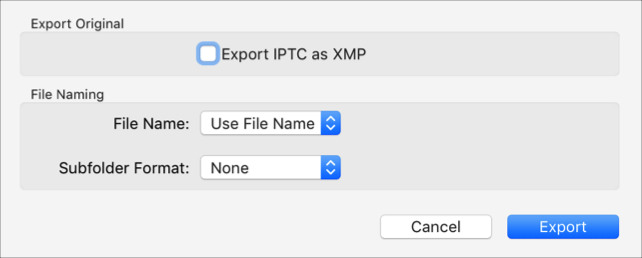
Step 2: Go to the "File" > "Export" > "Export Unmodified Original", and tick the "Export IPTC as XMP" option;
Step 3: Click the "File Name" popup menu and choose the "how to name the exported files" (optional);
Step 4: Click the "Subfolder Format" popup menu and choose the "how to divide the exported files into folders" option. You can export pictures from different moments or select "None" to export the photos as individual files without subfolders;
Step 5: Press the blue "Export" button and select the location to save the exported photo files. Then click the "Export Originals" to save Live Photos as videos.
