








 VidiKit (21-in-1 Toolkit) >





iPhone screen recording is perfect for capturing gaming highlights, bugs, or tutorials, but raw footage often includes awkward moments from starting or stopping the capture. Fortunately, you do not need expensive software to fix these issues. Apple's built-in Photos app and iMovie provide robust editing tools that allow you to easily trim and refine your clips directly on your device.
For users requiring precision editing or advanced audio cleaning, desktop software offers a significant upgrade over mobile options. This guide covers both approaches, starting with the convenient native iPhone methods before demonstrating professional desktop solutions for those needing a higher level of control.
- Part 1. How to Editor Screen Recording on iPhone via Photos App
- Part 2. Edit Screen Recording on iPhone Using Apple iMovie (Free)
- Part 3. Edit Screen Recording Video Using Joyoshare VidiKit (Mac/Win) [Hot]
- Part 4. Pro Tips for Better Screen Recordings
- Part 5. Conclusion
Part 1. How to Editor Screen Recording on iPhone via Photos App
For 90% of users, the native Photos app is all you need. Apple has integrated non-destructive video editing capabilities that allow you to polish your screen recordings in seconds.
How to Trim the Start and End
The most common edit required is removing the "setup" and "teardown" phases—specifically, the part where you pull down the Control Center.
- Step 1. Open the Photos app and select your screen recording.
- Step 2. Tap the Edit button in the top right corner.
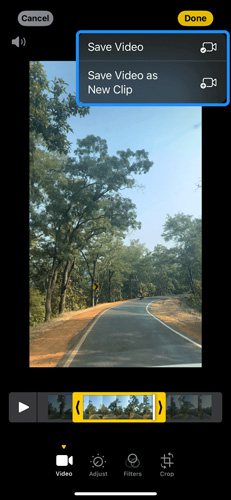
- Step 3. Look at the timeline bar at the bottom. You will see a frame-by-frame representation flanked by yellow arrows (handles).
- Step 4. Drag the left yellow arrow to the right to cut out the beginning.
- Step 5. Drag the right yellow arrow to the left to cut out the end.
- Step 6. Tap Done and choose Save Video (overwrite) or Save Video as New Clip.
Cropping Video Dimensions
Sometimes you record the whole screen but only want to show a specific Instagram post or game area.
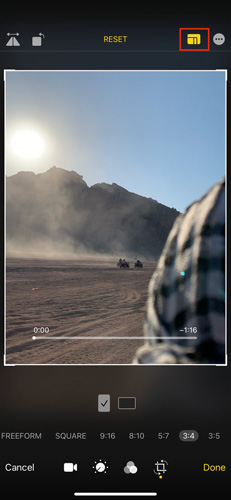
- Step 1. In Edit mode, tap the Crop/Rotate icon (bottom of screen).
- Step 2. Drag the corners of the white grid to frame the area you want to keep.
- Step 3. Tap the Aspect Ratio icon (top right) to select presets like Square or 16:9.
Part 2. Edit Screen Recording on iPhone Using Apple iMovie (Free)
If the Photos app is the "scissor," iMovie is the sewing machine. It allows you to stitch clips together and add text.
Combining Multiple Screen Recordings
- Step 1: Open iMovie and tap Start New Project > Movie.
- Step 2: Select your screen recording clips.
- Step 3: Tap Create Movie.
- Step 4: Drag clips to reorder them or tap the transition icon between clips to change the fade style.
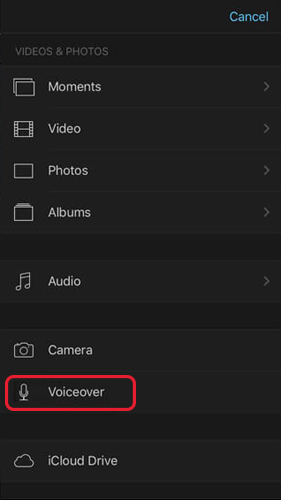
Adding Voiceovers
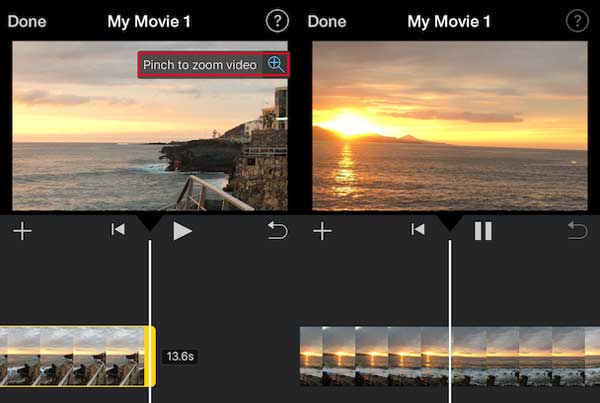
- Step 1: Scroll the timeline to where you want to speak.
- Step 2: Tap the + button > Voiceover.
- Step 3: Tap Record after the countdown to narrate your action.
Part 3. Edit Screen Recording Video Using Joyoshare VidiKit (Mac/Win)
Sometimes, the iPhone's small screen isn't enough. If your screen recording has poor audio quality—such as background hiss, low volume, or requires precise equalization—transferring the file to a computer is your best bet.
Joyoshare VidiKit - Video Editor is a powerful all-in-one toolbox for Mac and Windows that excels at fixing these specific issues without the learning curve of professional software like Adobe Premiere. It is particularly useful if you recorded a tutorial or presentation and need the voice clarity to be perfect.

- Crop video files with high quality intact
- Preview function is available in real time
- Support multiple video formats and devices
- With preset aspect ratio to better match the video
- Built-in editor to trim, effect, subtitle, watermark and adjust
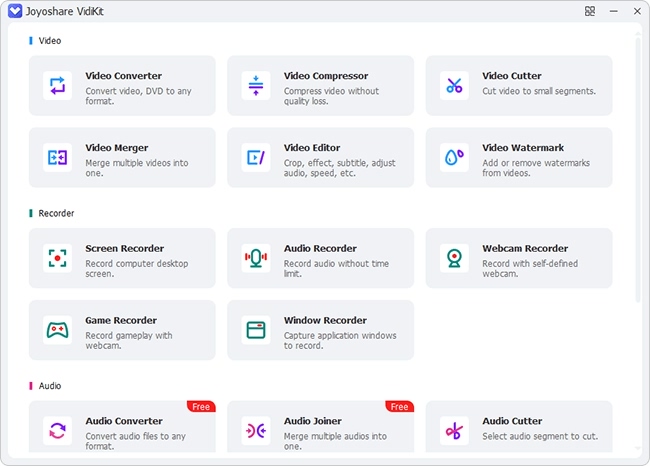
Step 1 Launch the Video Editor
Open Joyoshare VidiKit on your computer. In the main interface, locate the "Video Editor" section. Click to open the editor.
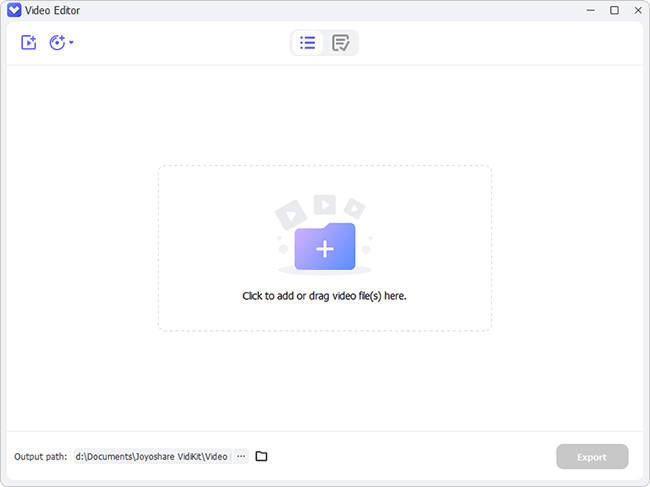
Step 2 Import Your Screen Recording
Drag and drop your iPhone screen recording (transferred via AirDrop, iCloud, or cable) into the interface. Alternatively, click the Add Files button (usually a "+" icon) to browse your folders.
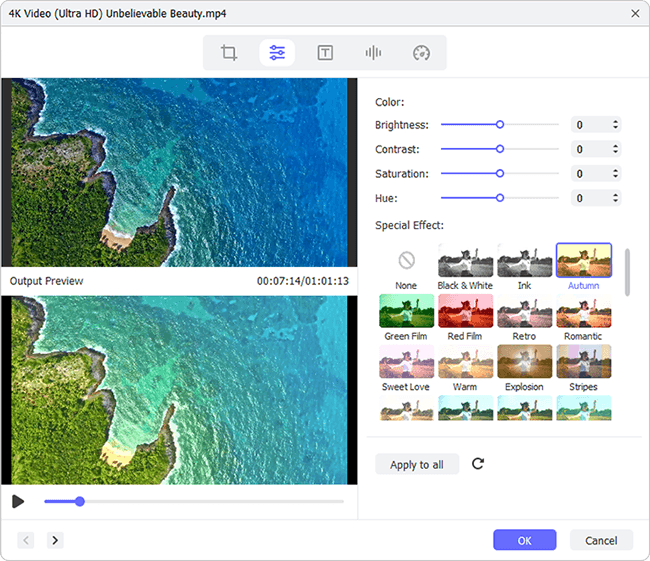
Step 3 Edit the Recorded Video
Here you can no edit your recorded video by using Joyoshare Vidikit. The program provides powerful features, allowing users to crop, change color, adjust voice, speed up or down, etc. After editing, just click on the OK button.
Step 4 Export the Polished Video
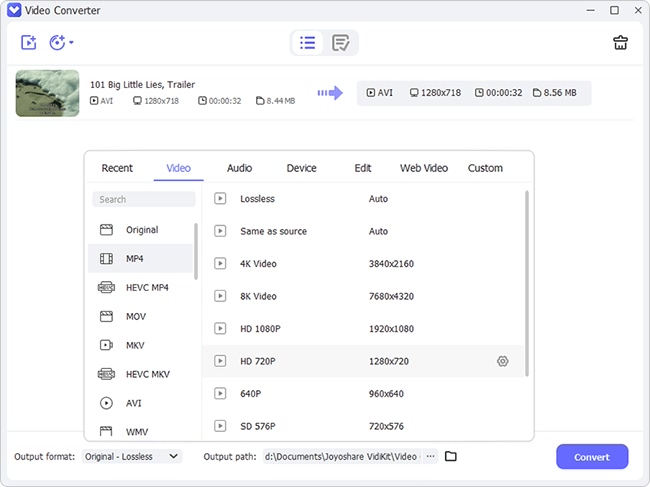
Once the audio sounds crisp, choose your output format (MP4 is best for sharing). Click Export to save the video to your computer.
Part 4. Pro Tips for Better Screen Recordings
Save Video vs. Save Video as New Clip
Save Video: Overwrites the file. You can "Revert" later. Saves space.
Save Video as New Clip: Creates a separate copy. Safest option for big edits.
Optimizing Control Center Settings
Before you record, decide on the microphone:
- Step 1: Open Control Center.
- Step 2: Long-press the Screen Recording icon.
- Step 3: Toggle Microphone On for voiceovers, or Off for internal system sounds only.
Conclusion
Mastering iPhone screen recording edits elevates your content. Use the native Photos app for quick trims or iMovie to combine multiple clips for storytelling. For advanced precision and superior audio, export footage to desktop tools like Joyoshare VidiKit. Start with the software that matches your immediate needs and upgrade as your editing abilities develop.