Looking to enhance your QuickTime video with a voiceover, background music, or a new audio track? Whether you want to improve the sound quality of your footage, create a tutorial, or dub a movie, adding audio doesn't have to be complicated. While QuickTime Player is primarily known as a media player, it actually offers hidden, straightforward features to merge audio and video files on your Mac.
If you are wondering how to add audio to a QuickTime video, you have come to the right place. In this comprehensive guide, we will walk you through the exact steps to insert, replace, and sync audio tracks seamlessly—no advanced editing skills required.
- Part 1. How to Add an Audio Track to QuickTime Video Directly
- Part 2. Method 2. How to Replace Original Audio in a QuickTime Video
- Part 3. Best QuickTime Alternative to Add and Sync Audio
- Part 4. FAQs About Adding Audio to QuickTime Video
Part 1. How to Add Audio to QuickTime Video
QuickTime makes it extremely easy to add a secondary audio track to a video. You can synchronize background music, narration, or matching sound effects. However, before you start, ensure both your video and audio files are in Apple-compatible formats.
- 🎬 Video Formats: .MOV, .MP4, .M4V
- 🎵 Audio Formats: .MP3, .M4A (Apple's standard, includes AAC), .WAV, .AIFF
Step 1 Open Target Video with QuickTime
On your Mac computer, locate the target video file. Simply double-click it to open it in QuickTime Player by default. If it opens in another app, right-click the file and select Open With > QuickTime Player.

Step 2 Drag and Drop the Audio File
Locate your audio file (such as an .mp3 or .m4a file) on your Mac. Drag the audio file and drop it directly onto the QuickTime Player window where your video is currently playing.

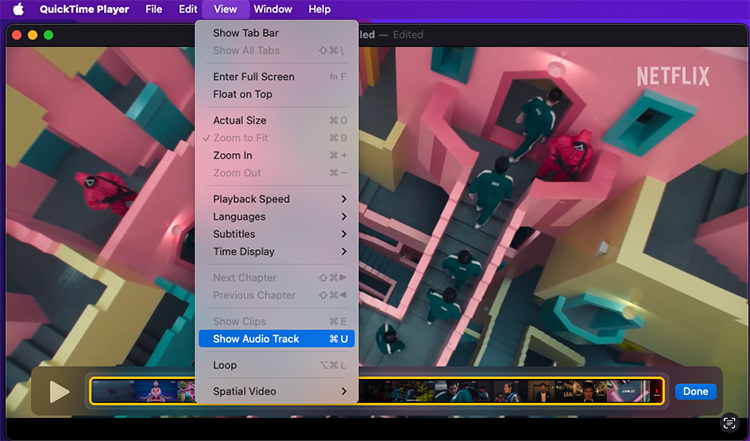
After dropping the file, a timeline will appear at the bottom of the QuickTime interface, displaying your video track and the newly added audio track underneath it. Click on the Done button to confirm the addition.
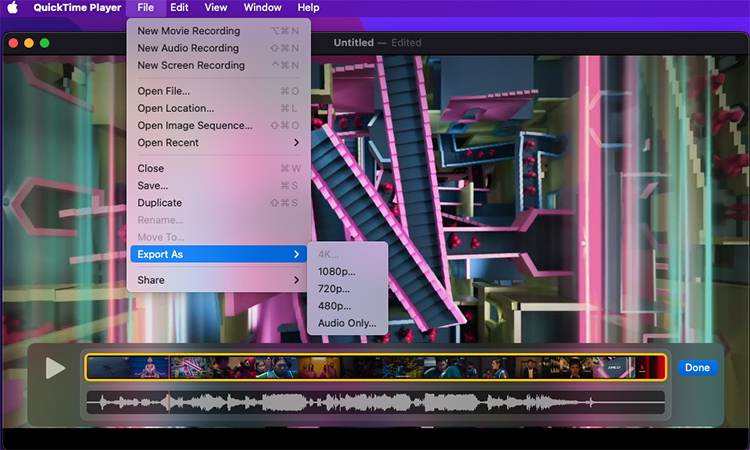
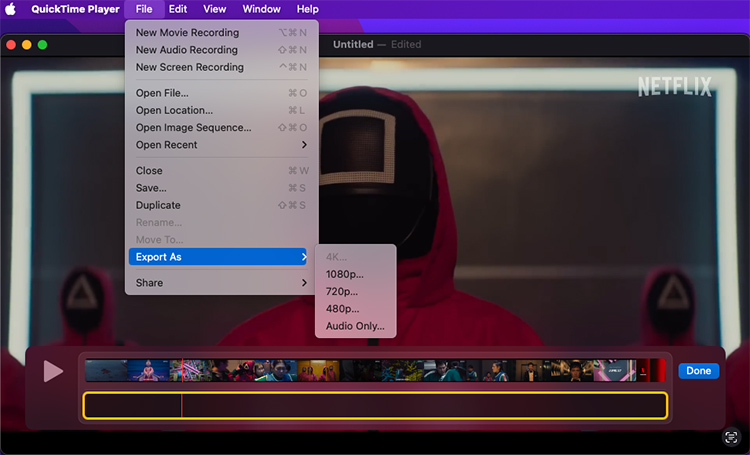
Step 3 Export Video and Newly Added Audio
To save your video with the newly synced audio, navigate to the top menu bar. Click File → Export As and select your desired resolution (e.g., 1080p or 720p). Assign a new file name, choose your storage location, and click Save. QuickTime will generate a self-contained movie file with your audio perfectly integrated.
Part 2. How to Replace Original Audio in a QuickTime Video
Sometimes, you don't just want to add audio; you want to completely mute or remove the original background noise and replace it with a clean track. QuickTime allows you to separate and delete the original audio track with a few extra steps.
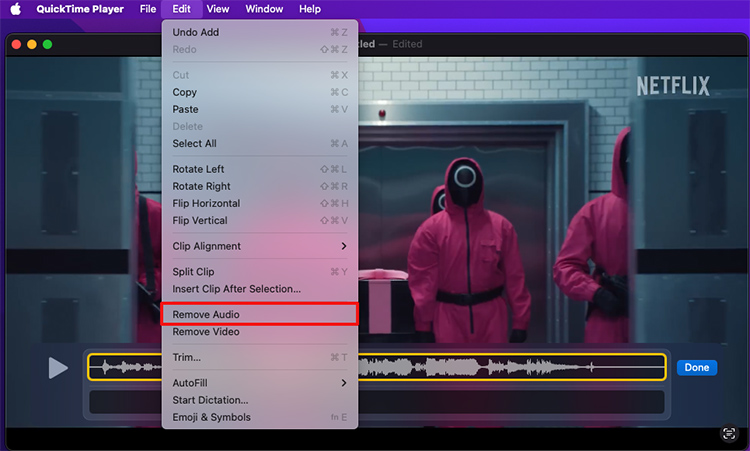
- Step 1: Double-click your video to open it with QuickTime Player on your Mac.
- Step 2: Head to the top menu bar and click Edit → Extract Audio. This will separate the audio into a new window. However, to remove it from the video, you should instead go to Edit → Remove Audio. The video will now be completely muted.
- Step 3: Now, locate your new audio track on your computer. Drag and drop the new audio file directly onto the muted QuickTime video window.
- Step 4: Click the Done button on the timeline to combine the new audio with the video.
- Step 5: Navigate to File → Export As on the top menu, choose your resolution, and save the newly edited file to your Mac.

Part 3. How to Add Audio to Video in QuickTime Alternative
While QuickTime is incredibly convenient for basic drag-and-drop tasks, it has noticeable limitations. For instance, QuickTime does not allow you to adjust the volume of the added audio track, nor does it support non-Apple formats like MKV or FLAC. If you need to lower the background music so your voiceover can be heard, or if you need to reduce background noise, you will need a dedicated editor.
This is where Joyoshare VidiKit shines. As a comprehensive 21-in-1 multimedia toolkit available for both Mac and Windows, it provides professional-grade editing capabilities to overcome QuickTime's limitations.
Beyond simply adding audio, Joyoshare VidiKit allows you to balance volume levels, apply fade-in/fade-out effects, sync out-of-place audio, and export to over 150+ formats without losing quality.

- Fine-tune volume, denoise, and sync audio
- Trim, merge, crop, rotate, and adjust playback speed
- Add filters, effects, subtitles, watermarks, and animated text
- Support a wide range of video and audio formats
- User-friendly interface for beginners to get started quickly
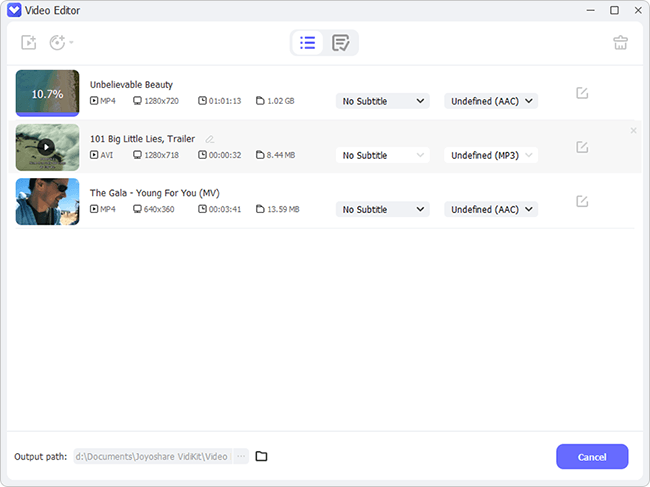
Step 1 Import Video to Joyoshare Video Editor
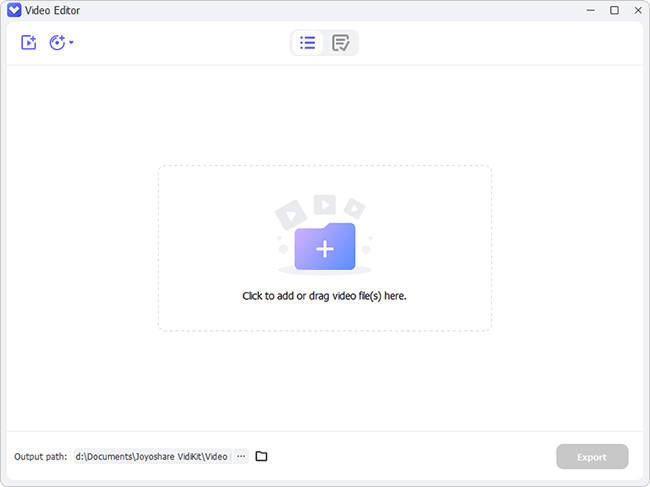
Launch Joyoshare VidiKit on your computer and open Video Editor under the Video section. In the main interface, simply click to add desired video file or straightly drag it to the program.
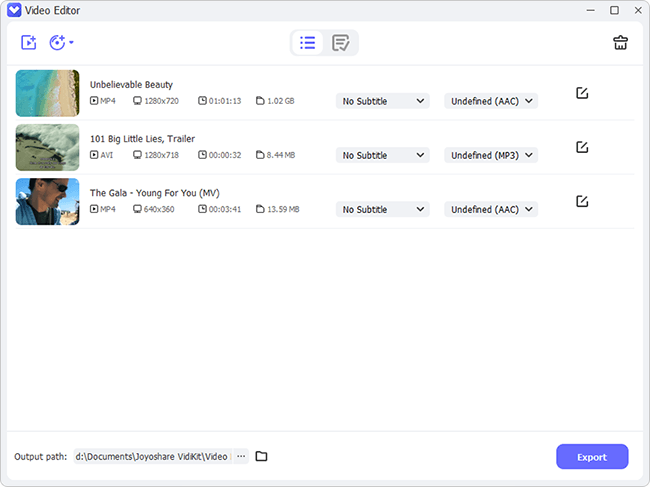
Step 2 Add Audio to QuickTime Movie
Locate your target video and click the "Edit" option in the rear of it to open the editing window. Navigate to the Audio panel and select "Add soundtrack" to import your new audio track. You can customize various audio settings including loop playback, start time, volume adjustment, playback speed, and noise reduction.
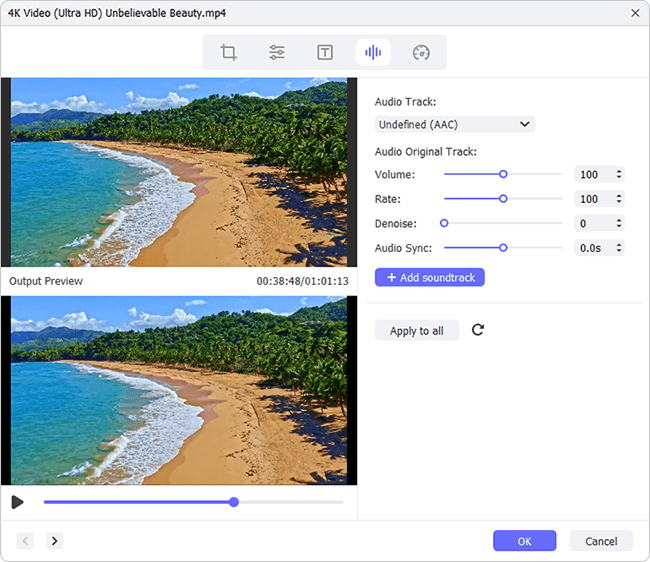
Note: To mute the original audio, simply choose "None" under Audio Track at the top of the interface.
Step 3 Export Edited Video File
After completing your edits, click "OK" to confirm and return to the main interface. Finally, use the "Export" option to save your finished video with all modifications applied.
Part 4. FAQs About Adding Audio to QuickTime Video
Q1. Can I adjust the volume of the audio track I added in QuickTime?
No, QuickTime Player does not feature a built-in audio mixer. Once you drag and drop an audio file into your video, you cannot adjust its volume independently. If your new background music overpowers the original video dialogue, you will need to use a dedicated video editor like Joyoshare VidiKit or iMovie to balance the audio levels.
Q2. Why is my added audio playing over a black screen at the end of the video?
This is a very common issue that occurs when the audio file you imported is longer than your original video. QuickTime will continue to play the remaining audio even after the video footage has ended, resulting in a black screen. To fix this, simply navigate to Edit → Trim in the top menu, and drag the yellow handles on the timeline to shorten the audio track so it matches the video's duration.
Q3. What audio formats are compatible with QuickTime Player?
QuickTime is optimized for Apple's ecosystem. It natively supports standard audio formats including MP3, M4A, WAV, and AIFF. If you attempt to add an unsupported format (like FLAC, OGG, or WMA), QuickTime may refuse to import the file or play the video without any sound. In such cases, you need to convert the audio file first.
Q4. Can I add multiple audio tracks to a single QuickTime video?
Yes, you can drag and drop multiple audio files into the QuickTime Player window one after another. However, managing multiple tracks on QuickTime's basic timeline can be quite clunky. Because you cannot adjust individual track volumes or apply fade effects, the tracks may clash and create a messy audio experience.
Conclusion:
QuickTime Player is an incredibly efficient and convenient built-in tool for Mac users to add audio to a QuickTime video without sparing much effort. By following the simple drag-and-drop guide in this post, you can easily combine your audio and video files into a new movie. However, if you run into limitations—like needing to adjust track volume, sync delayed audio, or work with incompatible formats—Joyoshare VidiKit stands out as a highly qualified and user-friendly alternative ready to handle all your advanced editing needs.