
Q:"Is there anyone know how to trim a video in QuickTime?"
As one of built-in programs on every Mac, QuickTime Player is absolutely one of the most useful tools for regular users. It's more than just a media player, but a versatile tool that can record your screen, edit the videos and share them to Facebook, Vimeo, YouTube, Flickr, etc. It means a lot for users who have tight budgets but also need to do some basic video trimming since some video editing tools are so expensive and complicated. If you also want to use QuickTime Player to trim videos on Mac but didn't know how to do it, you can simply read this post and follow it to learn.
- Part 1. Trim a Video Using QuickTime Player
- Part 2. Questions in Trimming Videos with QuickTime
- Part 3. What Video Formats Can QuickTime Support
- Part 4. Cut a Video in QuickTime Alternative
Part 1. How Does QuickTime Trim Video
As mentioned above, QuickTime Player also works as a simple video editor which offers several video editing tools such as trimming, splitting, cutting, flipping, rotating, etc. Yet, if you're not familiar with this software, you may feel confused how to trim clip in QuickTime. Now let's take a look at the detailed guide to remove unnecessary parts of your video step by step.
Step 1 Open your target video file

First find QuickTime app in your Dock or the Applications folder. Open the video file that QuickTime supports. Typically this program will open it by default. If not, just right click the video file, choose "Open With" and select this player. Or run QuickTime and click "File" > "Open File..." to make it.
Step 2 Set a trimming segment
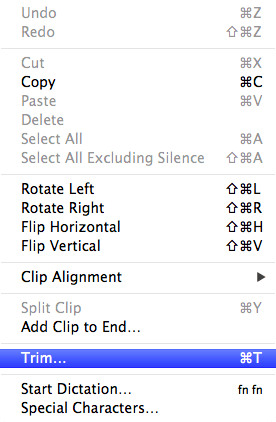
Next, navigate to the "Edit" option on the menu bar of QuickTime and choose Trim option in the drop-down menu (or with shortcut keys "command" + "T"). A timeline will appear and now you can drag the handle on each end to determine the part you'd like to keep. Note that this program will preserve everything inside the yellow bar.
Note: 1. You're allowed to preview the video clips you retained by click the "Play" button on the left. 2. To identify the silent fragments of the file, you can just go to the "View" > "Show Audio Track".
Step 3 Start to trim video in QuickTime

Once you've decided the clip you want, just click the "Trim" button on the top right corner of the timeline, and all the segments that outside the trimming bar will be deleted. You can easily undo it by going to the "Edit" > "Undo Trim". At last, press on "File" > "Save..." to name your new video and save it.
Part 2. FAQs about Trimming Video in QuickTime:
1 When placing the markers on a clip to edit, the trim selection is greyed out. How to solve it?
According to the feedback and suggestions of users on Apple forums, when your QuickTime Trim turns gray, it is probably because your source video format is MPEG-1. QuickTime Pro has no ability to edit muxed file formats so you have to try MPEG Streamclip to convert it to a QuickTime format.
2 Can QuickTime trim video in the middle?
Usually you will only select a section from your video and trim to save it in QuickTime. What if you want to remove the middle of a video and leave both its start and end? Just check the following steps:
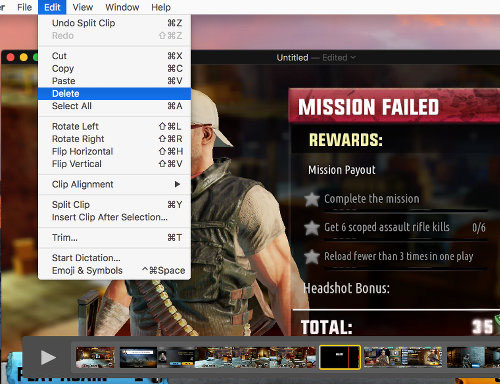
Step 1: Play a designated video in QuickTime and stop at the start of a section you need to trim out;
Step 2: Head to Edit on the top menu bar and choose "Split Clip";
Step 3: Similarly make the playback stop wherever you want to trim (the end of a video section) and click "Split Clip";
Step 4: Among the three sections, click to select the middle one you don't need and tap "Delete" under Edit to trim it out.
Part 3. QuickTime Supported Video Formats:
Users who are new to Mac may not know enough about QuickTime, including what formats it supports. Actually, aside from the default QuickTime movie files (MOV), it's also natively compatible with AIFF, MP3, WAV, DV-DIF and MPEG program stream. If you have additional QuickTime Components, it can besides support formats like ASF, Flash Video, OGG, DivX Media Format, Matroska, etc.
Videos with different codecs can be supported by QuickTime. They are mainly MPEG-4 (Part 2), H.265, H.264, H.263, H.261, DV, Apple ProRes, Cinepak, Animation (FLI, FLC), Animated GIF, 3GP, 3G2, Sorenson Video, Apple Video (QT, MOV), AVI, Microsoft Video 1, Pixlet, QuickTime VR, Motion JPEG, etc. However, since the release of macOS Catalina, QuickTime can no longer support many codecs.
Part 4. Alternative Way to Trim QuickTime Video - Joyoshare Media Cutter
Joyoshare Media Cutter for Mac is the best alternative to trim video in QuickTime Mac program you can rely on. It's easy to operate with intuitive interface and compatible with all Mac OS systems, ranging from iOS X 10.8 to 10.15.
Besides trimming videos and audios, you can also use this tool to make ringtones for iPhone, merge video clips, extract audio from video file, add background music to video, etc. The most important part is that it allows you to cut, trim, split and merge video clips at a lightning fast speed without damaging any original quality.
In addition, this video trimmer allows users to trim tons of video file formats including MP4, M4V, AVI, MPG, MPEG, 3GP, 3G2, WMV, ASF, RM, HD MOV, HD MKV, etc. You can also export the trimmed video in various formats and devices like Apple iPhones, iPads, Android, Blackberry Bold, Smart TVs, Xbox 360, PSP, etc. You're also allowed to customize the parameters according to your needs, like codec, sample rate, bit rate, resolution, channel, etc.
Highlights of Joyoshare Mac Media Cutter:
Trim video clips on Mac fast and losslessly
Support tons of media file formats and devices
Provide many other video editing tools
Available for both Windows and Mac systems
See also: How to Trim Videos on Windows 10
The following is the quick guide on how to trim video on Mac by using Joyoshare Media Cutter software.
Step 1 Launch Joyoshare and add a QuickTime video
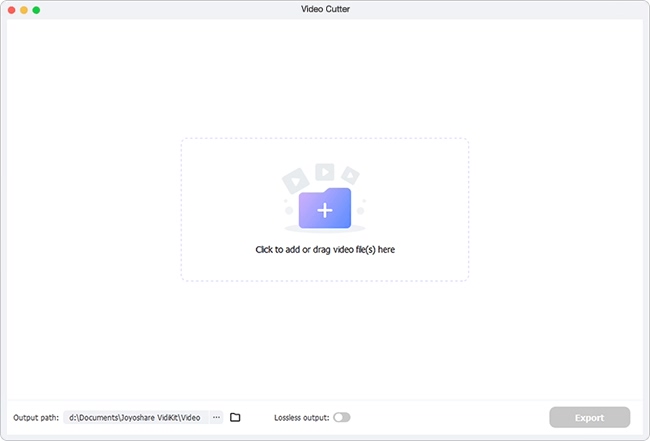
First, you need to import your target video file to Joyoshare Media Cutter after completed the installation successfully. You can simply drag and drop it to the main interface or click the "Open" button to add the file you want to trim.
Note: Joyoshare Media Cutter is specially designed to deal with one single file, so you can only import one file at a time.
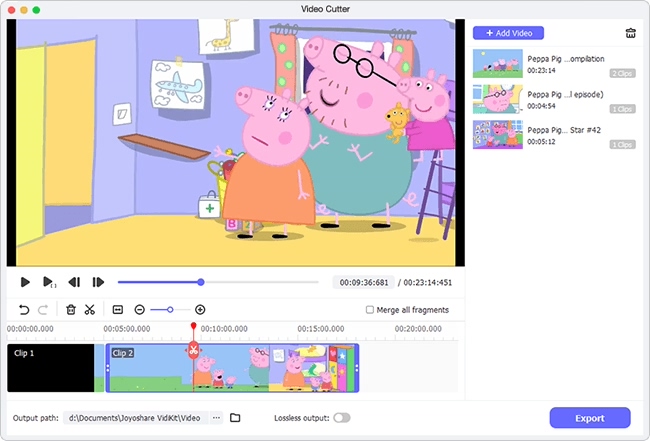
Step 2 Determine the trimming fragments to keep

Next it's time for you to decide the cutting segments. You can drag the handles to determine the start point and end point or manually enter the temporal intervals in millisecond.
Note: 1. Click the "+" button to add more source file and cut another clips you want and then click the "Merge Segments" box to merge them together. 2. During the whole process, you have chance to preview the video file in real time.
Step 3 Choose an output mode/format
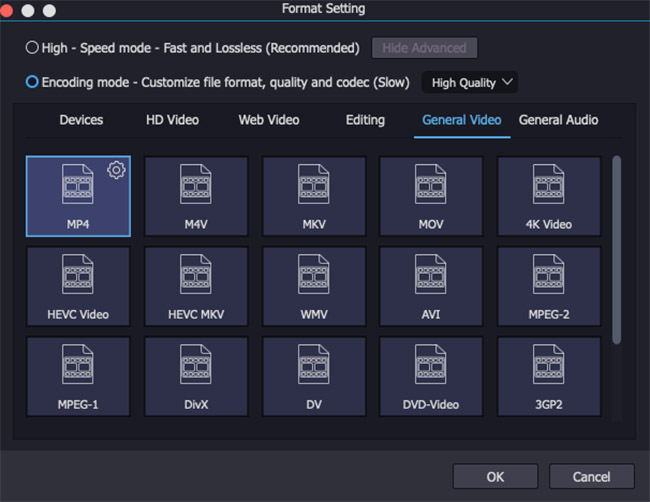
Then click the "Format" option and choose an output mode. If you'd like to retain the original quality, we recommend you to choose the first "High-speed mode"; otherwise you can choose the "Encoding mode" to select a preferred format and change other parameters.
Step 4 Save trimmed video file
After all the settings are done, you can now click the "Start" button to ask Joyoshare to trim the video file for you as required. A few seconds later, you can check your new video on the destination folder.
