Recently, the question about how to cut the video in Movie Maker draws too much concern from a large number of users. Sincerely speaking, Windows Movie Maker is a pretty lightweight and handy tool that can be used to deal with video files. Its basic features can well cater to non-professionals and newbies. To give more assistance to the one who has installed this tool already, we kindly show quick guide. If you are the one, just move your step to this post. You will be clear about how to make it. Here we go!
- Method 1. Split Video in Windows Movie Maker
- Method 2. Trim Video in Windows Movie Maker Alternative
Method 1. Quick Guide on How to Cut Video in Movie Maker
If you are a novice, Windows Movie Maker can be your top priority to cut your large video files. It is easy to learn with pretty straightforward operation. Here's how to use it.
Note: You may suffer from Windows Movie Maker because of its frequent crashes. Besides, it can only offer basic features. If you are the one who has experience in processing videos, you should not cut video in Windows Movie Maker but to use another professional video cutter.
Step 1 Run Windows Movie Maker to add designated video
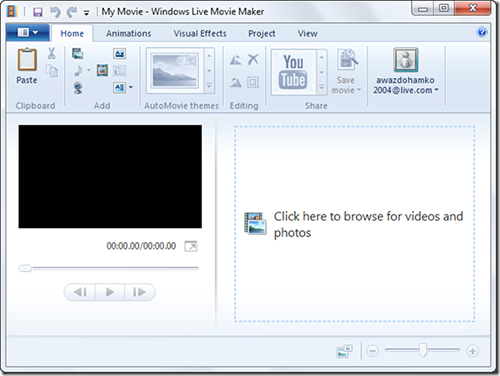
Launch Windows Movie Maker firstly. Then you will see Click here to browser for videos and photos. Hit it to add any video file you want to cut. Or you can directly drag and drop the video to this program.
Step 2 Load imported video file
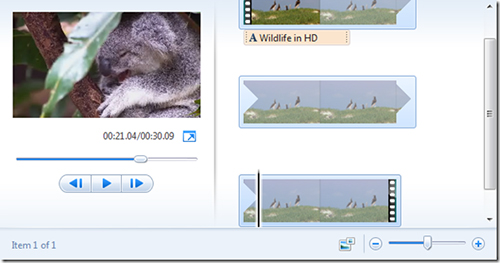
After adding the video to the specified place, Windows Movie Maker will begin to analyze it. When the analysis is done, the frames of your video will be displayed on the right hand side time line.
Step 3 Set cutting points for both start time and end time
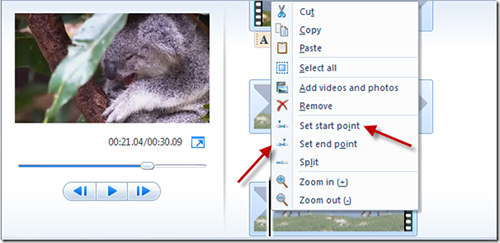
In order to decide a starting point, you have to head to the definite frame of your video. It is available for you to utilize preview player or video timeline to fine tune the position of the playhead based on your own preference. Once the navigation bar leads you to the specific frame, you can right click on it and press the Set Start Point. Operate the same steps to set end point for you video.
Step 4 Output edited video file from Windows Movie Maker
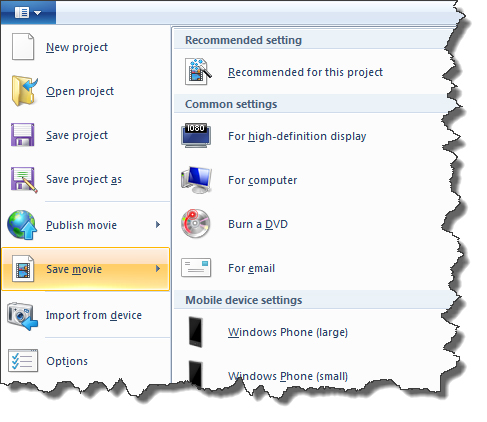
Afterwards, you have right to preview the video to see whether it is in accord with your requirements. If there is no any problem, directly go to the main menu to choose Save Movie option. Then Windows Movie Maker will help you render the video and store it on your computer locally.
Method 2. Complete Tutorial on How to Cut Video with Joyoshare Media Cutter
Coming with more dedicated features, Joyoshare Media Cutter can be a fairly superb alternative to Windows Movie Maker. It is capable of cutting any video and audio files on your Windows without altering original high quality.
By means of this forthright assistant, you can enjoy the best user experience. It gives you a series of attentive designs, like auto-playing imported video files for you, providing both timeline and handles, letting you setup temporal intervals and adjusting video volume. Most of all, you are authorized to customize corresponding parameters for you video, involving codec, quality, sample rate, bit rate, resolution, channel, etc.
Without any quality loss, you can even remove noise parts, strip blank sections, make ringtone for iPhone and combine video cuts from the same source and so forth. Joyoshare Video Cutter is supportable for any common formats and popular devices, like MP4, M4V, MKV, AVI, ASF, OGV, MP3, M4R, FLV, SWF, or iPad, iPhone, Android, smart TV, Xbox 360, PSP, BlackBerry Bold, etc.
Key Features of Joyoshare Media Cutter
Cut any video files in lossless quality
Complete cutting assignment at up to 60X faster speed
Extract audio track from original video
Merge video clips into a new one without problem
Show excellent compatible with different formats and devices
Step 1 Import required video into Joyoshare Media Cutter
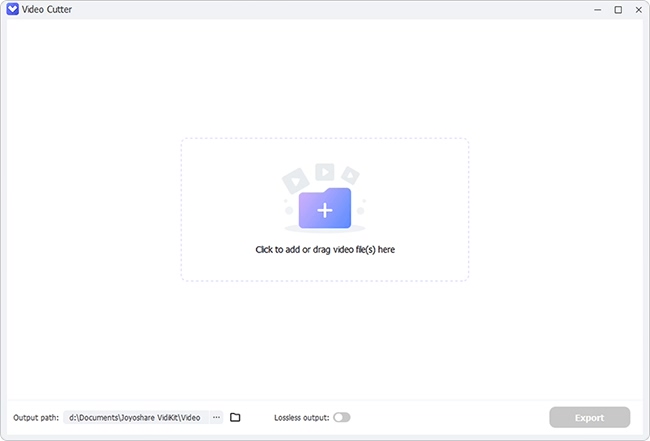
Having launched Joyoshare Media Cutter on your computer, you can go straight to add the video file that you want to cut. Flexibly, you can hit the "Open" button or drag the specific video to add to this smart program.
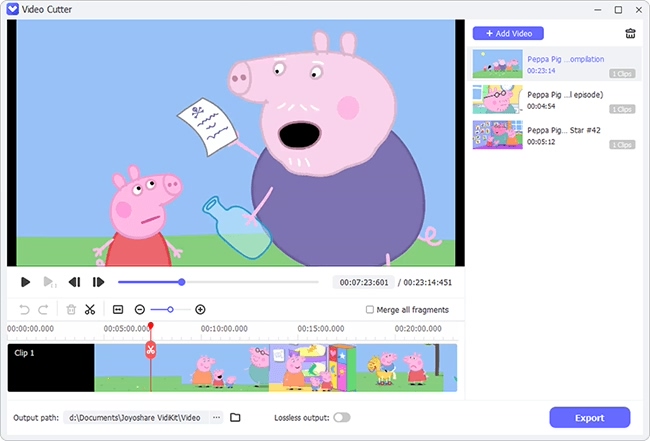
Step 2 Figure out which part to be cut

To enhance the accuracy of selected trimming sections, you are supposed to make full use of both timeline and handles. Move the slider key to an exact point. Likewise, you can enter a detailed start time and end time to the temporal intervals, which come with high preciseness to each second.
In case you'd like to join video cuts together, you can press the "+" icon to generate more than one segments and tick the "Merge segments" option at the same time
Step 3 Choose a desired output mode
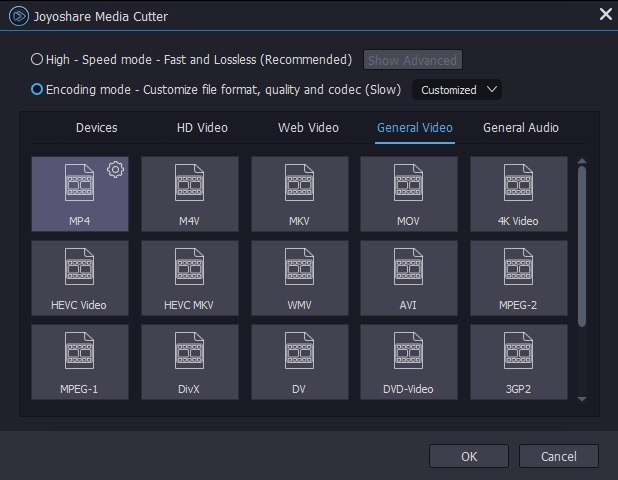
Once you click the "Format" panel, you will see the interface as above. Choose "High-Speed" mode to bring up a fast and lossless task. As per you needs, you can also customize codec, resolution, bitrate, sample rate, channel, quality, format, etc., which is delivered in "Encoding" mode.
Step 4 Start to cut video
As long as everything gets ready, go forward to click the "Start" button simply. Just a moment later, you can get what you want and verify finished video on destination folder.
