There are countless practical reasons why you might need to learn how to trim an MP3 on Mac. Perhaps you want to extract the catchiest chorus of a song to create a custom iPhone ringtone, cut out long silences from a recorded lecture, or split a massive audio file to save storage space. Whatever your goal is, editing audio files doesn't have to be complicated. In this comprehensive guide, we will walk you through the 5 best ways to cut and shorten MP3 files on macOS, ranging from built-in free apps to professional audio cutters.

- Part 1. Joyoshare VidiKit [Lossless, 21-in-one Toolkit]
- Part 2. QuickTime Player
- Part 3. iTunes
- Part 4. GarageBand
- Part 5. Audacity
Part 1. How to Trim MP3 on Mac with Joyoshare VidiKit
If your primary goal is to trim your MP3 music files on Mac without losing any audio quality, we highly recommend Joyoshare VidiKit - Audio Cutter. Unlike standard built-in tools that force you to re-encode or compress the file, Joyoshare VidiKit acts as a lossless audio trimmer. It enables you to cut MP3s and other media files with 100% original quality preserved at lightning-fast speeds.
You can cut the audio file down to the exact millisecond. Furthermore, the real-time preview feature allows you to listen to your edits instantly. Beyond MP3, this robust toolkit supports a vast array of audio formats, including WAV, FLAC, AAC, OGG, M4A, and more, ensuring complete compatibility.

- Trim MP3 on Windows and Mac without quality loss
- Millisecond (ms) accuracy for pinpoint trimming
- Split MP3 into multiple tracks for seamless combination
- Visual waveform and draggable handles for intuitive editing
- Supports MP3, WAV, FLAC, AAC, OGG and other mainstream formats
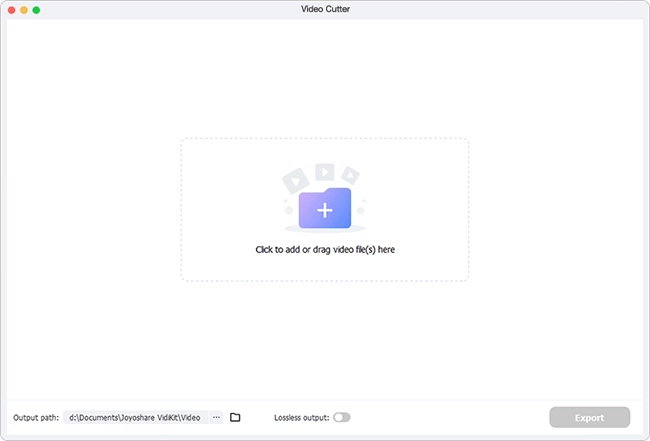
Step 1 Add an MP3 file to Joyoshare VidiKit
Download, install and launch Joyoshare VidiKit for Mac. In the main interface of the program, navigate to Audio section and open Audio Cutter. Then click the "+" button to import an MP3 file you want to trim. Or simply drag the target file and drop it to VidiKit.
Step 2 Select MP3 segment(s) to trim
Simply drag the blue handles to select a segment, or manually enter a specific start time in millisecond precision. Locate the desired audio fragment and use the Split tool to divide the entire MP3 file into smaller pieces. Then pick up unwanted portion and right-click to Remove it.
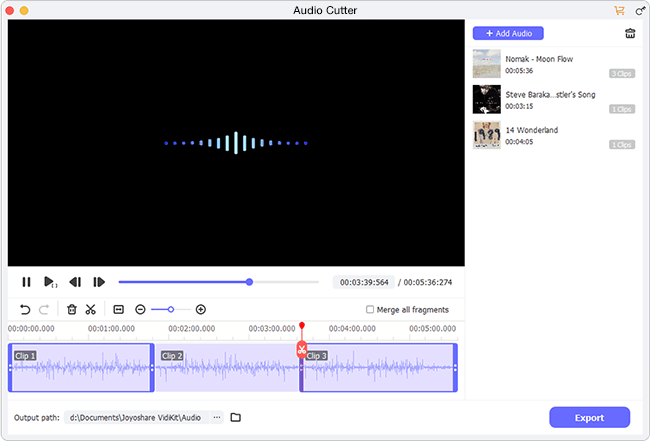
Note: If you want to add more sections from the same source, then cut and merge them together, you can repeat the same operation and tick the "Merge all fragments" box to combine the audio clips losslessly.
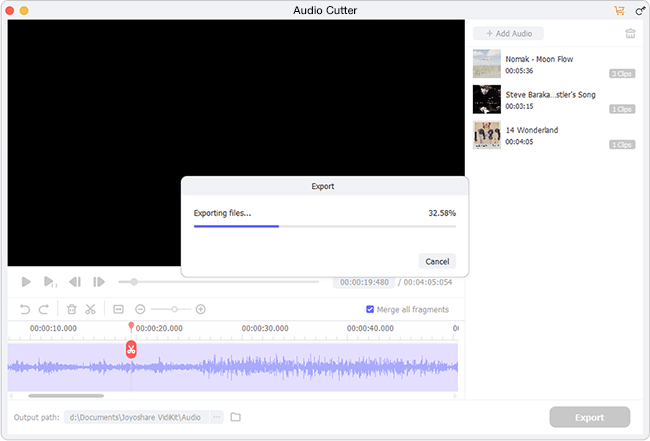
Step 3 Start to trim MP3 on Mac
Now it's time to click the Export button to save the file(s) on your Mac. Wait a few seconds and then get your trimmed MP3 file from the destination folder of your computer.
Part 2. How to Trim an MP3 on Mac Using QuickTime Player
If you prefer a quick solution without downloading third-party software, Apple's built-in QuickTime Player is a highly convenient option. Pre-installed on every Mac, QuickTime offers basic but effective audio trimming features.
- 😄Pros
- Pre-installed on Mac
- Completely free and user-friendly
- ☹Cons
- Cannot export as MP3 (exports as M4A by default)
- Very limited editing features
- Low precision for precise audio cuts

- Step 1: Locate target MP3 file on Mac and open it with QuickTime Player. (Alternatively, run QuickTime and head to File → Open File to select your MP3 file.)
- Step 2: In the top menu, click Edit tab and then choose Trim option. (or use a keyboard shortcut Command + T).
- Step 3: Drag the yellow left and right handles to decide the segment you desire. Press the play button to confirm whether it's the right clip you want. Once confirmed, click the blue "Trim" button in the upper right corner.
- Step 4: Go to File → Export As → Audio Only to save the trimmed audio clip in M4A format by default.
Part 3. How to Trim an MP3 File on Mac with iTunes
For users on older macOS versions, iTunes was the go-to media manager. However, on modern macOS systems (Catalina and later), Apple replaced iTunes with the Apple Music app. You can use this built-in application to effectively "trim" MP3 files by customizing the specific start and stop times of a track.
- 😄Pros
- Native app on macOS
- Original MP3 file remains untouched
- Excellent for songs already in your Apple Music library
- ☹Cons
- Lacks a visual waveform and millisecond precision
- Exports as an AAC file by default
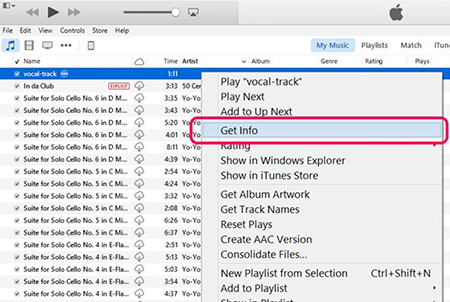
- Step 1: Import MP3 file on Mac using iTunes → File → Add File to Library. For macOS Catalina and the later, open Apple Music app and go for Music to add audios.
- Step 2: Play MP3 audio in iTunes and right-click Get Info → Options.
- Step 3: Type in the specific timestamps you want to keep for both Start Time and Stop Time. Simply Click OK to confirm.
Part 4. How to Trim MP3 Files on Mac with GarageBand
GarageBand, Apple's another built-in music creation studio, is far more than just an MP3 trimmer. This full-fledged digital audio workstation (DAW) excels at precise audio editing, being a great solution for professional musicians to compose and produce music. With studio-quality tools, it can trim, split, and enhance MP3 files.
- 😄Pros
- Sample-accurate trimming
- Support advaned multitrack editing
- Preinstalled on Mac
- Support multiple audio files
- ☹Cons
- Steep learning curve
- Complex project-based workflow
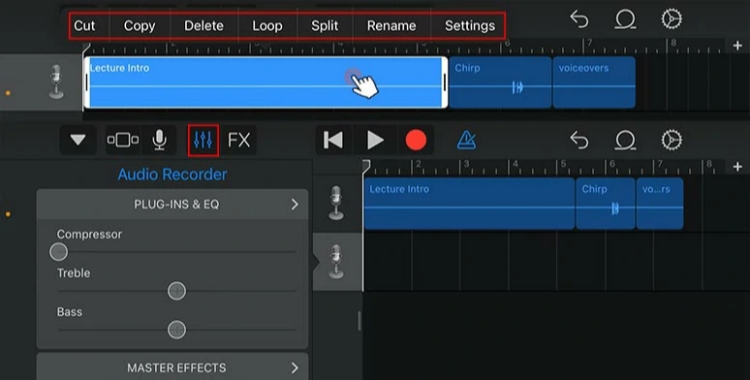
- Step 1: Open GarageBand and click New Project → Empty Project → Audio → Choose to create a new project.
- Step 2: Drag and drop your target MP3 file into the timeline area of GarageBand.
- Step 3: Move your mouse to the right position you like. Click and drag over the part of the waveform you want to delete.
- Step 4: Click the playing button to listen to the trimmed clip, then go to Share → Export Song to Disk to save the file in MP3, AAC, AIFF, etc.
Part 5. Trim an MP3 on Mac Using Audacity
Audacity is a free, open-source, and cross-platform audio editor that provide professional-grade tools for multimedia users to trim and edit MP3 files. It supports batch processing for multiple audio files and sample-accurate cutting.
- 😄Pros
- Free and open-source software
- Provide advanced editing features
- Directly export to MP3 format
- ☹Cons
- Hard for novices to get started
- User-unfriendly interface
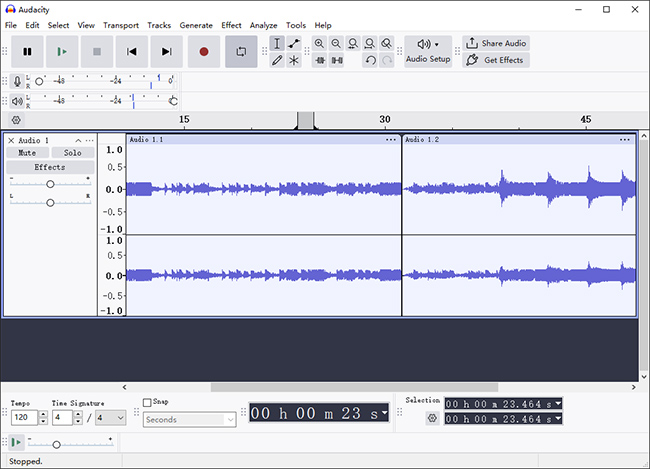
- Step 1: Run Audacity and go to the File → Open to import the desired MP3 file.
- Step 2: In the top menu, simply click the "Selection Tool" and select a segment in the timeline.
- Step 3: Stop playing audio and click the "Split" button to trim MP3 in Audacity and use Delete keyboard to remove it.
- Step 4: Head to File → Export Audio → Export to computer to save your trimmed MP3 file.
Conclusion
Trimming an MP3 file on a Mac is incredibly straightforward once you know which tool to use. While macOS includes basic, free audio editing tools like QuickTime Player, Apple Music, and GarageBand, they often force you to export your audio into different formats like M4A or AAC.
If you want to maintain the original format and achieve sample-accurate cuts without a steep learning curve, dedicated third-party solutions like Joyoshare VidiKit consistently deliver the most superior, lossless results. Evaluate your specific needs—whether it's speed, precision, or format compatibility—and choose the method that best suits your audio editing workflow.
| Joyoshare VidiKit | QuickTime Player | iTunes | GarageBand | Audacity | |
| Supported OS | Windows, Mac | Mac | Windows, Mac | Mac | Windows, macOS, GNU/Linux |
| Supported Formats | Nearly All | Mainly MP3, AAC, AIFF and WAV | WAV, AIFF, Apple Lossless, AAC, and MP3 | Many like AIFF, WAV, MIDI, MP3 | WAV, AIFF, OGG, MP3 |
| Suitable for | Novices | Novices | Novices | Professionals | Professionals |
| Advantages | No quality loss, high accuracy, 60X speed, toolkit | Free, easy to use | Free, easy to use | Edit multiple tracks | Edit multiple tracks |
