
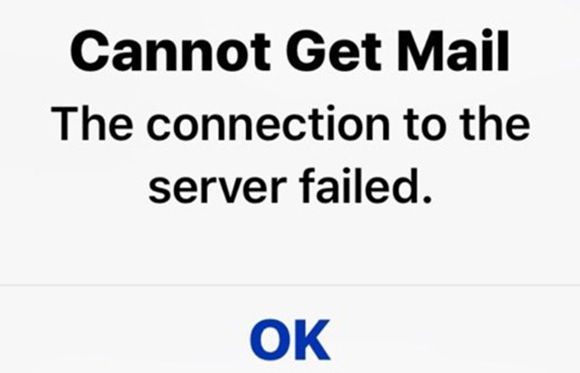
Q:"How to solve? My iPad and iPhone are giving me the message 'Cannot get mail - The connection to the server failed'. Does anyone have a solution to this error message?" - From Apple Community
In the era of the popularity of online communication tools, Mail has not been replaced and still occupies an important place. Different business people around the globe rely on the Email service to make negotiation and build cooperation. However, like mentioned above, not everything goes as smoothly as it always does. A vexing problem comes out and causes mail error. No matter how many times you try, you just receive an error message showing "Cannot Get Mail - The connection to the server failed". If you are unfortunate to encounter this issue, you can read through this article attentively and learn 12 efficient ways to solve it.
- Part 1. What Does Connection to Server Failed Mean?
- Part 2. How to Fix the Connection to the Server Failed
- Solution 1: Inspect Network Connection
- Solution 2: Reset Network Settings
- Solution 3: Force Quit Mail App
- Solution 4: Delete Mail Account and Sign in Again
- Solution 5: Change the Password of Mail Account
- Solution 6. Fetch New Data
- Solution 7. Check Mail Server
- Solution 8. Manually Configure Server
- Solution 9. Change Microsoft Exchange Security Settings
- Solution 10. Use iOS System Repair Tool – Joyoshare UltFix [No Data Damage]
- Solution 11. Restart iPhone
- Solution 12. Factory Reset iPhone
- Part 3. Conclusion
Part 1. What Does Connection to Server Failed Mean?
Two servers, including the SMTP for sending emails and POP/IMAP for receiving and reading mail, should work appropriately to transfer the emails. When you cannot get mail, these two servers are inaccessible, which can be due to a unstable and poor Internet connection, incorrect email settings, or errors with the email server itself.
Part 2. Troubleshoot "Cannot Get Mail, Connection to Server Failed"
What if the problem remains but you urgently need to email others? Try to use some basic solutions and make possible checks as we suggest below:
1. Inspect Network Connection
The Internet connection stability as well network speed play a huge role in determining whether you're sending or receiving emails appropriately. Thus, when you fails to get mail, check your network, switch between WiFi and cellular data. Or you can disconnect and connect again.
2. Reset Network Settings
It might have happened that you tinkered with the network settings, which ended up causing the "cannot get mail, connection to the server failed" issue. Thus, you can fix the server connection issue by resetting the network settings. Doing so will reset the cellular, Bluetooth, VPN, and WiFi connections.
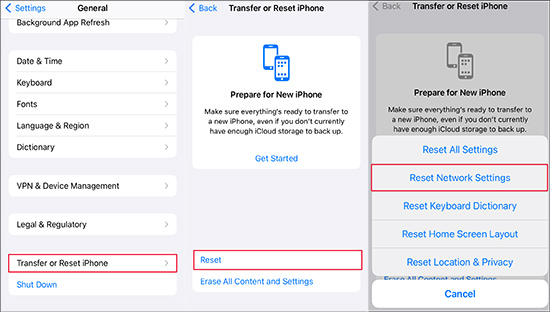
- Step 1: Navigate to the iPhone Settings.
- Step 2: Tap on General → Transfer or Reset iPhone.
- Step 3: Continue to tap "Reset" and choose "Reset Network Settings" to restore all networks to factory defaults.
- Step 4: Reconfigure and reconnect to your network to see if you can get mail now.
3. Force Quit Mail App
A quick effective way to fix Mail not working issue is to force quit app and launch it again. It can get some minor problems solved simply, refresh and reload your Mail app.
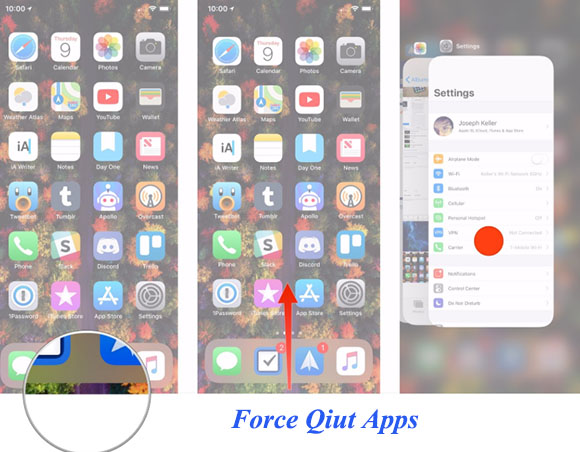
- Step 1: Click the "Home" button twice. If there is no "Home" button with your iPhone, you just swipe up from the bottom of the screen.
- Step 2: Afterwards, you will see the multitasking view appear on the screen and you need to find Mail app.
- Step 3: Now, it is necessary to swipe the Mail application away to quit it.
- Step 4: Get back to the home screen and tap on Mail app to relaunch it.
4. Delete Mail Account and Sign in Again
If you are sure that your mail username and password are correct but you are still disturbed by Mail not working, it is probably due to a problem with the settings used while trying to connect to your mail account. In this case, you may remove the account from your device and sign in back. If necessary, you'd better back up your mail information on your computer so that you can set it up again easily.
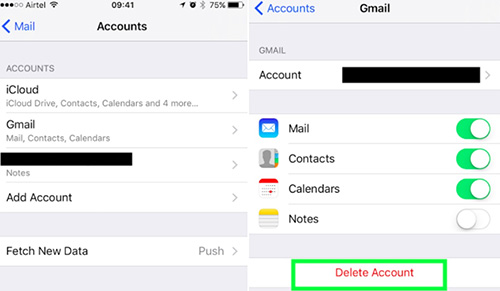
- Step 1: Navigate to "Settings" on your iPhone and scroll down to find "Mail".
- Step 2: Choose the mail account you need to delete under "Accounts".
- Step 3: Select "Delete Account" and then tap on "Delete from My iPhone".
- Step 4: Get back to "Accounts" screen and click on "Add Account" option.
- Step 5: Choose the mail you removed just now and enter both email address and password to sign in.
- Step 6: The Mail will verify your account automatically. Wait a moment, you can customize your mail information and tap on "Save" to save it.
5. Change the Password of Mail Account
There might be some issues with the mail password, provided you changed the mail password various times. Hence, setting up a new and appropriate mail password can help you fix the issue.
6. Fetch New Data
iPhone Mail account is able to be set up to check email according to a specific schedule (for instance, every 15 minutes) or push messages to your device as soon as it's received. How to configure these settings will affect how email arrives. Therefore, you need to check whether it configured as expected. If you don't know how to do, please follow these steps below.
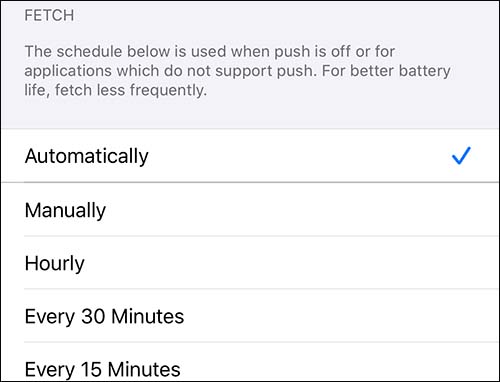
- Step 1: Go to Settings → Mail → Accounts → Fetch New Data.
- Step 2: "Push" slider can make the mail messages sent to your iPhone once it arrives on the mail server.
- Step 3: You can get into the "Fetch" option to control the schedule, in which you are allowed to choose how often to check your mail following your need.
7. Check Mail Server
If the Mail server is down, facing issues like not connecting to server, will be evident. Thus, you'll need to navigate to the Apple System Status and check the current status of the Mail app there.

8. Manually Configure Server
You should notice that the reason for this issue may be the mail server not allowing you to access. It is because the ISP blocks some ports, or incoming and outgoing server settings you use are not correct. In this situation, you are required to confirm Mail server configuration or configure the server again.
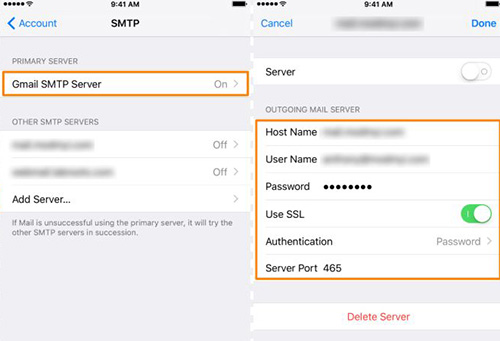
- Step 1: Tap on "Settings" and choose "Mail".
- Step 2: Click "Accounts" and choose the mail with problem.
- Step 3: After that, you just scroll down to choose "SMTP" from "Outgoing Mail Server".
- Step 4: Just ensure the server of the Mail provider as the Primary Server.
- Step 5: Next, you can click "SSL" to turn it on if it is off. In addition, "Authentication" should be set to "Password" option and "Server Port" should match "456".
- Step 6: Finally, click "Done" at the upper right corner of the screen. Besides, you also tap "Account" in the next interface and click "Done" again.
9. Change Microsoft Exchange Security Settings
If you can contact the administrator on the Microsoft Exchange server, you can ask him to adjust the settings for you.
- Step 1: Open Active Directory Users and computer.
- Step 2: Go for View → Advanced Features on the top menu.
- Step 3: See which mail account has an error and click on "Properties".
- Step 4: Next, click on Security → Advanced → check Include inheritable permissions from this object's parent.
10. Use iOS System Repair Tool – Joyoshare UltFix [No Data Loss]
If none of the above solutions are helpful, it is likely that there is something unknown with your iPhone system. Hence, you need an additional tool to solve 'cannot get Mail server connection failed' issue. Among various system repair software, Joyoshare UltFix iOS System Recovery is recommended to you. Developed with fantastic repair features, this software makes itself fairly simple to eliminate 150+ iOS bugs without causing the data loss, such as cannot getting mail, mail icon missing, email notification on iPhone not working, etc. It comes with intuitive interface and ensures you a high success rate. More than that, it lets you free enter and exit recovery mode, reset your device and update iOS.
- Come up with the highest success rate
- Fix mail not receiving and more iOS issues no data loss
- Free option to enter and exit recovery mode
- Help you to upgrade or downgrade iOS software
- Factory reset iOS device without iTunes/Finder
The steps of operation are not complex. You can finish the repair process according to the easy guide below. Before you do this, please make sure your iPhone is full of power.
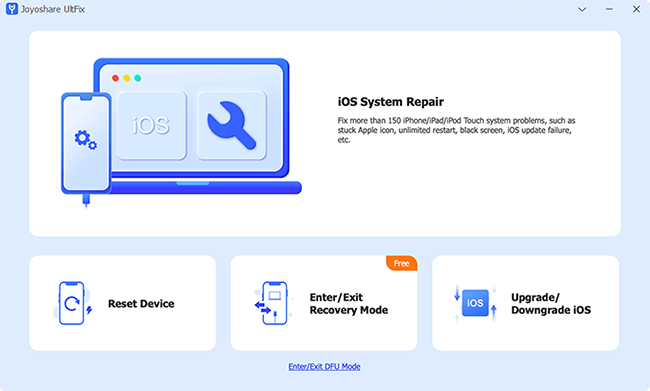
Step 1 Activate iOS System Repair Tool
Launch Joyoshare Ultfix and connect the iPhone to the computer. After selecting the iOS System Repair, click on Start button.
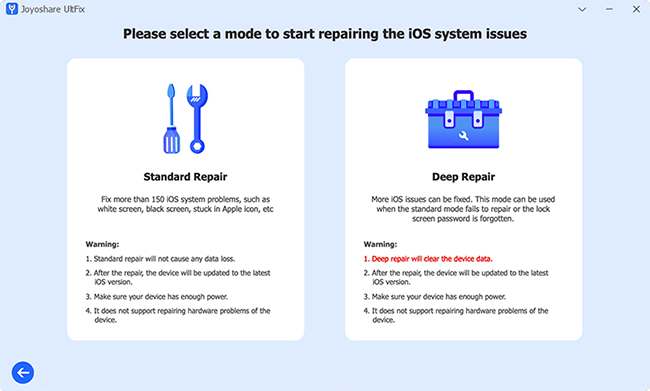
Step 2 Choose Standard Repair
Select Standard Repair mode to repair mail error as it won't lead to important data loss. If the program prompts no device detection, you should follow onscreen instructions to put your device into DFU/Recovery mode.
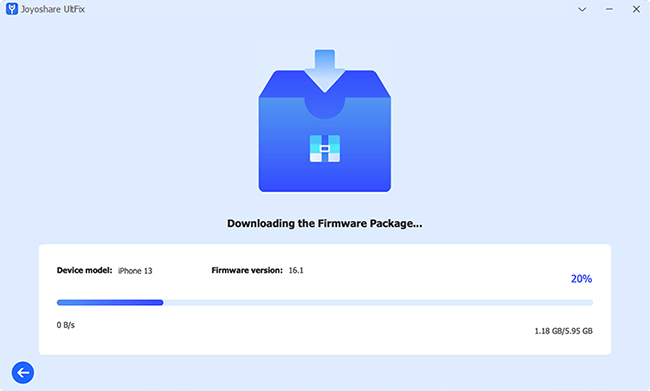
Step 3 Download Firmware Package
After confirming the information regarding your iOS device, click on the Download button to verify and download the firmware package.
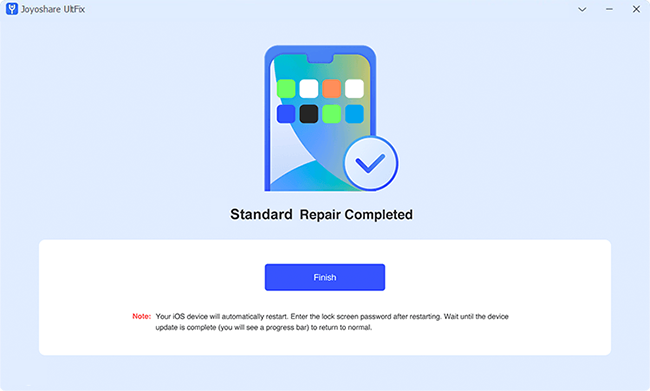
Step 4 Repair Connection to the Server Failed on iPhone
Click on Repair button to unzip the firmware package, and if the Internet connection is stable, it hardly takes any time. After a while, your mail error can be fixed.
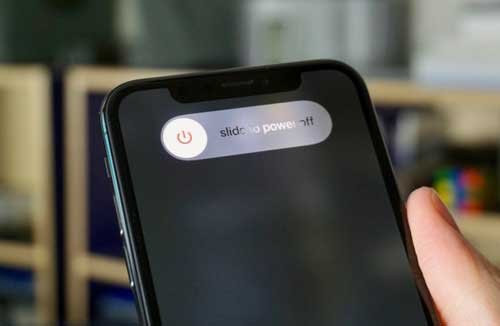
11. Restart iPhone
Despite trying everything you could, if the issue doesn't go away, you can consider restarting the iOS device. Doing so empowers the iOS device to tackle the software bugs causing the chaos. You can power off your device and then restart it with Power button. After this, go to open Mail app again and see if emails run into your account.
12. Factory Reset iPhone
Although factory resetting the iPhone will end up causing all the data loss, it can also help you fix multiple iOS issues, including the connection to the server failed issue. Doing so helps the iOS device fight the software glitches.
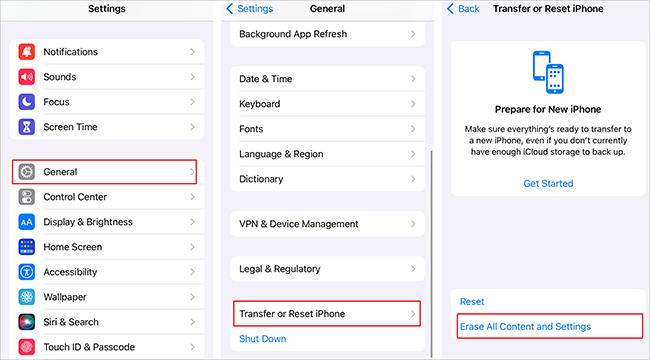
- Step 1: Open Settings on your iPhone and click to enter General section.
- Step 2: On the bottom of the screen, tap on "Transfer or Reset iPhone".
- Step 3: You can now select "Erase All Content and Settings" to factory reset your device.
Part 3. Conclusion
Since the prompt of "cannot get Mail the connection to the server failed" is annoying, we've listed the 12 wonderful ways to deal with this issue. All the options listed in this guide are worth admiring, but Joyoshare UltFix remains the best. It allows you to tackle 150+ iOS issues without prompting data loss.
