Why and How: Error Connecting to Apple ID Server
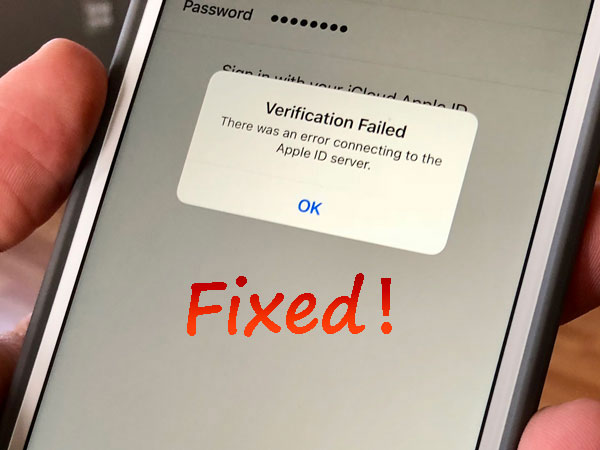
Did you encounter the problem of "error connecting to Apple ID server" on your iPhone/iPad? One of my friends had this trouble on her Phone earlier this month and she couldn't connect to the Apple ID server. But fortunately, her issue was successfully fixed and she shared this experience to me. So I wrote this article to help you and other people who are seeking for the causes behind the error and the workable methods to fix it.
Part 1: Why does "error connecting to Apple ID server" appear?
In some cases, when you attempt to log in iTunes or App Store, there might be a message that writes "Verification Failed. There was an error connecting to the Apple ID server." Why does it say unable to connect to server? According to my friend's information collected, the following reasons can be used to explain it.
1. Unstable internet connection.
2. Apple servers are down.
3. Wrong Apple ID and password.
4. Incorrect iPhone/iPad settings like Time.
5. iOS errors or software glitches.
Part 2: How to fix "There was an error connecting to the Apple ID server?"
To fix iPhone error connecting to Apple ID server, my friend tried the ways presented below one by one and there are also other two potential fixes provided.
2.1 Force restart the device
When the error first showed up, the first and quick way my friend could think about is to force restart her iPhone.
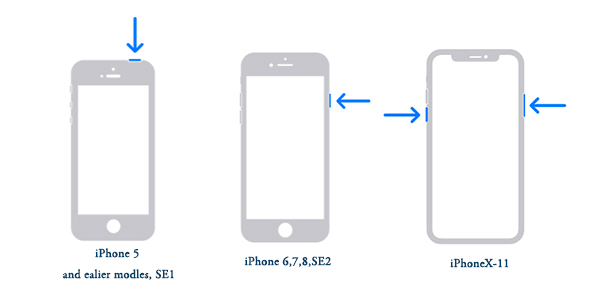
For iPhone X/11, simultaneously press down the Side and the Volume buttons until the Slider is shown, then drag on the slider to turn off the iPhone, finally hold the Side button to turn on your device.
For iPhone SE (2nd) /8 /7/6, press down the Side button until the Slider is dispalyed and drag on the slider to switch off the iPhone, finally hold down the Side button to switch on the device.
For iPhone SE (1st) / 5 and former, press down the Top until the Slider is presented, then pull on the slider to power off the iPhone, finally hold the top button to power on your device.
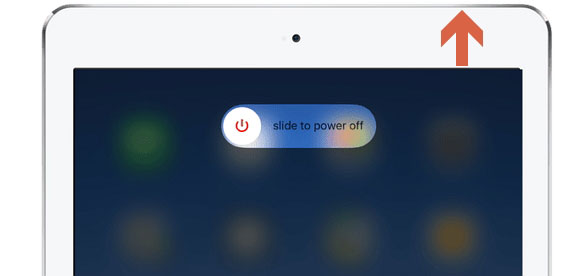
For iPad with Home button, hold down the Home and Power buttons at the same time until the Apple logo appears on the interface.
For other iPad versions, each quickly hold and let go of volume up and down buttons, then press the top button until the Apple logo appears on the screen.
2.2 Check network connection
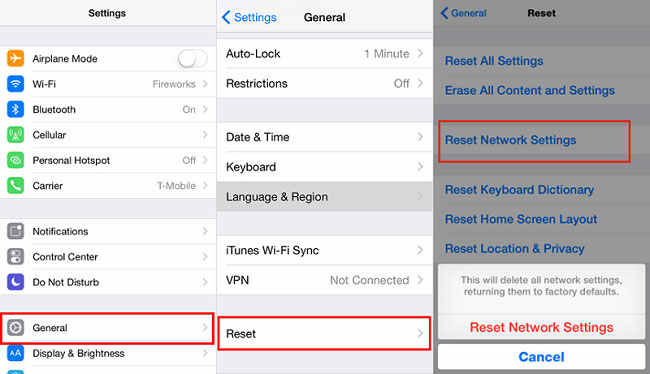
Since a strong network connection is necessary when logging into Apple's servers, my friend was wondering whether the Internet connection is poor. Thus, she checked it and did a reset about the network.
Steps: Head to Settings > General > Reset > Reset Network Settings.
2.3 Re-sign in the account
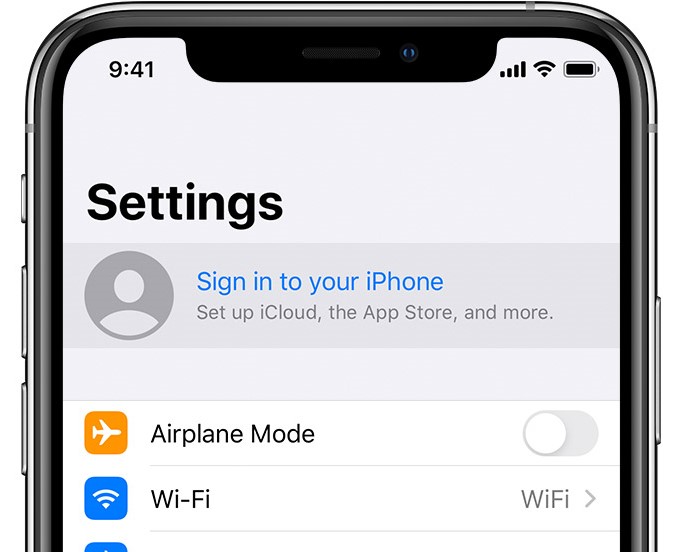
However, it is not the matter of network connection leading to her iPhone error connecting to Apple ID server. So she also tried to log out her Apple ID account and log in it again.
Step 1: Launch Settings and click her own name.
Step 2: Hit the account and tap on Sign Out option.
Step 3: Re-sign in the account.
2.4 Check Apple servers
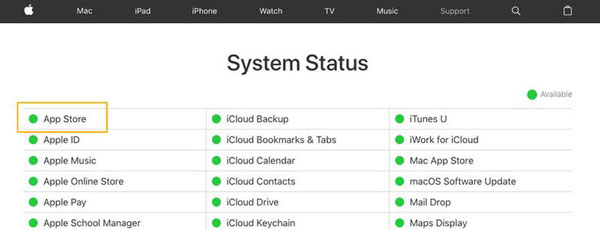
As she saw the error connecting to Apple ID server still exists, she started to think whether the Apple servers are down. In such a case, she visited the Apple system status official page and found all are good. Usually, if an Apple server goes down, then it is due to the maintenance. Then the only thing that can be done is to wait.
2.5 Set Date & Time
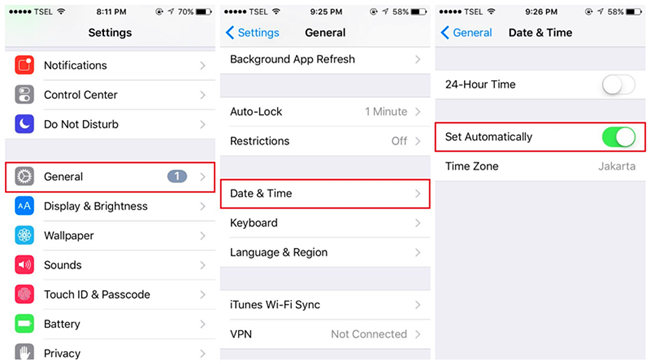
Owing to the recent software update on her iPhone, she thought that it could also be the out-of-sync Date & Time settings resulting in the error connecting to Apple ID server. Resultantly, she went to Settings > General > Date & Time, and switched on "Set Automatically" option.
2.6 Apply a third-party repair tool [Useful]
Yet none of them worked after my friend tried the above solutions and "There was an error connecting to the Apple ID server" message still popped up on her iPhone. Getting tired of this issue and wanting to resolve it as soon as possible, she applied a professional iOS repair tool called TunesKit iOS System Repair. After that, she discovered that the problem was completely solved and there was no data loss on her device.
Key Features of TunesKit iOS System Recovery
- Fix 150+ kinds of iOS issues like iPhone stuck on Apple logo, apple errors, etc.
- Supports different iOS devices such as iPhone, iPad and iPod.
- Compatible with all iOS versions including the latest iOS 14.
- Offer Standard Mode and Advanced Mode.
- One click to enter or exit the recovery mode for free
- Support downgrading iOS versions.
- Easy operating steps and friendly interface.
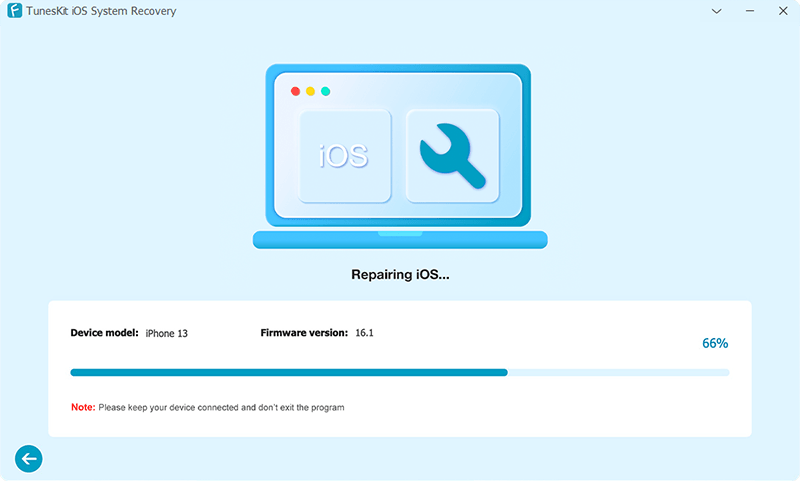
Here are the steps of her using TunesKit iOS System Recovery to fix error connecting to Apple ID server.
Step 1: Connect iPhone to computer via a USB cable and open the TunesKit iOS System Recovery for Win software. Then tap on the "Start" button. In the next window, select Standard Mode to fix iPhone error connecting to Apple ID server without data loss.

Step 2: Check iPhone's information and then click on "Download" button to download the firmware package matched with the device.
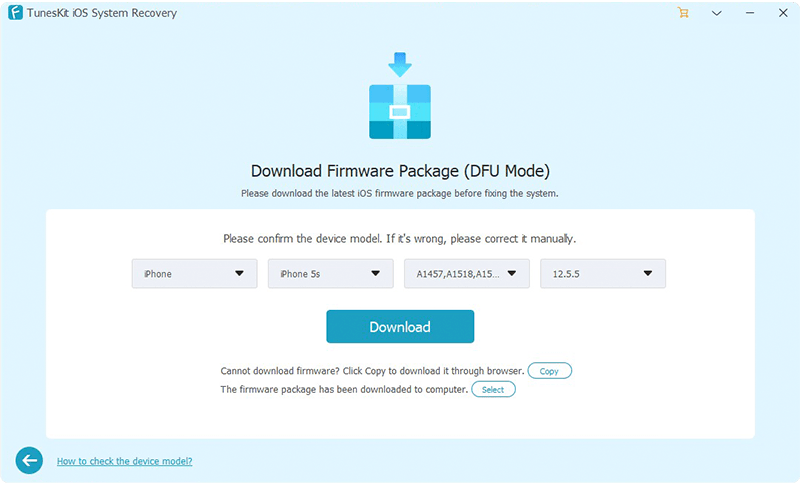
Step 3: After the firmare package is downloaded, press the "Repair" button to quickly verify it and begin to fix the iOS. When everything is completed, the error is removed.
2.7 Update iOS
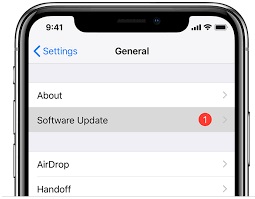
Given the situation that some people are not much willing to use third-party software temporarily, there are still 2 fixes offered. One is to update the iOS system on your iPhone/iPad through clicking Settings > General > Software Update. But "There was an error connecting to the Apple ID server" generally occurs after an iOS update, so it is not very recommended.
2.8 Use verification code
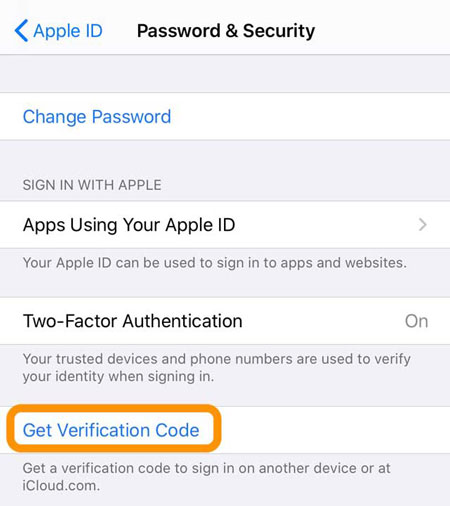
The other is to use verification code to remove the error connecting to Apple ID server. But this requires another iOS device such as iPad and iPod and you need to enter the same Apple ID to generate the verification code. To get the code, please navigate to Settings > Apple ID > Password & Security, then just tap on the "Get Verification Code" option.
Part 3: Error connecting to Apple ID server on computer
Well, these are almost all methods to fix error connecting to Apple ID server on iPhone or iPad. Nonetheless, this issue can also happen on the computer. When “There was an error connecting to the Apple ID server” appears on the computer, simply rebooting the computer. Of course, the above solutions can be also applied. Finally, if you have any questions, please be free to contact us.
