Online video streaming via Internet browsers is very much common, especially for desktop users. And while Chrome remains the number one most preferred music streaming browser, many Chrome users have reportedly been encountering the "Error loading media: File could not be played" problem, making it difficult for them to enjoy music video on Chrome. So, if you are one of them, then you are looking at the right post! This article will feature different methods on how to fix the problem and get you playing media on Chrome again!
- Tip 1. Update Browser
- Tip 2. Try Incognito Mode
- Tip 3. Reset Browser Settings
- Tip 4. Disable Extensions and Plugins
- Tip 5. Clear Browsing Data
- Tip 6. Try a Different Media Player
- Tip 7. Turn off Hardware Acceleration
- Tip 8. Use Joyoshare VidiKit
Solution 1. Update Browser
When using an outdated Chrome browser, you are more likely to encounter an error loading media problem as the file may be incompatible with the browser. Usually, browser updates come with more media file support abilities, and therefore, it will serve you best if you update the browser to the latest available version. To update Chrome, simply follow the instructions below.
- Step 1: Launch Chrome browser.
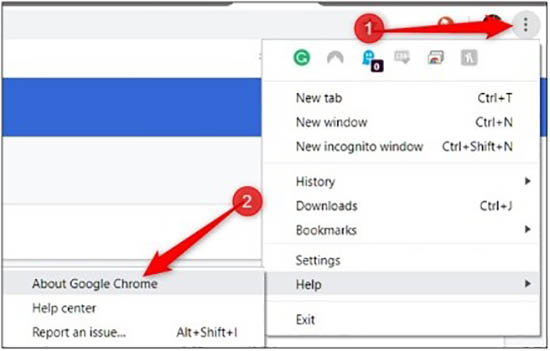
- Step 2: Click on the three vertical dots and select Help - About Google Chrome.
- Step 3: If there are any available updates, click "Update Google Chrome" to update Chrome to the latest version.
- Step 4: Relaunch Chrome and check if the "Error loading media: File could not be played" is resolved.
Solution 2. Try Incognito Mode
Even though rare, it is possible that the installed Chrome extensions could be triggering the error loading media problem when you attempt to play video via Chrome. Apparently, the most straightforward way to ensure that this is not the case is to switch to incognito mode and here are some easy-to-follow steps.

- Step 1: Start Chrome browser.
- Step 2: Click on the three dots on the right-top.
- Step 3: Select the "New incognito window" option and try and play the video.
Solution 3. Reset Browser Settings
Like other applications, browsers too develop "crises" or bugs that limit optimal function. In that case, your browser may have developed such a problem and resetting it could go a long way in solving the problem.
- Step 1: Open Chrome browser and click on the three dots on the top-right.
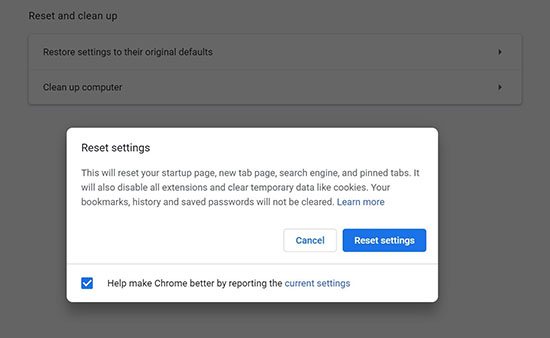
- Step 2: Hit "Settings" - "Show Advanced Settings" option and scroll to find "Reset settings".
- Step 3: Click "Reset settings" to reset your Chrome settings.
Solution 4. Disable Extensions and Plugins
As we mentioned earlier, there is a possibility that your "Error loading media: File could not be played" issue emanates from installed Chrome extensions and plugins. This is more likely to happen if you have internet security extensions on your browser. If switching to Incognito Mode does not help, you should consider disabling the extensions and activating them afterward. Here is a quick step-by-step guide to tackle the issue.
- Step 1: Start Chrome and click on the dots on the far-right corner.
- Step 2: Scroll down and expand the "More tools" option.
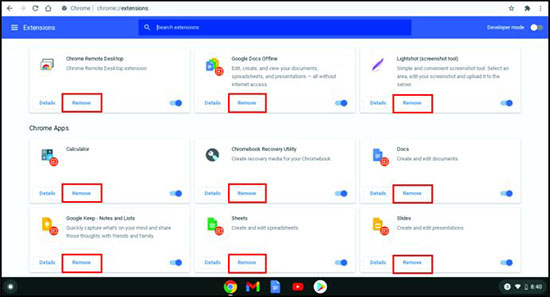
- Step 3: Now, click "Extensions" from the second menu.
- Step 4: A list of all available extensions will show on the screen. Use the toggle to disable all the extensions.
- Step 5: The toggle switch turns grey the extension is disabled. Relaunch Chrome and play your media file.
Solution 5. Clear Browsing Data
If the problem persists even after updating and disabling the extensions, you should try clearing your Chrome browsing data, i.e., all browsing history, cache, and cookies. This should help improve your Chrome browser user experience and fix the error loading media: File could not be played problem. Please, follow the steps below to permanently delete your browser data. Always remember to regularly clear your cache and cookies. This should help fix the problem and fasten Chrome's response.
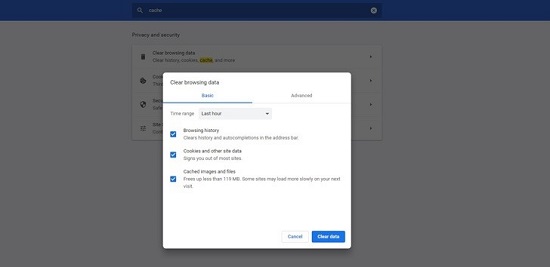
- Step 1: Open Chrome browser and click on the three-dot icon at the right top corner.
- Step 2: Find and expand the "More tools" option.
- Step 3: Hit the "Clear browsing data" option. Then, go on to check the boxes and select the time range.
- Step 4: Finally, click "Clear data" to delete all the browser cache and cookies.
Solution 6. Try a Different Media Player
Sometimes avoiding the problem is also an excellent way to resolve an issue, and in this case, you can choose a different media player application. For example, you can use a different browser such as Mozilla, Brave, etc. Alternatively, you can download the media file and use media playing applications such as VLC and Kido to play your digital media file.
Solution 7. Turn off Hardware Acceleration
Even though the hardware acceleration technology works to improve visual performance, it may actually be causing the error loading media issue when you try playing media files on Chrome. To ensure that this is not the case, you need to disable it and see if the problem will disappear.
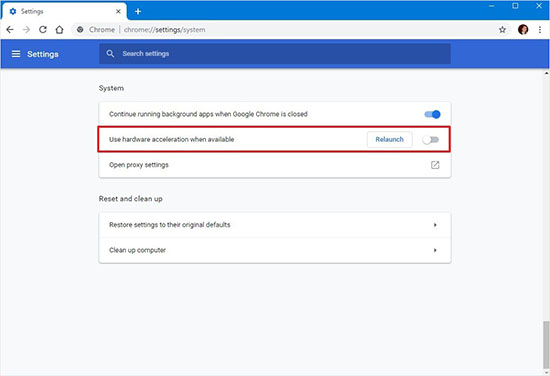
- Step 1: Go to Chrome toolbar, hit Settings - Advanced.
- Step 2: Under System, turn off the toggle on the "Use hardware acceleration when available" option.
Solution 8. Use Video Repair - Joyoshare VidiKit
If the above browser solutions have not worked to end error loading media, then it is probable that your video is the problem; it could be damaged or corrupt and luckily, we have just the right remedy for the problem - Joyoshare VidiKit, which is compatible with the video files from DJI, Canon, Nikon and supports 150+ formats. It is a world-class tool precisely designed to help you repair corrupt, damaged or unplayable videos on Chrome. The software supports different possible issues about video files, is 100% safe, and has a remarkable success rate.
- Fix damaged, unplayable, corrupted videos in batch or alone
- Repair unable to play video error 5, blurry video, choppy video and more
- Option to preview video to check quality after the repair process
- Choose desired output location to save repaired video
- Enable or disable Warning Window as you want
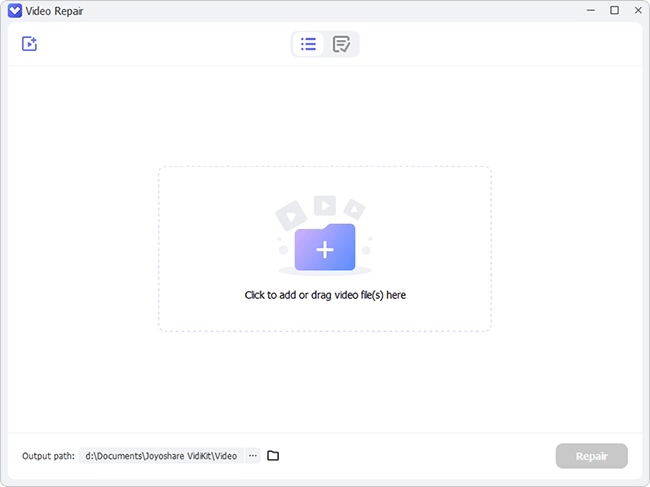
Step 1 Open Software and Add Files
Head to Repair and select Video Repair to add your unplayed video files after downloading and operating Joyoshare VidiKit. Also, it supports drag and drop method to import files.
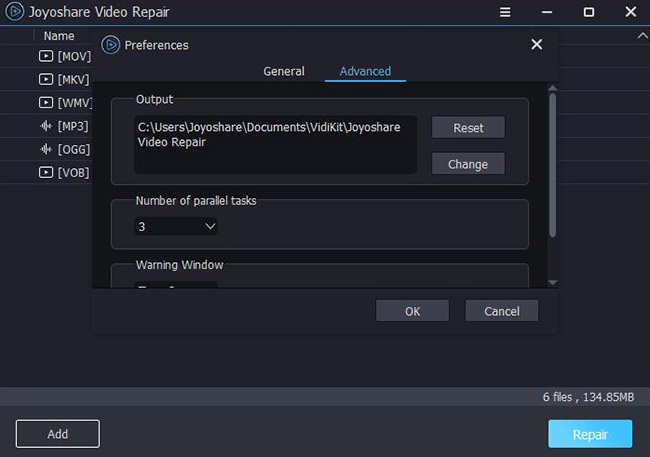
Step 2 Configure Settings
Find more advanced settings by navigating to menu bar and press Preference - Advanced to configure the number of parallel tasks. You can also change output location and warning window as you want.
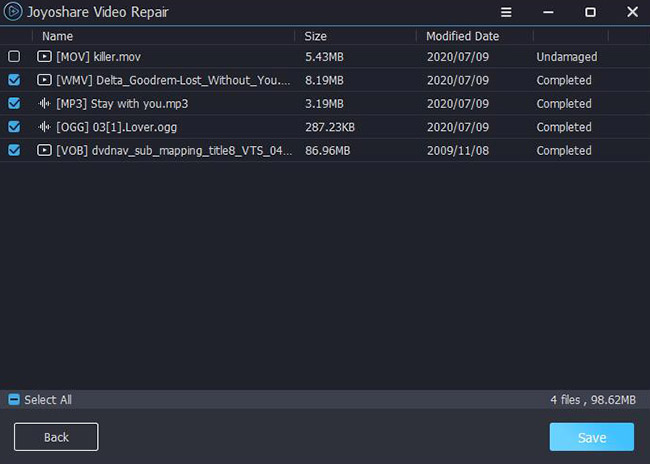
Step 3 Repair and Save Video
To begin the process of your video repair, click the blue Repair button in the right corner of the window. You can preview your video using its built-in media player to check quality. The best part of this program is that it offers detailed reason for your failed repair video.
Conclusion
We can all agree on one fact - the error loading media: File could not be played issue is such an annoying issue, but the good news is that you are now equipped with some top working tips to fix the problem. You have to try each of the suggested fixes and hopefully find one that works to resolve the inconveniencing problem. Also, if the browser solutions fail to work, you can always try repairing your video using the new Joyoshare VidiKit to ultimately resolve your problem on the Chrome browser.
