Q:"I have irreplaceable photos on my iPad Air 2 – which were synched with a now dead computer. These are the only copies of the photos that I have. After not using the iPad for a while I have forgotten the passcode. How can I recover photos from locked iPad Air 2?" – ht2002 from Apple Community

Everyone must have confronted with the situation where you need millions of passcodes or passwords for your device or apps to protect your personal information. iPad users are no exception. We trust our iPad and have put so many messages, photos and notes into it. But there are chances that we cannot access to our precious photos in iPad if it is locked or disabled accidentally. So, if you have wrestled with thinking about how to recover photos from disabled iPad without losing any of them, you can refer to this article. It will show you 5 ways to help you make it.
- Part 1. What Causes an iPad to Become Disabled?
- Part 2. How to Remove iPad Passcode?
- Part 3. The Best Tool to Recover Photos from Disabled iPad – Joyoshare iPhone Data Recovery [Hot]
- Mode 1. How to Recover Photos from Disabled iPad Without Backup
- Mode 2. How to Recover Photos from Locked iPad via iTunes Backup
- Mode 3. How to Recover Photos from Locked iPad via iCloud Backup
- Part 4. Basic Ways to Recover Photos from Locked/Disabled iPad
- Way 1. Erase iPad and Recover iPad Photos from Locked iPad via iTunes
- Way 2. How to Get Pictures off a Disabled iPad with iCloud
- Part 5. How to Disable Your Passcode from iPad?
- Part 6. The Bottom Line
Part 1. What Causes an iPad to Become Disabled?
Only incorrect password attempts will be the answer to this question. It all depends on how many times you fail to enter the correct password. If you forget your passcode and make 6 unsuccessful attempts at entering it, the device will be disabled for some period of time, such as 5 minutes.
Once that period is over, you can try it again. The time interval will be longer this time if you continue entering incorrect attempts. A permanent iPad disable will be the result of an unlimited number of attempts. The only way to resolve the issue is through the data erasure option. But before you do this, let's take a look at how to recover photos from a disabled iPad.
Part 2. How to Remove iPad Passcode?
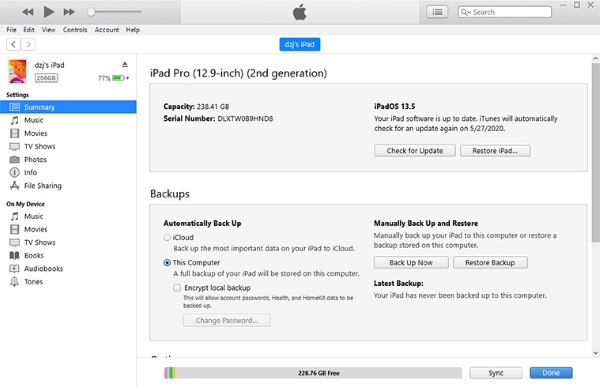
There are several ways for you to remove your iPad passcode. For example, if your iPad is synced with iTunes, you can restore your iPad with iTunes which will erase all your iPad data as well as your iPad passcode.
Step 1. Connect your iPad to your computer and then open iTunes;
Step 2. Click the tiny phone icon appearing in the upper left corner of the window;
Step 3. Select Summary temp;
Step 4. Choose Restore iPad in the right panel.
If you just don't want to install iTunes, you can also unlock your disabled iPad using Find My iPhone.
Step 1. Open Find My iPhone website;
Step 2. Log in with your Apple ID;
Step 3. Find your disabled iPad on the website and click on it;
Step 4. Tab the circled "i";
Step 5. Choose Erase iPad.
In case that the two methods mentioned above don't work on you, you can check Apple Community for more related information.
Part 3. The Best Tool to Recover Photos from Disabled iPad – Joyoshare iPhone Data Recovery [Recommended]
Not everyone will remember to back up their iPad in a regular interval. Under such circumstances, you could ask Joyoshare iPhone Data Recovery for help. As an expert in iPhone/iPad/iPod data recovery, it can restore more than 20 types of files including photos, contacts, calendar, videos, all Safari bookmarks, apps' attachments, etc. Furthermore, it is capable of supporting diverse data loss scenarios such as locked or forgotten passcode, jailbreak failure, iOS update failure, system crash, water damaged, factory reset, etc.
This outstanding iOS data recovery software also enables you to recuse your photos perfectly under 3 recovery modes so that you can retrieve lost photos from iPad without backup or with iTunes or iCloud backup. Connect, scan, and recover. Within 3 simple steps, you are able to recover you missing photos quickly and smoothly.
Highlights of Joyoshare iPhone Data Recovery:
Selectively scanning
Support all models of iPad
Preview photos before recovery
Mode 1. How to Recover Photos from Disabled iPad Without Backup
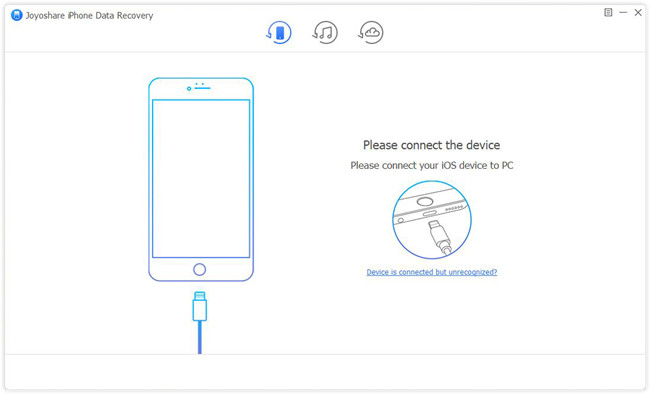
Step 1Connect iPad and Run Joyoshare iPhone Data Recovery
Launch Joyoshare iPhone Data Recovery on your desktop. Choose Recover from iDevice button at the top of the screen. Now you can connect your iPad to your computer.

Note: If it is your first time to connect your iPad, you will be unable to use this program to extract your photos without entering the right passcode to authorize computer. In this case, you can go to Mode 2 or Mode 3 to choose to recover photos from iTunes or iCloud backup.
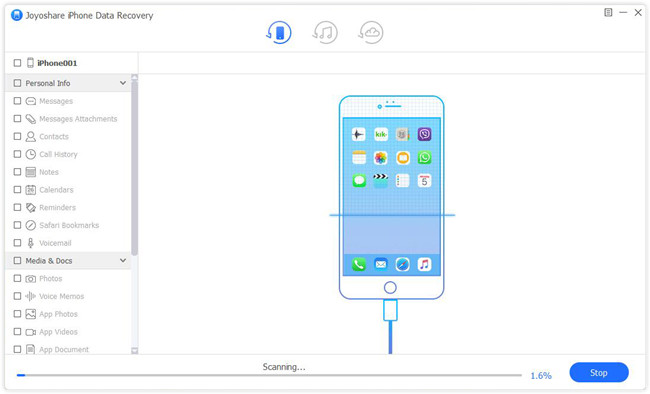
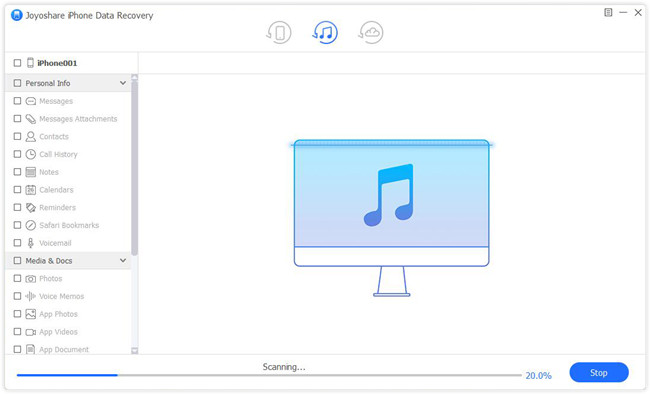
Step 2 Choose and Scan iPad Photos
After you iPad has been recognized, you are able to see a list of supported data types at the right side of the screen. You are free to scan selectively here. Choose Photos or App Photos. Next, press Scan at the right bottom to go on.
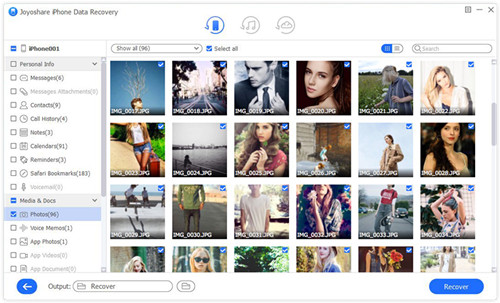
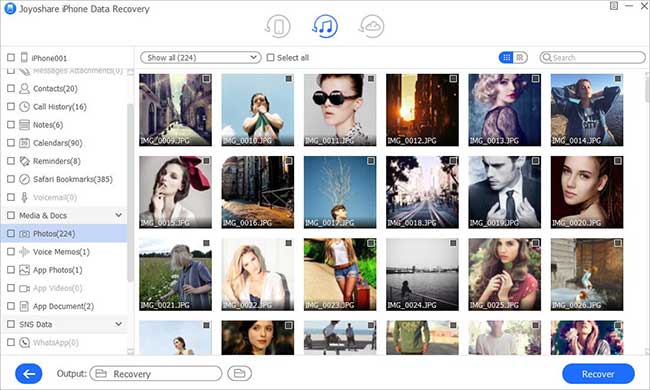
Step 3Preview and Retrieve Photos from Disabled iPad
After scanning, you are allowed to preview your iPad photos. Select either Only Show the Deleted or Only Show the Existing in the Show All box to choose your wanted photos. Click the blue Recover button to begin. Within a few minutes, you will be capable of accessing to your priceless photos from locked/disabled iPad.

Mode 2. How to Recover Photos from Locked iPad via iTunes Backup
Maybe you will ask why not just recover photos from iTunes app directly. Well, you should notice that you are at risk of erasing all your data if you choose this way. Therefore, you can ask this software for a favor.
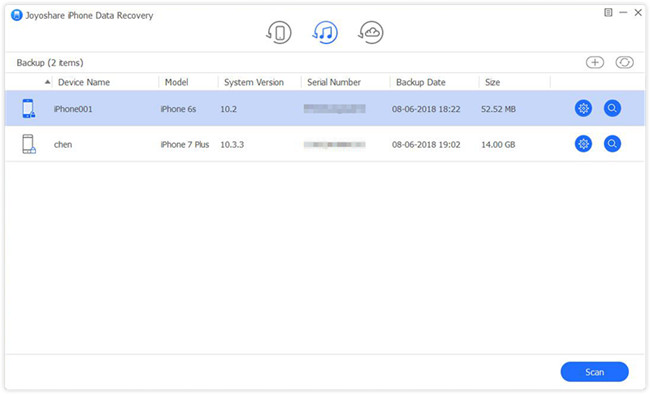
Step 1Choose iTunes Recovery Mode
Select iTunes recovery mode by clicking the middle blue Recover from iTunes button at the top of the screen. Choose the newest backup you have.
Step 2Scan iTunes Backup Photos
Click the blue gear
 . Now you are able to see a range of data types supported by this application. Select Photos or App Photos as you wish. Then press Scan button to move on.
Step 3Preview and Retrieve Photos from a Locked iPad
It is convenient to preview your desired photos before recovery. After selecting, click Recover at the bottom right corner. Lately, your photos from locked/disabled iPad will be exported to your computer perfectly.
Mode 3. How to Recover Photos from Locked iPad via iCloud Backup
If you happened to back up your data via iCloud recently, then congratulations, you are able to get back your photos from iCloud easily.
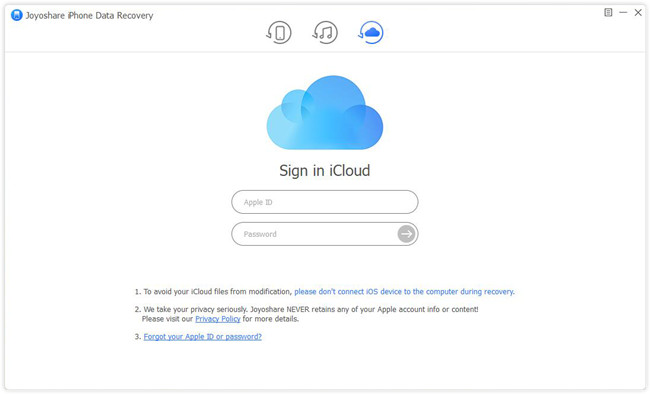
Step 1Choose Recover from iCloud
Launch Joyoshare iPhone Data Recovery and log in iCloud with your Apple ID. Click the Recover from iCloud button to start.
Step 2Download iCloud Backup and Scan
When your backups in iCloud have been displayed on the screen, you can choose the one you need and hit Download option at the rear of it. After downloading, you can see the blue gear
. Click it and choose both Photos and App Photos or just one of them to scan. Click Scan so that this program can extract your photos.
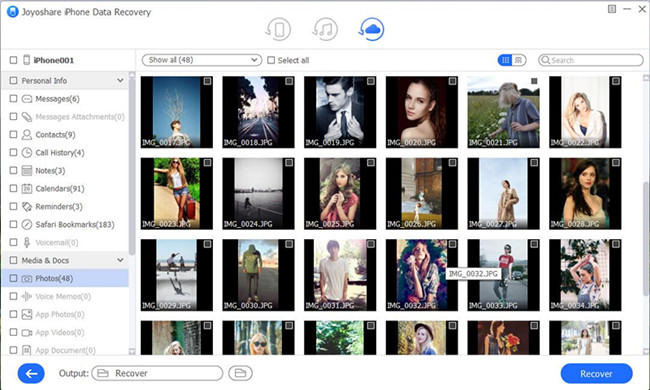
Step 3Choose Needed Photos to Recover
Preview and select photos from your locked/disabled iPad shown on the screen. After that, you are able to press the blue Recover button to get back your photos from iCloud backup smoothly.

Part 4. Basic Ways to Recover Photos from Locked/Disabled iPad
Way 1. Erase iPad and Recover Photos from Locked iPad via iTunes
When you sync your device with iTunes, you will be able to recover your photos. The steps are below.
Step 1. Launch iTunes on your computer and connect the iPad. If you are prompted for a passcode, use another computer you have synced with or enter recovery mode.
Step 2. Once iTunes has synced your device, click on "Restore iPad". On your iPad, follow the instructions to restore from a backup and choose "Restore from iTunes Backup".
Step 3. If you want to restore the device from a backup, pick the most relevant one.
Way 2. How to Get Pictures off a Disabled iPad with iCloud
Even if you don't have a passcode, you can easily restore your iPad using the iCloud service even if you have set up Find my iPhone. Here are the steps you need to take.
Step 1. Sign in to iCloud using your Apple ID from any other device via https://www.icloud.com.
Step 2. Then select the device you wish to erase from the list, in this case, the locked iPad, by clicking on "All Devices" at the top of the window.
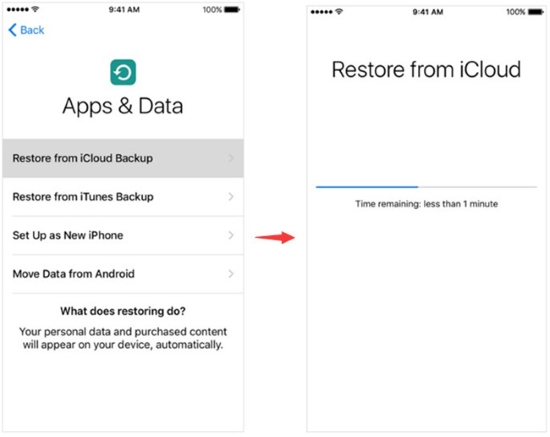
Step 3. By clicking "Erase iPad", you will erase both the device and the passcode. The device can then be set up either as a new one or restored from a backup.
Step 4. On the Apps & Data screen, choose the option to Restore from iCloud Backup.
Part 5. How to Disable Your Passcode from iPad?
If you are fed up with tons of different passcodes and afraid of getting your iPad locked again, you can actually choose to disable your iPad passcode.
Step 1. Go to Settings in your iPad and tab General;
Step 2. Find and click Passcode Lock;
Step 3. Enter into your right iPad passcode before making any changes;
Step 4. Select Turn Passcode Off at the top of the screen.
Part 6. The Bottom Line
Do not feel helpless if you are unsure how to retrieve photos from a disabled iPad. To retrieve your valuable photos, simply follow Joyoshare iPhone Data Recovery. With it's easy-to-follow instructions, it can solve your worries instantly. Please leave a comment below if you have any questions or want to make a direct conversation. Getting in touch with our talented techs will help you solve your problem quickly.