Do you need to explain what is going on when you are recording a gameplay video, online tutorial, or presentation? If yes, this completed guide on how to record a voice over will help you a lot. Here will show you what is voice over, what you need to prepare before recording, and how to record your voice with the best voice over software on your computer.

- Part 1. What Is Voice Over
- Part 2. Preparation for Recording Voice Over
- Part 3. How to Record Voice Over with Recorder
Part 1. Definition of Voice Over
Voice over, also known as off-camera or off-stage commentary, is used in a radio, television production, filmmaking, theatre, etc. The voice over is read or spoken by someone doesn't appear in the video. In another word, a voice over is someone speaking while a video is playing, but the person is usually not in the scene. For example, the voice that explains the time, the leading role at the beginning of a movie is a voice over. This can help you learn the background of the story.
Part 2. What Need to Do before Recording a Voice Over
To prepare for recording voice over, you are suggested to do as below steps, which can help you record a voice over smoothly and without errors.
Step 1: Firstly, you need to write a script to illustrate what do you intend to express. The content needs to be brief yet highlight the key point. Also, the most important part is matching the scene of the video. Read it several times and check if it is fluent;
Step 2: If you are confident about your own voice, you can be a narrator to record the voice over. On the contrary, you can hire a professional narrator. You can send part of the script to the professional narrator to test if it is your desired voice;
Step 3: Choose a good microphone that will get twice the result with half the effort;
Step 4: Select an easy-to-use yet full-featured recording tool;
Step 5: Download and install a video and audio editor.
Part 3. How to Record a Voice Over - Joyoshare VidiKit
As it is mentioned, choosing a good software to record voice over is very important. Joyoshare VidiKit - Screen Recorder is an advanced recording tool that can capture sound from the system and microphone, so it can help you to record voice over, online radio, and more audio flexibly.
Other than that, it allows you to skip unwanted content and cut recording voice to different sections. Also, it is not a problem to save the recording to popular format, for instance, MP3, M4A, AAC, OGG, AIFF, WAV, M4B, M4R, FLAC, etc. For professionals, it's also practical to specify codec, channel, bit rate and sample rate handily. In addition to recording audio, this software is good at recording all the activities on the desktop, like gameplay, movie, live streaming video, online meeting, etc. The capture area is changeable. By means of it, you can record screen in full screen and certain screen.

Key Features of Joyoshare VidiKit:
Can edit ID3 tag infomation
Support a wide range of audio formats
Record online radio, voice over, etc. in high quality
Personalize related parameters for audio format
Step 1Launch Joyoshare Voice Over Recorder
Double click the icon of Joyoshare VidiKit to get it run. Then open "Screen Recorder" and switch to "Record audio" mode by pressing the speaker icon next to "REC". Input a microphone to your computer. Turn off the system audio and keep the microphone sound turning on.

Step 2Confirm recording settings
Lightly hit on the gear icon at the bottom right corner to bring up the hidden window for recording. You can change storage location, choose the desired format, create a recording schedule, embed watermark, hide or show the cursor. If you want to change the parameters of the audio, you can select an audio format and click the small gear icon at the top right corner of the format option.

Step 3Begin to record a voice over
Now, all the preparations are done. You can go ahead to click the "REC" button to initiate the recording. After a three-countdown, you can start to speak to the microphone and the software will record the sound. Once you make a mistake, you can click the "Pause" button and record the sentence again.
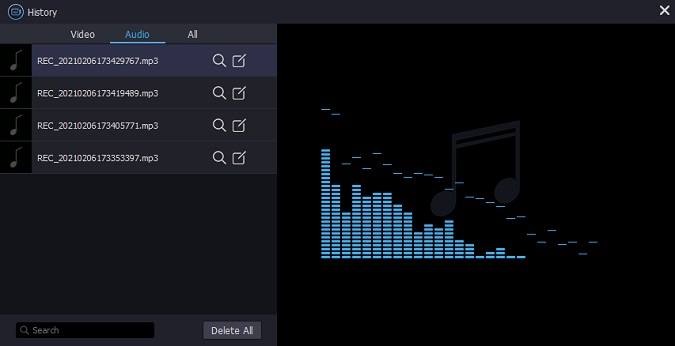
Step 4Manage the recordings
When the recording is completed, press the "Stop" button. The program will lead you to the "History" tab where you can see all voice over tracks. Then you can hit on the "Search" icon to locate the files, click the "Edit" button to trim and revise the ID3 info. Double clicked the audio file, you can listen to the recording.