Do you realize that it is easier to use a Windows computer to rip DVD than use a Mac computer? Are you looking for a workable way to rip and store a DVD on your Mac? Is it inconvenient for you to watch a DVD movie on DVD player? Here will instruct you how to rip DVD on Mac with three tools. Then you can play the DVD files on your MacBook, mobile phone, and tablet every time and place.
- Part 1. Convert DVD on Mac with Disk Utility
- Part 2. Convert DVD on Mac with Joyoshare Video Converter
- Part 3. Tips to Choose a Good DVD Ripper for Mac
Part 1. How to Rip DVD on Mac with Disk Utility
Disk Utility is a system utility software on macOS operating system. With it, you can rip DVD on Mac without installing other third-party programs. It can create, convert, backup, compress and encrypt logical volume images.
Step 1: Insert the DVD to the Mac's CD slot. If your Mac computer doesn't come with a DVD drive, you need to use an external one. Now, click the "search" icon at the top-right corner of the screen and enter "Disk Utility" to get Disk Utility run;
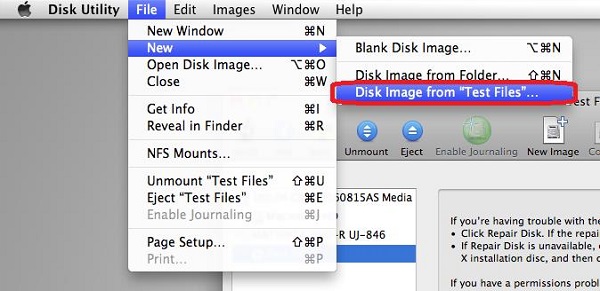
Step 2: Find the DVD's name, which is under the "External". Tap on the "File" on the top side > select "New Image" > click "Image from + DVD's name" > rename the file > hit on "Save As";
Step 3: Click "Format" and choose "DVD/CD master". Select "Desktop" from the "Where" menu to store the output files;
Step 4: After that, press "Save" to start ripping DVD on Mac. Please note that the DVD copy cannot be played directly after the process. You need to choose "Open Disk Image" from the "File" list and open the .dmg file. Then you can watch the video.
Part 2. How to Rip DVD on Mac with Joyoshare Video Converter
Although the default way can help you rip DVD disk on Mac without other program installations, it has some limitations. To help you rip DVD and watch them directly on Mac computer and other devices, here is another way introduced.
Joyoshare Video Converter is a DVD ripper, which can be run on Mac and Windows platforms. Different from Disk Utility, this program can rip DVD to any digital formats, such as MP4, MOV, MKV, AVI, WebM, WAV, FLV, MP3, OGG, AC3, M4A, WMA, etc. Then you can enjoy the converted videos on any compatible devices, like iPhone, Galaxy Tab, iPad, Apple TV, Galaxy S8, LG TV, and so on.
Beyond that, this DVD ripper not only can convert video and audio quickly and losslessly but also can edit video. The built-in video editor allows you to trim video, add effect, embed watermark, insert background music, and more.
Key Feature of Joyoshare Video Converter:
Rip DVD to digital formats on Mac at 60X speed
Remove protections from the DVDs
Support to trim video, add effects, etc.
Convert video in batch and can merge files
Step 1Add DVD files to Joyoshare DVD Ripper
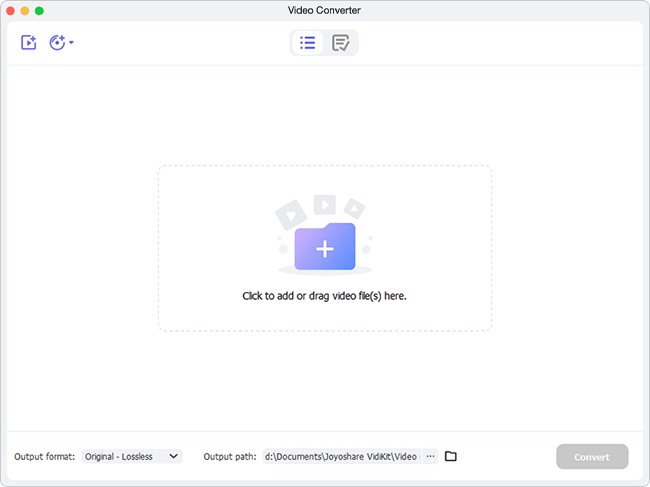
To begin with, you need to insert a DVD disk, which contains the video that you want to copy to your Mac computer into the drive. Then run the Joyoshare Video Converter. Next, Tap on the "Load DVD" button at the top of the interface or choose the DVD's name from the drop-down list to load the DVD files.
Step 2Choose a format
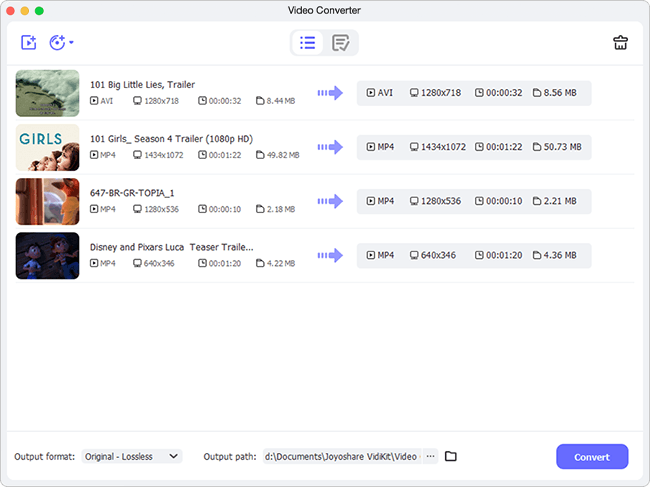
After a while, you will see all the DVD files are on the interface. You can select any output format by tapping the "Format" button at the lower-left corner. Tick the "High-Speed mode" option to convert the DVD to any digital formats without quality loss. Under this mode, the conversion speed is 60X faster than other converters. Then you can select "Original" or other formats under the "General Video" tab. Besides, choosing "Encoding mode" allows you to customize the file format, quality, and codec.

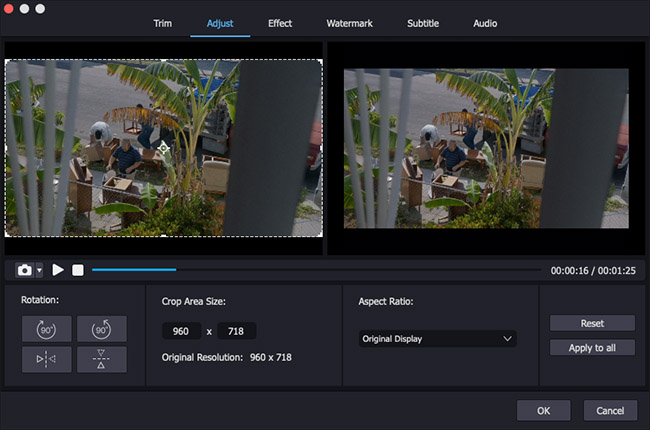
Step 3Edit DVD files (optional)
In case you need to edit the video, please go back to the format window and select "Encoding mode". Rerun to the main interface and tap on the "Edit" button next to the file. A video editor will appear. You can trim and crop the video, take screenshots, flip horizontal, and adjust audio. What's more, you can add watermark, frame, and subtitles to the video. If you don't need to edit DVD, you are suggested to opt "High-Speed mode" and go to the final step directly.
Step 4Start ripping DVD on Mac
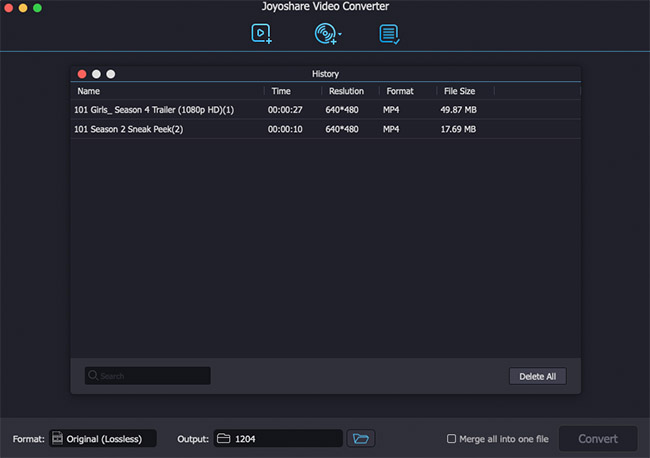
In this final step, you can hit on the "Convert" button to begin the conversion. If you need it, you can join all video files together by checking the "Merge all into one file" option before converting the DVD. Ultimately, you can preview the videos by clicking "Converted".
Part 3. How to Choose a DVD Ripper for Mac
There are many DVD rippers on the market, each of them can help you rip DVD on Mac. The following are the aspects or factors we should take into consideration while choosing a DVD ripper for Mac.
Speed
It is known that the files of a DVD disk are usually large. Therefore, it will take much time to convert a DVD. Choosing a high-speed DVD ripper, which can help you rip DVD quickly is a very important element.
Output Quality
Most of us want to enjoy a video with high quality. But some of the DVD rippers will compress the video during the conversion. Thus, using a lossless DVD ripper or converter to rip DVD is an advisable option.
Output Format
This is also a significant aspect need to be considered while you are choosing a DVD ripper for Mac. The more formats that the program offers the more conveniences that you can obtain.
Additional Features
In addition to ripping and converting DVDs, it will be better if a DVD ripper has a built-in video editor. Also if the converter can remove various limitations from the DVD, it will be more intelligent.
