Live Photo has catch much attention since Apple introduced it as a new camera function on iPhone 6S/6S Plus. Though it seems like an image file with still picture shown, it comes to life once there is a touch. Capturing videos and sound synchronously, it attracts a group of iOS users. However, it has drawbacks too, which cause inconvenience for you. This is the reason why some people have a mind to turn off Live Photos on iPhone. For further discussion, next we are going to talk more specifically.
- Part 1. Reasons for Closing Live Photos on iPhone
- Part 2. Guides to Shut off Live Photos on iPhone
- Part 3. Tips to Convert Live Photos to GIF or Still Images
Part 1. Why You Have to Turn off Live Photos on iPhone
As it already mentioned, Live Photos is made up of both animated clip and static image. Compared to the standard single JPG picture, it produces extra data that makes file size about twice of common still one. Consequently, you will soon run out of your iPhone storage space if there are a mass of Live Photos captured on camera app.
Furthermore, this special feature, Live Photo, is not supported by all software. If you upload or sync it to them, you can only find a set of still photos plus unrecognized files. Supposing you delete Live Photos from iPhone using software after import, a stack of blank video files will be left on iPhone. Anyway, it is troublesome to manually remove them.
Another important aspect, grainy images will be generated by Live Photo if you capture pictures in low light and compel camera to continue to take video, making your iPhone camera is unable to use longer exposures to take more light in this case. Nevertheless, obvious improvements can be saw after turn off Live Photos on iPhone.
Part 2. How to Turn off Live Photos iPhone
You can get Live Photo function disabled on iPhone so that the photos you take at a later time will not be saved as Live Photo files anymore. To do this, let's pay attention to following content right now.
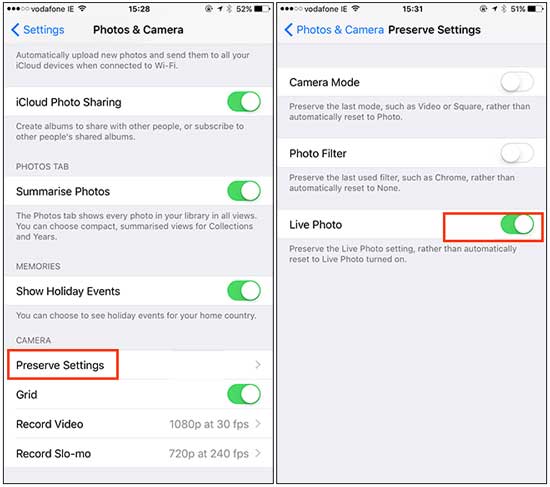
Step 1: Open your iPhone's "Camera" app;
Step 2: Tap on the top yellow Live Photo icon (three concentric circles), which will turn to white (meaning being closed);
Step 3: Go ahead to "Settings" > "Camera" > "Preserve Settings";
Step 4: Slide the switcher of Live Photo and make it ON/GREEN so that your camera app settings will be kept.
Part 3. Trick to Convert Live Photos to JPG, GIF, PNG and More
Although you have successfully disabled Live Photos, there is no change for previous Live Photo files. Do you feel like converting them to common formats, like GIF, JPG, BMP or others? Don't fret. With a simple Live Photo converter, such as Joyoshare LivePhoto Converter, you are allowed to carry out any Live Photo conversion easily. Here's how.
Step 1 Sync iPhone Live Photos to computer
Go to download and install Joyoshare LivePhoto Converter from its official website. Transfer Live Photos to your computer with a USB cable.
Step 2 Import iPhone Live Photos
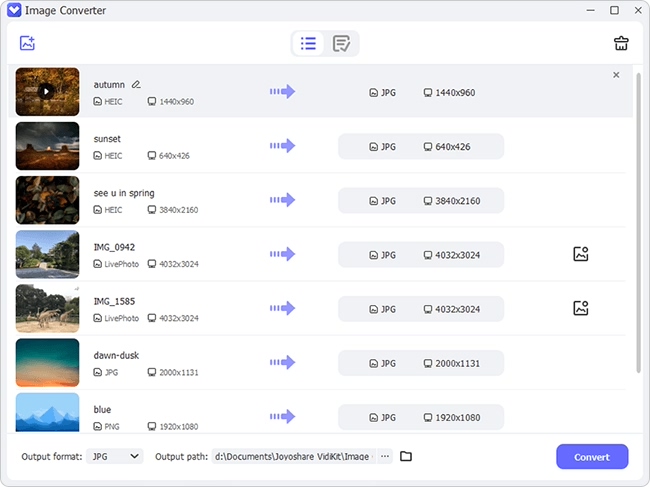
Simply launch Joyoshare LivePhoto Converter and import selected iPhone Live Photo files to its main interface. You are enabled to click "Add file" button on its top or drag & drop what's ready to Joyoshare. Notably, Live Photos can be added in batch or singly according to your preference.
Step 3 Confirm format settings and edit Live Photos
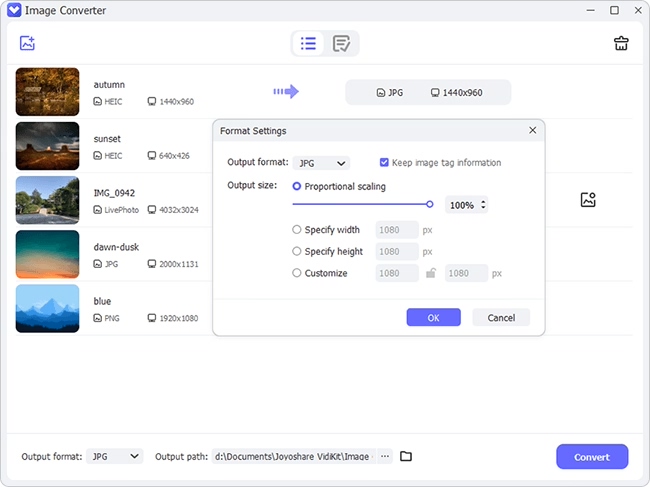
Hit the "Format" panel to choose desired format, including JPG, GIF, BMP, PNG, TIFF and WEBP. You can set resolution, adjust quality and keep aspect ratio as you wish. Besides, go to preview each Live Photo by pressing its "Play" button, revise its name or select designated frames flexibly.
Step 4 Convert iPhone Live Photos to still pictures or GIFs
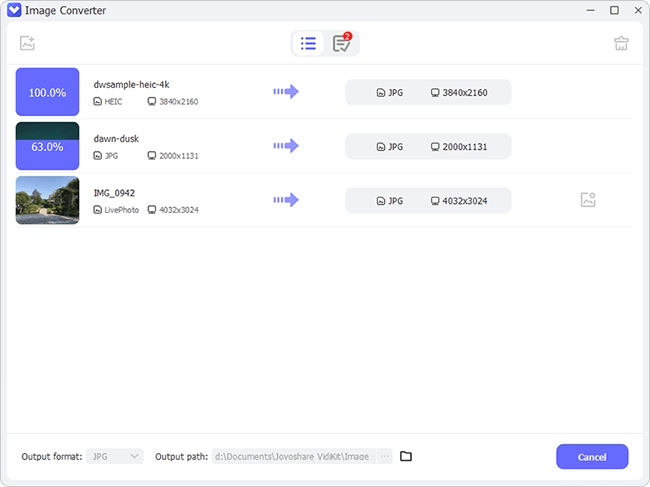
Since everything gets done already, you can go to click on "Convert" icon at the right bottom. Joyoshare will soon export converted files for you. To check them, you just have to head to "Converted" > "History" > "Search".
