Q:"How to add a watermark in Windows Movie Maker?" - from Quora
Creating a watermark for video is one of the simplest and most effective things that you could do to protect your working from being arbitrarily reproduced and used as well as improve the appearance vision. So then, how to watermark a video at little cost of time and effort? For this end, we suggest Windows Movie Maker, a free and straightforward video editing program on Windows. Instructions of add watermarking in it are detailed below.

- Part 1. Add Watermark in Windows Movie Maker
- Part 2. Add Watermark in Window Movie Maker Alternative
Part 1. How to Add a Watermark in Windows Movie Maker
That's just a fact that it is nothing challenging to add watermark in Windows Movie Maker. Though, before implementing, what you should know is that Windows Movie Maker is discontinued software, which only works to create text watermark on Windows 7 and earlier. In case it fails to work on your computer or you want to design image watermark unsupported by it, no worries, we share alternative in the next part.
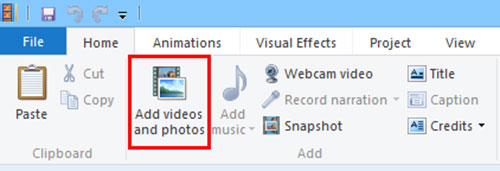
Step 1 Import video to Windows Movie Maker
First and foremost, launch Windows Movie Maker on your Windows computer and then click on "Add videos and photos" to add the video to be watermarked from local folder.
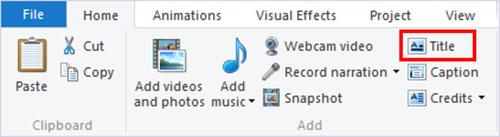
Step 2 Add text watermark in Windows Movie Maker
Once your video has been uploaded, select "Title" option from "Edit" menu. Then, a window will appear, in which you can type whatever you want to make the text watermark. If you need to edit the created watermark, please go to "Animation" > "Subtitle" to customize the text watermark font, color, size, position, transparency, etc. as you prefer.
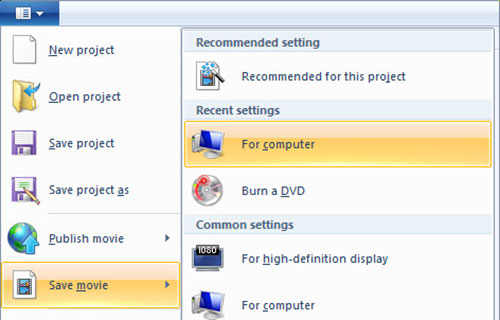
Step 3 Output and save the new video
At a final step, choose "File" and then to "Save movie" to set the output folder and quality. Soon afterwards, Windows Movie Maker would export the watermarked video to the specified folder.
Part 2. How to Add a Watermark in Windows Movie Maker Alternative
Joyoshare Video Cutter for Windows, as the best alternative to Windows Movie Maker, is introduced as the another solution to create a watermark to a video. Known as one of the top video cutting tools, it indeed channels the ability to split or cut clearly any audio & video without the expense of quality. Except for the precise and lossless cutting function, it is fitted with an easy-to-use and serviceable video editor, which enables you to simply watermark a video in text and image, insert subtitles, apply visual and sound effects, edit file quality, etc. On top of that, it features good compatibility, working with a wide number of formats - MP4, YouTube, MOV, WMV, MPG, TS, 3GP, FLV, DVR-MS, H.264, M4A, OGG, MP3, and so on.
- Also available for Mac besides Windows
- Cut and split audio & video without diminishing quality
- Watermark any video in text and image with easy steps
- Support various types media formats and portable devices
- Easily crop, rotate, adjust, subtitle, add background music, etc
A complete guide on how to watermark a video using Joyoshare Video Cutter:
-
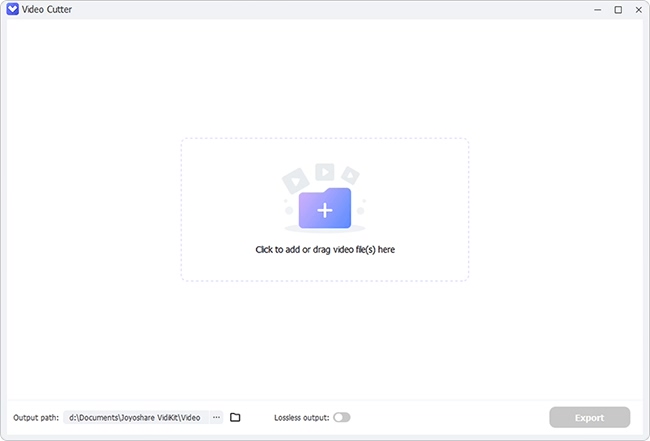
Step 1 Launch program and add video
Make the latest version of Joyoshare Video Cutter installed on PC. Launch it and perform to "Open" to import video from local system. Conveniently, drag your video file to the instructed area.
-
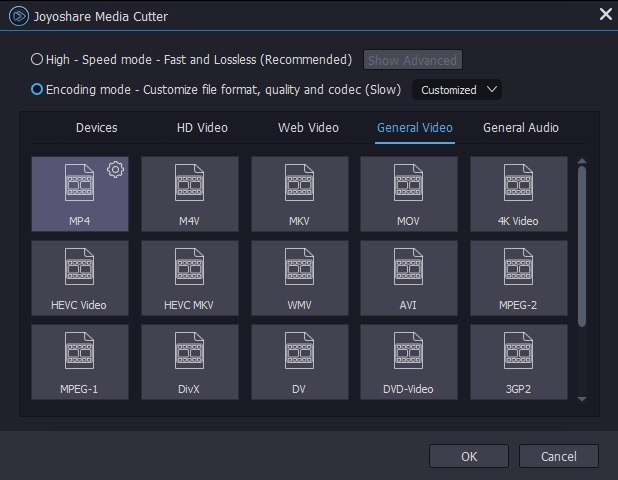
Step 2 Perform output format settings
Go forward to the "Format" tab to gain access to the formatting panel. There lie two processing modes and mass of output formats. In order to watermark a video, you are asked to finish format settings under the "Encoding mode", as the "High-speed mode" is designed to cut, split, and merge files without the cost of quality. After the selection of export format, you can go further to custom the output quality, codec, resolution, frame rate, etc by the click of a gear icon located at the top right of chosen format.
-
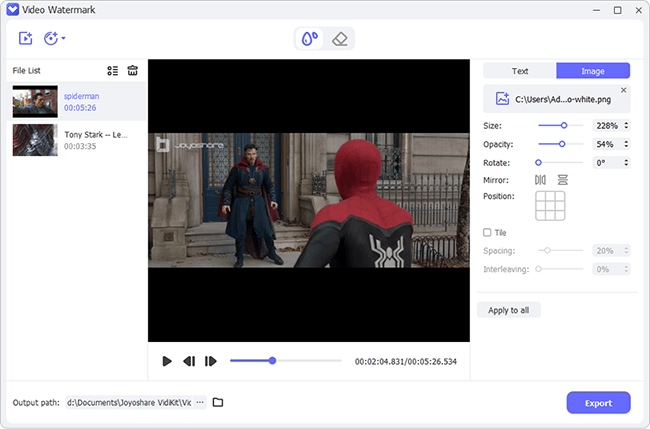
Step 3 Add a watermark to video
It is about time you are required to click "OK" back to the first interface. Next, please find "Edit" icon and touch it to go to the editing interface, in which use "Watermark" tool to watermark your video. To create text watermark for video, type words in "Text" field. According to your preference, freely adjust position, color, font, style, size, transparency, and more. For the design of an image watermark, tap on "+" icon to upload the picture. After positioning it in the proper area, click on "OK".
-
Step 4 Output the watermarked video
You should be back to the main screen of the program by now. The last thing to do is pressing the "Start" button to export the final video. The output video will be stored in a "converted" folder on your computer. Simply, head to "Open The Output Folder" to locate it promptly.