For a large quantity of Mac users, adding a cool video effect is a critical editing step to present personal video file with an extraordinary style. To do that, iMovie always firstly comes into mind as it is a fairly reputable video editing program. Hence, in this post we'd like to share how to add video effects in iMovie with these Mac users. By the way, we will also show how to add video effects on PC for other Windows uses.
- Part 1. Add Video Effects with iMovie on Mac
- Part 2. Add Video Effects with iMovie Alternative on Windows
Part 1. Simple Guide to Add Video Effects in iMovie
iMovie provides users with a huge array of video effects to enhance any beloved video file. If you are the one who wants to create a unique video with your own hands, you can manipulate iMovie on your Mac computer by referring to following instruction.
Step 1 Add target video project
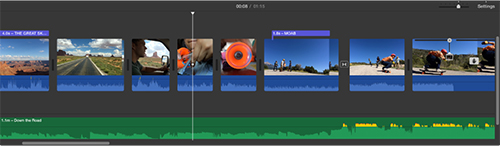
Launch iMovie on Mac and start open a new project by heading to "+" icon > "Movie" > "Import Media". Once it is chosen and added to the timeline, it will displayed as above.
Note: Not all video formats are supported in iMovie. It can only support HDV 1080i (25 and 30 fps), HDV 720p (25 and 30 fps), DV, DV Widescreen, MPEG 4 Simple Profile and iSight. You should be clear about whether your imported video can be accepted straightly.
Step 2 Go for "Video Effect" panel

Hit the "Clip Filters and Audio Effects" icon in the row of adjustments icons, with which you can adopt a wide series of video effects to your video file.
Step 3 Begin adding video effects in iMovie
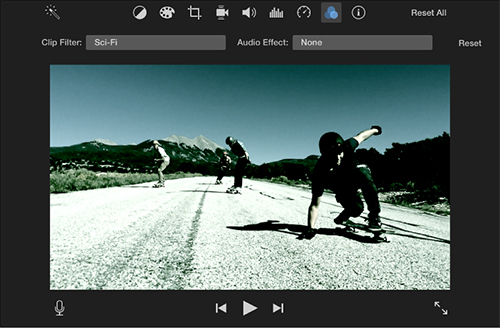
Next you can click the "Clip Filter" button to bring up a pop-up window with a list of video effects for you to choose, including "Flipped", "Raster", "Cartoon", "Film Grain", "Hard Light", "Dream", "Romantic", "Vignette", "Heat Wave", "Sepia", etc. Once you decide the one you want, you can hit on it simply and go to press "Done" to complete a task.
Part 2. Optimal Solution to Add Video Effects in Joyoshare Media Cutter
It is hassle-free to add video effects on iMovie with just few clicks. However, in case you would like to get a more professional way to make it, you can take an iMovie alternative, Joyoshare Media Cutter, into consideration. Broader than iMovie, this tool can work well on both Mac and Windows. With it, you can not only add special video effects to your video, but also offers ability to adjust brightness, contrast, hue and saturation at the same time.
Comprehensively, this versatile video editor also delivers wonderful platform for you to cut off needless pieces, rotate video to desired degrees, trim a specific part, add sound effects and background music, crop a certain area, insert right subtitle, etc. Most notably, it lets you customize your output format in a flexible manner; any configuration info like resolution, codec, bit rate, channel, sample rate, etc. can be changed directly. Surely, it is as well available to support multiple video formats, such as MP4, M4V, MKV, MOV, WMV, AVI, ASF, RM, RMVB, OGV, MPEG, FLV, SWF, TS, TRP, 3GP, DV, DivX, etc.
Key Features of Joyoshare Media Cutter:
Add different video effects to imported video
Convert video to new format or transfer to portable device
Automatically play the loaded video file for you
With built-in editing tools to enrich designated video
Come with well-arranged preview window to see any changes in advance
Step 1 Open up Joyoshare Media Cutter to add video
Since you have fit out your computer with Joyoshare Media Cutter, you can directly run it on Windows. Then it's time to operate this smart program to import video. You can click the "Open" button to browse local folder or drag the selected one to the main interface.
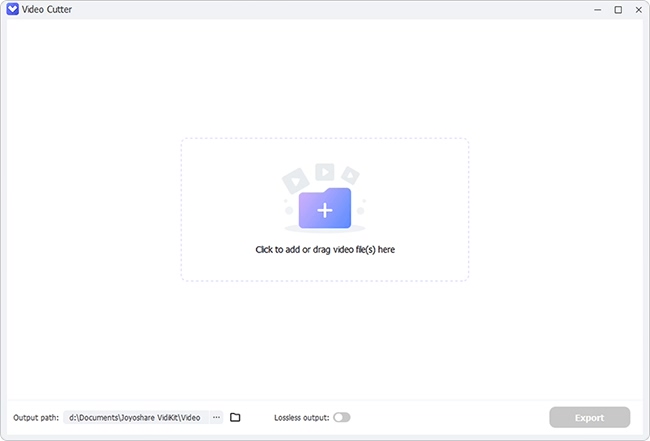
Note: You are allowed to deal with one video file at a time and generate more than one video clips to edit by hit the "+" icon.
Step 2 Add eye-catching video effect
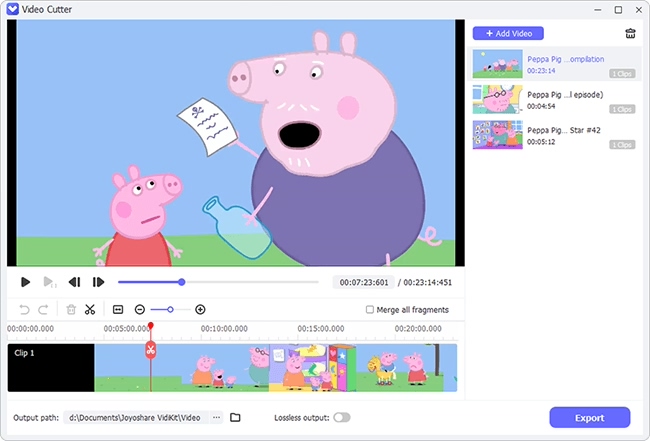
The auto-play function gives you convenience to control each second for the loaded video. Having figured out which part to edit, you can move the yellow sliders or simply type in the temporal intervals to set both start and end time points. Hereafter, continue to press the "Show segment list" icon
 and click the edit button
  to add video effect.
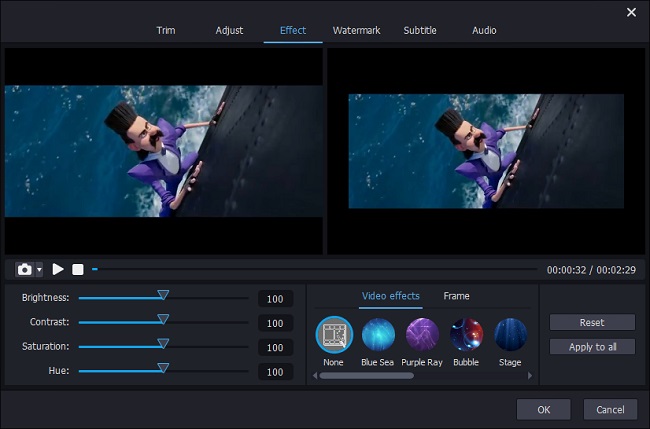
Go forward to hit the "Effect" tab on the pop-up window's top menu bar. There are diverse popular video effects you can apply, including "Blue Sea", "Bubble", "Stage", "Soft Shine", "Red Halo", "Fireworks", "Rain", "Snowflake" and "Flying Catkins". You have chance to try all of them one by one and preview the visual effect on the right window. Choose the one you like and click "OK" button to confirm your operation. During the whole process, you can make use of the snapshot-taking option
 to capture favorite shots in your own way.
Joyoshare Media Cutter also entitles you to adjust brightness, contrast, saturation as well as hue to produce a professional-looking video.
Step 3 Output new video
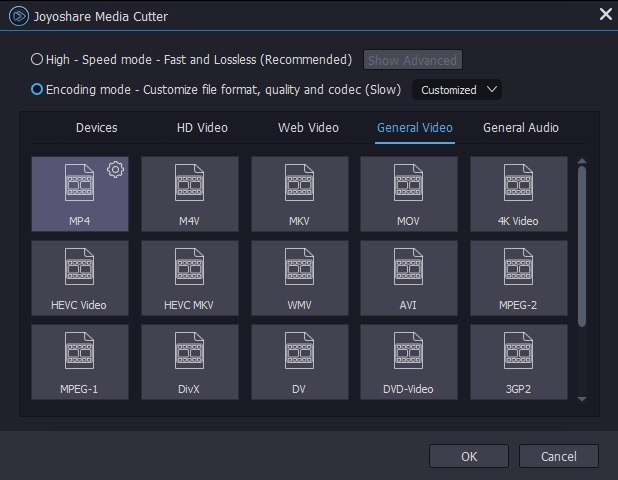
Go for "Format" panel to select a preferred output format. Remember that you ought to tick the "Encoding" mode so that you can specify bit rate, codec, frame rate, resolution, channel, etc. at your own will. It can be done under any selected accessible format and mobile device. Lastly, hit the "Start" button to end the whole editing process and export destination video locally.