VSDC Free Video Editor is a well-known non-linear editing system that can deal with both video and audio files in HD resolution. It also offers ability to import and export a large number of formats. Excluding performing as a handy video editor, it can also do well in creating slideshow, capturing screen and recording video. Without doubt, there are thousands of users adopt it to manage their video files. What if you want to cut video in VSDC Free Video Editor? Here we go!
- Method 1. Trim Video in VSDC Free Video Editor
- Method 2. Split Video in VSDC Free Video Editor Alternative
Method 1. Easy Steps to Cut Video in VSDC Free Video Editor
As a totally open source, VSDC Free Video Editor can be a comprehensive program for users. Now, let's see how to cut video with VSDC.
Note: The operating interface of VSDC Free Video Editor is not straightforward enough, which will overwhelm new starters. If you set about previewing the designated video file, it will start an independent video player to do that work for you.
Step 1 Launch VSDC Free Video Editor and import video file
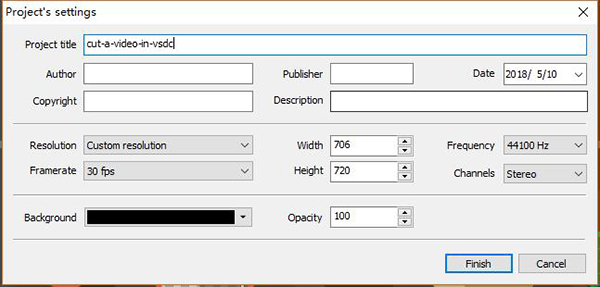
Double click the icon on your desktop screen to open VSDC Free Video Editor. Hit "Import Content" so that you can search a definite video file from your computer's local folder. When determine the video, the "Project's settings" will be shown at once that empowers you to customize some parameters at your own will.
Step 2 Decide cutting area to remove

The chosen video file will be presented in the central position. You have right to preview it firstly. Then move the playhead and handles to make sure which part you don't need. When get ready, utilize "Cut out fragment" button on the top Tools menu of the "Editor" tab.

Likewise, you can right-click the video clip to bring up "Cutting and splitting" option in object menu or simply press it on the right part "Properties window".
Step 3 Edit video and save it on your PC
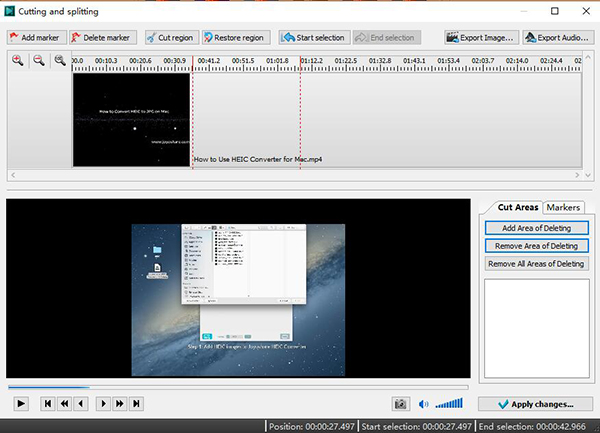
Afterwards, there will be a pop-up window that facilitates you to edit your video file in VSDC Free Video Editor. To get rid of unwanted portion from a required video, you can mark an region and click the "Cut region" icon, which will be deleted right away and added to the "Cut Area" window. Hence, if you need, you can also restore it at a later time by hitting the "Remove Area of Deleting" button.

Then it's your time to export your edited video. You can directly save it on your PC in distinct format. Moreover, it's as well available to output to DVD, transfer to iPhone/iPad or generate to web.
Method 2. Complete Guide to Cut Video in Joyoshare Media Cutter
Providing more thoughtful designs than VSDC Free Video Editor, Joyoshare Media Cutter is regarded as one of the most dedicated video cutters. It is sufficient enough to fit for specific requirements from different users, which makes it a top priority for novices particularly.
Without re-encoding process, Joyoshare Video Cutter can assist you to strip useless parts at 60X faster speed. Aside from high-quality output, this straightforward tool can even support exporting destination files to abundant formats along with popular devices, such as MP4, M4V, MKV, AVI, DV, DivX, SWF, HD MOV, TS, M4A, AAC, M4R, MP3, AU, AIFF, or smart TV, Xbox 360, PSP, BlackBerry Bold, iPad, iPhone, Android, etc. Most of all, you are entitled to stylize your own videos by re-setting the relevant parameters, like codec, sample rate, quality, resolution, bit rate, etc.
Surely, Joyoshare Video Cutter can as well be applied to merge video clips into a seamless one, act as a ringtone maker, rip audio from video only, eliminate noise from recording and shrink video to manageable size and so on.
Key Features of Joyoshare Media Cutter
Cut any video file without damaging quality
With innovative acceleration processor to work fast
Join different video cuts together in finest way
Be compatible well with multiple formats and devices
Permit you to make customized video as you want
Step 1 Get Joyoshare Media Cutter run to add video file
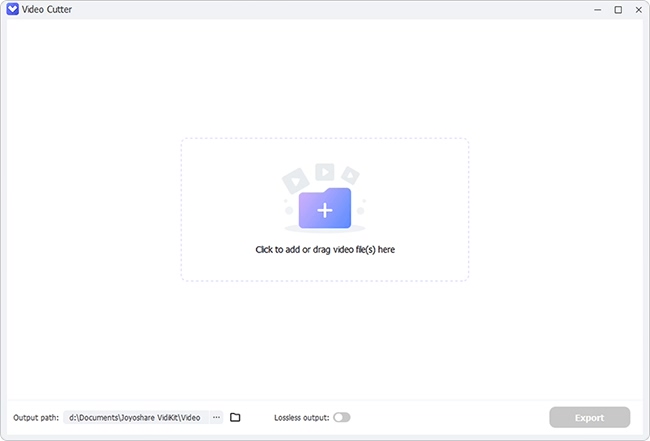
Since you have equipped your computer with Joyoshare Video Cutter already, you can go straight to run it and import a selected video file. Specify a video and directly drag it to the main cutting interface. Or you can simply click the "Open" button so that you can browser your local folder to get one video added.
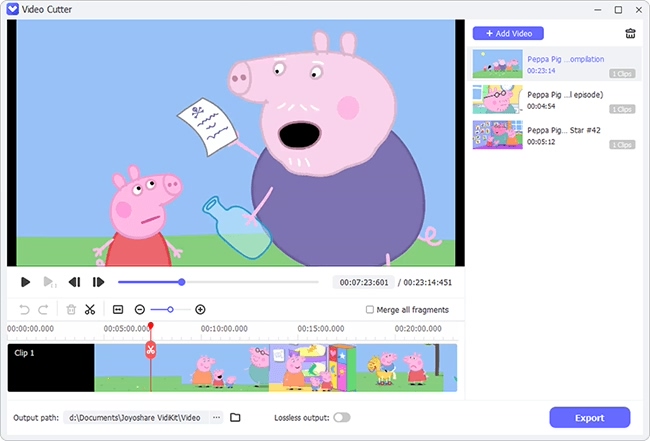
Step 2 Remove needless sections and keep desired portions

As long as the video is loaded completely in the main interface, Joyoshare Media Cutter will play it for you automatically. Combining the progress bar with the played video frame, you can figure out which part to be cut explicitly. More both handles for beginning and end points to isolate required part. Alternatively, you can enter precise start time as well as end time to setup the temporal intervals.
To join all video cuts that you want together, just go to press the "+" icon to produce more than one new segments and meanwhile tick the "Merge Segments" option.
Step 3 Opt for cutting mode for the required video
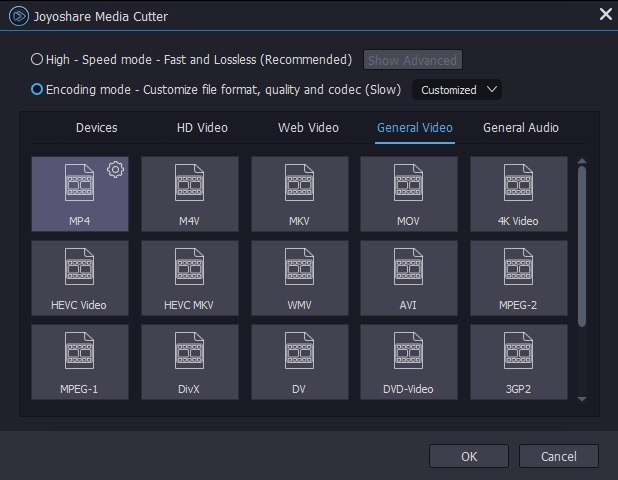
Hit the "Format" panel and you will be leaded to choose one cutting mode for your video file. "High-Speed" mode can be used to fulfill a lossless task in a fast way while the "Encoding" mode gives you chance to make customized video. Having selected the destination format, you can press the gear icon on its top right corner. As per your requirements, you can change resolution, codec, bit rate, sample rate and channel and more parameters freely.
Step 4 Begin to cut video with Joyoshare Media Cutter
Without any further operations, you are supposed to click the "Start" button to let Joyoshare Media Cutter show its powerful capability. Working at up to 60X faster speed makes cutting process easier than expected. Certainly, you are allowed to see the finished video in your destination folder.
