
It would be a frustrating situation where your iPhone won't sync with iTunes without any sign. As you can imagine, when you have to restore your iPhone in some special cases, but there is no way to do a backup on iTunes to avoid losing data as your iPhone can not be synced with iTunes, what should you do? Don't you have any clue about it? Well, in this piece, 5 reasonable solutions are brought out to assist you in disposing of this problem methodically.
- Solution 1: Update iTunes Version
- Solution 2: Re-authorize Computer to Access iTunes
- Solution 3: Change the Method to Sync
- Solution 4: Check If iPhone Is Syncing with iCloud
- Solution 5: Consider Joyoshare UltFix iOS System Recovery
Why Won't iPhone Sync to iTunes?
The occurrence of the problem that iPhone won't sync to iTunes results from various reasons. For the sake of an in-depth analysis of this issue, below lists several causes for your reference.
1. The lightning cable you use is broken or iTunes needs to be updated;
2. The sync option on iTunes are not set up properly;
3. If you iPhone is being synced with iCloud, the issue will also happen;
4. iPhone system glitches may limit the normal synchronization between them.
Part 1. Get iTunes Updated to the Latest Version
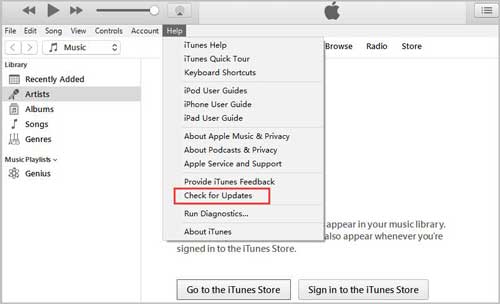
Needless to say, an outdated iTunes version is one of the most ordinary reasons for the issue that iPhone won't sync with iTunes. In other words, if you update the iOS version on your iPhone regularly but have lost sight of the iTunes update, then your iPhone will not be compatible with iTunes version to result in the sync problem. Most of the time, you just sort the mess out by easily updating iTunes. Follow the descriptions below to get it updated on Windows or Mac.
On Windows: Open iTunes - touch "Help" in the menu bar - find "Check for Updates". Then it will automatically check if there is an update available. If so, download and install it.
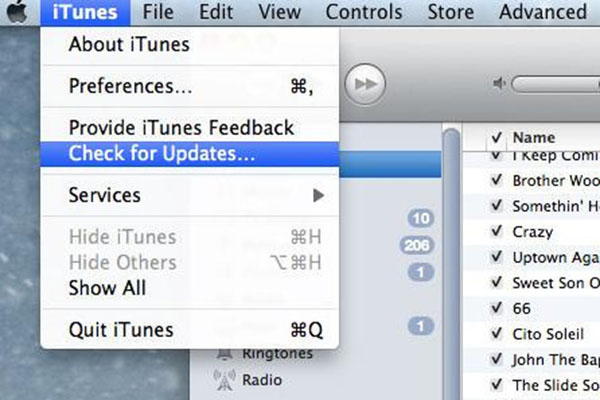
On Mac: Run "iTunes" - tap on "iTunes" at the top left corner - still choose "Check for Updates" from the list of options. It will check the recent iTunes version.
After updating, please try to sync iPhone with iTunes again. If the problem still lingers on, just move to the next method.
Part 2. Authorize the Computer Again
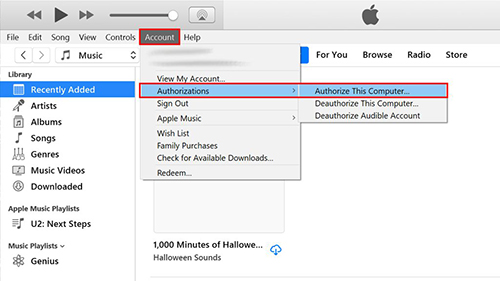
It should be known that only if you authorize the computer on iTunes, your iPhone can be recognized by iTunes. Therefore, reauthorizing the computer is well worth a try to resolve the issue that iPhone won't sync to iTunes. To do it, you need to head to "Account" on the top of the window after launching iTunes. Next, choosing "Authorizations" is necessary. Then you will see three options from which you have to click on "Authorize This Computer".
Part 3. Change the Syncing Way
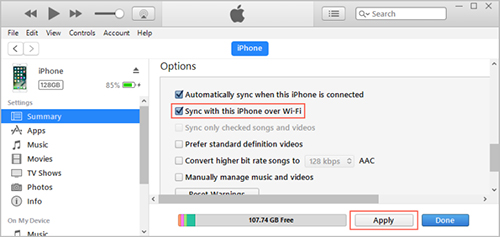
There are two syncing methods to sync iPhone with iTunes - sync with a USB cable and the wireless sync. In the event of the trouble that iTunes won't sync with iPhone is created by the USB sync issues, switching the syncing method to the wireless sync is the simplest way to tackle the problem. Here is how to operate.
Step 1: Please ensure your iPhone and computer to be connected with the same Wi-Fi network;
Step 2: Then, run iTunes and plug your iPhone to the computer;
Step 3: Afterwards, click your iPhone icon and touch "Summary". On the right panel, you just select "Sync with this iPhone over Wi-Fi";
Step 4: Lastly, please get into "Settings" on your iPhone - then to "General" - click on "iTunes Wi-Fi Sync - tap "Sync Now".
Part 4. Check If iPhone Is Syncing with iCloud
That's for sure iPhone won't sync with iTunes if your iPhone is being synced with iCloud. So faced with this case, you need to guarantee that the synchronization between iPhone and iCloud has been stopped before sync your device to iTunes. It is pretty simple to do. You can follow the on-screen instructions to check it.
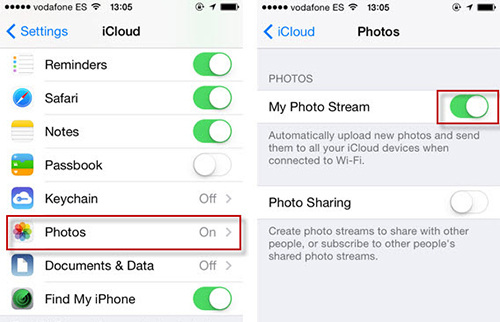
Step 1: Navigate to "Settings" on the home screen and touch the Apple ID;
Step 2: Then choose "iCloud" and you will see a list of options. Among them, you ought to check "Photos", "Calendars", and "Contacts";
Step 3: If any of these three options is toggled on, that signifies your iPhone is being synced with iCloud. You can turn them off and then try to sync with iTunes again.
Part 5. Employ Joyoshare UltFix (No Data Loss)
When "iPhone won't sync with iTunes" issue results from certain iPhone system failures, maybe the above methods fail to work. Hence, it is recommended to apply an iPhone issue repair tool - Joyoshare UltFix iOS System Recovery to thoroughly kill off the issue. Joyoshare UltFix is so powerful that it can have over 30 types of iOS problems settled without much effort. Else, it offers users a free and flexible option to make their device get into/out of recovery mode with one click.
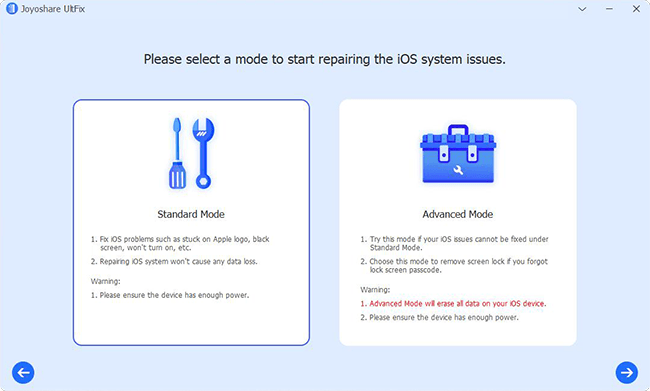
Not surprisingly, the repair program has the capability to repair problems with two modes - standard mode and advanced mode on iPhone/iPad/iPod touch even Apple TVs. Concretely speaking, standard mode is aimed to fix common issues like iPhone computer not recognizing iPhone, iPhone is disabled connect to iTunes, iPhone stuck in iTunes logo, and more with no data loss during the whole process. Advanced mode works the grave iOS problems by restoring the device. To fix your problem, just choose the standard mode.
Key Features of Joyoshare UltFix iOS System Recovery
Fix iPhone won't sync to iTunes issue without losing data
Designed with user-friendly interface and easy to use
Support all iOS devices and the newest iOS version
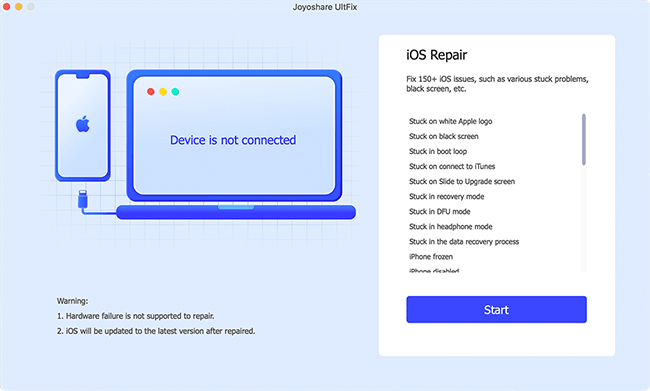
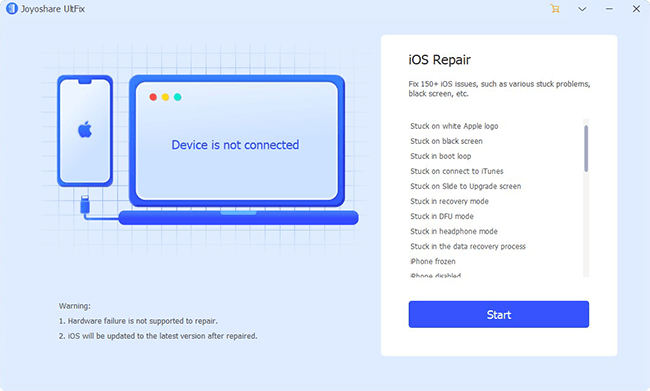
Step 1: Install Joyoshare UltFix on your computer and run it. Then apply a lightning USB to connect your iPhone with the computer. After your device is detected, please begin the repair process with the "Start" button;
Step 2: To avoid losing data while repair, you should choose standard mode to repair in this step. If standard mode is useless, it will not too late to try advanced mode;
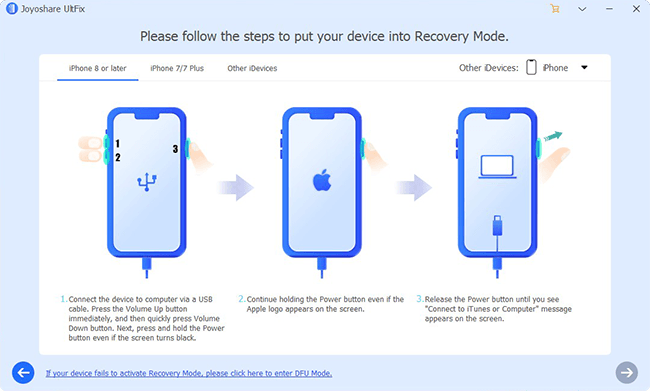
Step 3: Before setting your iPhone into recovery mode or DFU mode as instructs on the screen, you need to click your iPhone model;
Step 4: Now, the program will show you all information of your iPhone. You have to confirm it if there is nothing wrong. Then touch "Download" to get the firmware package and verify it;
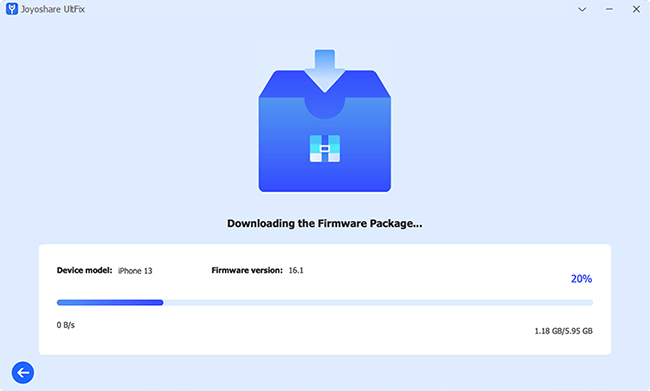
Step 5: Verifying the firmware package will cost you some time. After finishing, just tap on "Repair" to unzip it and soon Joyoshare UltFix starts to repair the iPhone not syncing with iTunes issue.

