As is well-known, Avidemux is a totally free and cross-platform video editor developed for basic video cutting, cropping, filtering, and encoding. However, designed with an outdated interface and a complicated system, it is doomed not to be that simple to operate. In case you are planning to crop video in Avidemux but some concerns, it would be well if you read this article that explains how Avidemux crops video and shares a hot Avidemux alternative - Joyoshare Media Cutter.
Comparison:
The following table briefly compares the merit and demerit of Avidemux vs. Joyoshare Media Cutter, so that you can gain an insight into these two programs ahead of selecting one to serve you.
| Program | Avidemux | Joyoshare Media Cutter |
| Compatibility | Windows, Mac and Linux | Windows and Mac |
| Operability | Not Hard | Fairly Simple |
| Interface | Outdated | Intuitive |
| Video Editing Ability | Basic Editing Options | Advanced Editing Options |
| Practicability | Not Friendly for Beginners | Perfect for Novices and Professionals |
| Price | Free | $29.95/Lifetime |
| Drop-and-drop Option | Yes | Yes |
| Accepted Formats | General video formats | Most media formats, device-compatible formats, web videos, HD videos |
| Drop Frames in Certain Format | Yes | No |
Part 1. Step-by-step Guide on How Avidemux Crops Video
Although far from perfect, Avidemux is still a viable option for simple video cropping. Have the basic features of Avidemux expounded, below will focus on how to crop video with this free video cropper at every step. Prepare your video and do as the detailed instructions to realize video cropping in Avidemux.
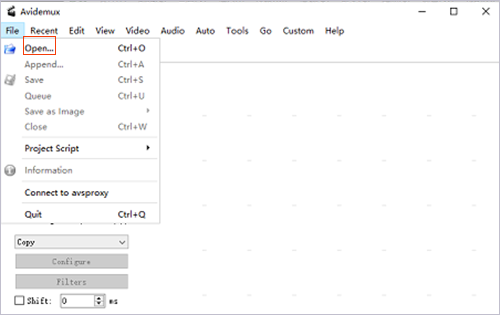
Step 1 Open Avidemux and add video
Start Avidemux after downloading and installing. After that, click on "File" - "Open" to choose the target video from the local file folder or straightway drag video to it.
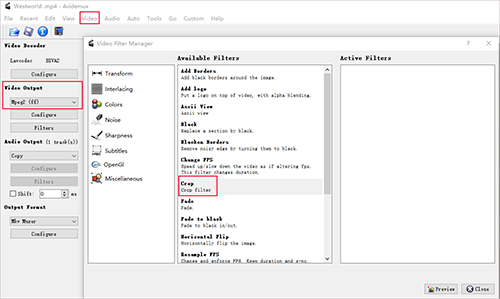
Step 2 Set output format and video filter
In "Video Output" section, please select an output format and then go for "Video" in the top menu bar - click "Filters" to gain access to "Video Filter Manager" window - locate and double-click "Crop" option.
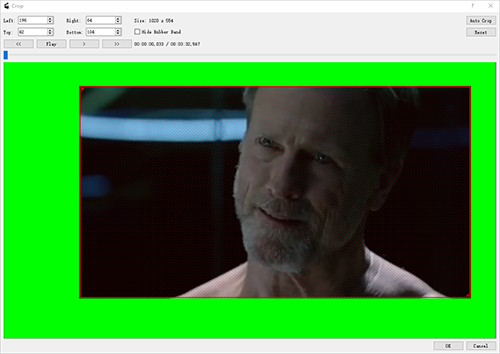
Step 3 Select area to crop
Afterwards, you will see the crop window as shown below. For video cropping, type a value in the box of "Left", "Right", "Top", and "Bottom". How much to crop from which direction depends on the value you enter. Alternatively, zoom in and zoom out the red preview window from the upper left or lower right corner to crop.
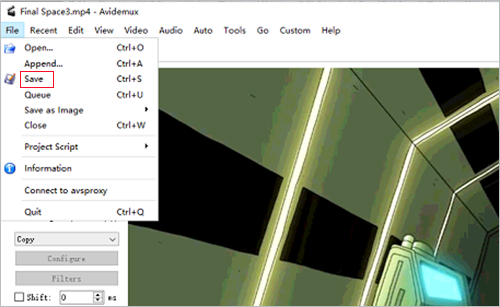
Step 4 Export and save cropped video
When it is done, return to the main interface and head to "File" - followed by "Save" to export your cropped video. It will be saved in your local file folder.
Part 2: Alternative to Avidemux Crops Video
In view of inevitable errors and uncertainties of Avidemux, an introduction of its top alternative - Joyoshare Media Cutter is absolutely necessary. Adopted advanced techniques, in addition to professional cropping usage, it is also used for cutting, converting, merging, cutting video and audio files. Even more impressively, two modes (high-speed mode and encoding mode) are featured with it for all the diverse requirements as well as tons of media formats are well accepted by it, such as MP4, MP3, M4V, MKV, OGV, WMV, AVI, MPEG, DVD, FLV, M4B, AAC, and others.
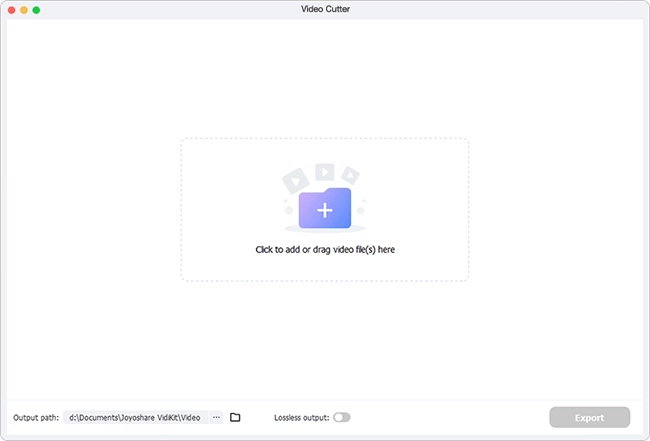
Step 1 Input video to Joyoshare Media Cutter
Once Joyoshare Media Cutter is downloaded and installed, double-click to open it on your computer and then video file to be cropped is added. Two ways are taken to get it done. One is tapping on "Open". The other is simply dragging and dropping.
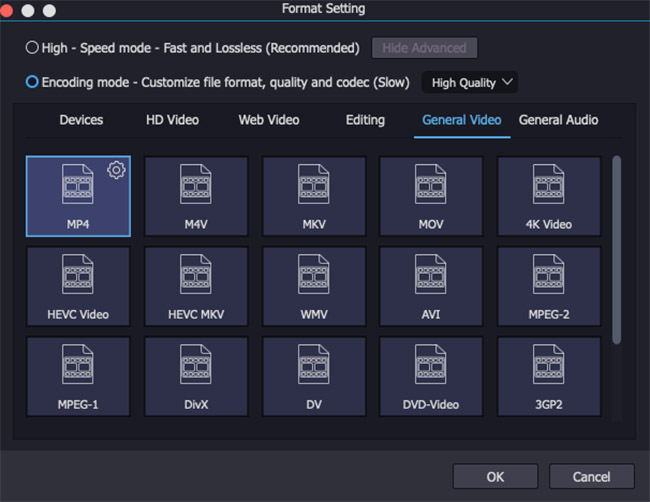
Step 2 Work with encoding mode
Next, proceed to "Format" and hit on "Encoding mode". You'll be presented with various media formats, from which you need to select one as the output format. Also, re-setting up parameters, such as resolution, codec, bit rate, frame rate, etc are permitted.
Step 3 Start to crop video
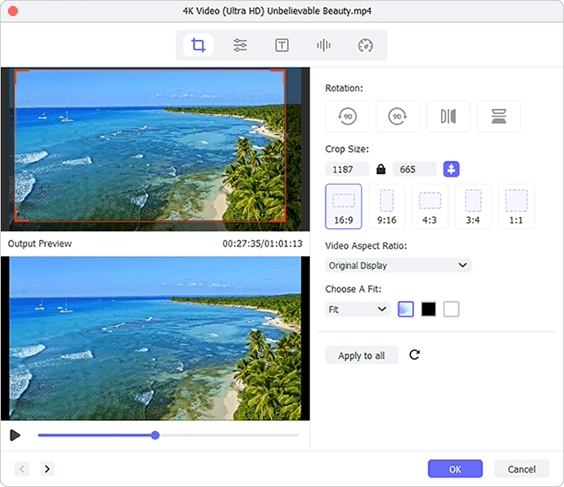
Touch "OK" to determine all format settings and get back to the first interface. Afterward, locate "Edit"
 and then to "Adjust". To actualize cropping video, you can either to customize the values of height and width that you would like to reserve for the cropped video or directly drag the white dotted bordered rectangle. After completion, further polish it with more editing options if required. Lastly, hit on "Start" to save the cropped video.