With the release of iOS 11, a new image format came out. If you are an iPhone user, you must be familiar with this iOS 11 image format, HEIC. Though it takes up less storage space than JPG, it comes with limited compatibility. Only iOS 11 devices as well as macOS High Sierra have access to HEIC. As a result, when take storage space along with compatibility into consideration, different users may have different preferences. Majority of users prefer to continue to shoot photos in JPG format for broader compatibility with sharing, backing up to a computer and more. However, some would like to choose HEIC to save more space. No matter which side you are, you have to get iOS 11 image as JPG lastly to better enjoy photos on all operating systems. Here we will show you what you can do to make it.
- Part 1. Change iOS 11 Image Format by Adopting Converting Tool
- Part 2. Change iOS 11 Image Format by Utilizing Built-in Features
Part 1. Best iOS 11 Image Format Converter-Joyoshare HEIC to JPG Converter
Adopted the most advanced processing core, Joyoshare HEIC to JPG Converter can assist you to convert iOS 11 image with few seconds only. To meet the satisfaction of a wide range of users, it can realize HEIC to JPG conversion without any quality loss. Furthermore, it is also available for other formats, like PNG, GIF, BMP, TIFF, etc. By means of this outstanding converting tool, all kinds of HEIC images, such as single picture, animation, live photos, etc, can be recognized without hassle.
No matter how many iOS 11 photos you have, you can choose one mode that is suitable for you, converting HEIC images one by one or in batch at a time. Aside from this, it also offers ability to customize resolution and adjust quality flexibly. To make your converted images perfect, you'd better keep aspect ratio and preserve EXIF information. Based on your requirement, you can decide to output all HEIC images at will. Attractively, it will not leak your privacy owing to the whole conversion process is done offline.
Key Features of Joyoshare HEIC to JPG Converter:
Convert HEIC images to JPG in high quality
Support GIF, PNG, BMP, TIFF and other formats
Recognize all types of HEIC images from iOS 11 devices
Support convert HEIC images individually or in bulk
Come with quality-adjusting and format-setting
Complete conversion process locally and securely
Following is the in-depth guide on converting iOS 11 image format from HEIC to JPG and more other formats:
Step 1 Sync iOS 11 images to computer
The indispensable step is to make use of a USB cable to connect your iDevice (iPhone/iPad/iPod) to computer so that you can sync all HEIC images on your computer and make preparation for conversion.
Step 2 Add HEIC images to Joyoshare HEIC to JPG Converter
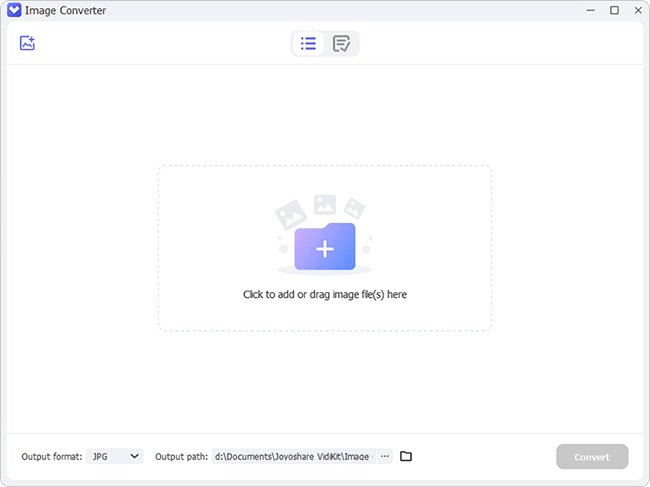
Follow the instruction to install Joyoshare HEIC Converter on your desktop and double click the icon to launch it. It depends on you whether to add files by pressing "+" button on the left bottom or dragging and dropping file/folder to main interface straightly. You are allowed to convert HEIC images piece by piece or in batch.
Step 3 Adjust quality and choose format
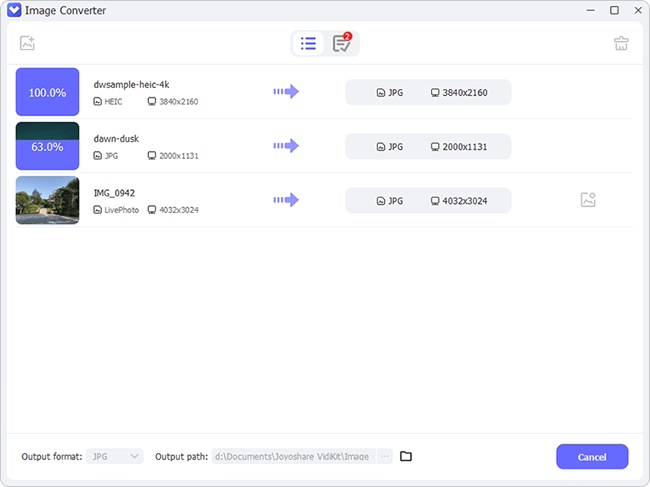
The imported HEIC imaged will be shown in the conversion list as below:
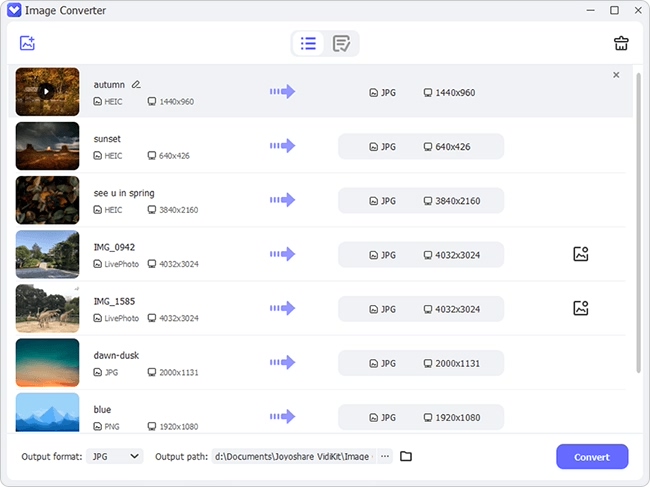
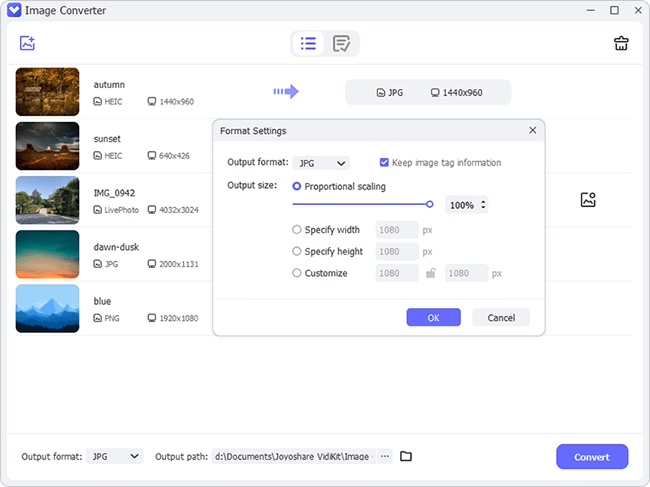
It is essential to hit "Format" panel to adjust quality and choose output format. Joyoshare HEIC Converter includes full support to convert HEIC images to JPG. Additionally, it also facilitates you to produce images as PNG, GIF, BMP, WEBP and TIFF. There are also colorful options of customizing resolution, outputting all images, keeping aspect ratio and preserving EXIF information.
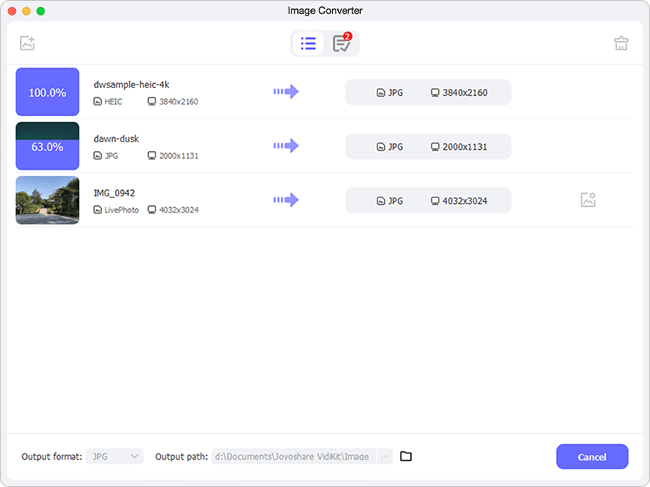
Step 4 Initiate HEIC to JPG conversion
Simply hit the conversion button at the bottom right corner and it will begin to change iOS 11 image in a fast way. You can locate all converted photos by entering "History folder" icon.
Part 2. Advantageous Functions of Switching the Picture Mode-Camera Settings
You may don't notice the features designed in your iPhone clearly. It doesn't matter because we will lead you to operate at every step. When you do it by yourself, you will amaze at how feasible it is. The distinct point is that there is no need for you to take the aid of other converting tools. Moreover, you can also benefit yourself to get wonderful experience on not only saving space but also pleasing compatibility. However, you are supposed to keep its downside in mind as well. Given that there are thousands of iOS 11 image stored in your iPhone, it will cost much time to transfer pictures one by one. Now you can see how to change it with few clicks.
Step 1 Set your iPhone to capture images in the new iOS HEIC format
Go to "Settings" > "Camera" > "Formats" and choose "High Efficiency" as standard format to take a picture.
Note: You can also directly choose "Most Compatible". Then your image will be saved as JPG accordingly. If you do like this, there is no need to do the next step. It is also practical. However, in this case, you cannot reduce your file size, which is same as Andriod phones.
Step 2 Export HEIC to JPG
It's time to change iOS 11 image format. Navigate to "Settings" > "Photos" > "Transfer to Mac or PC" and tick "Automatic". Once you send these HEIC images to your Windows or Mac computer, you phone will automatically transfer photos in a compatible format, which is JPG. In contrary to it, your iPhone will always transfer the original file (HEIC) without checking for compatibility.
